background image

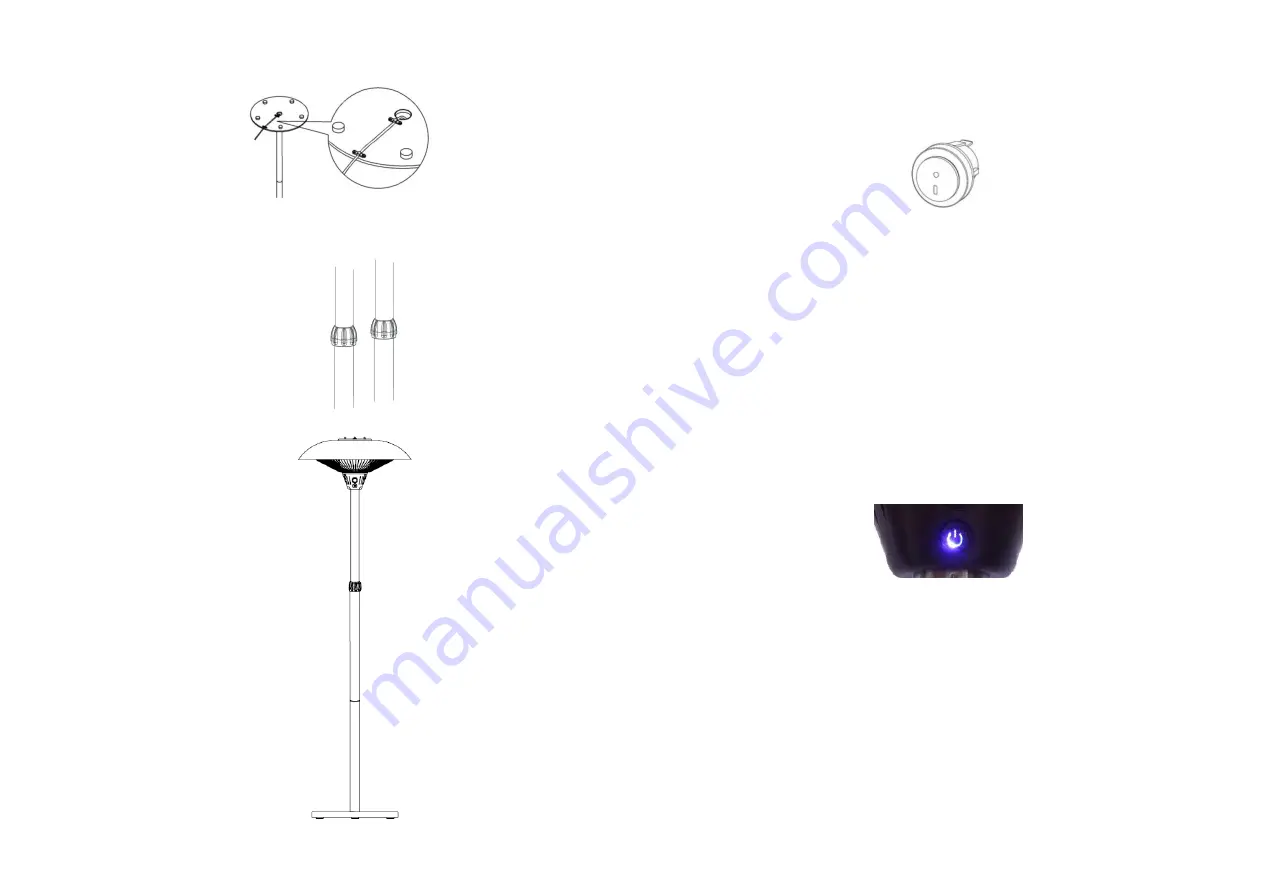
Step  6:  Pull  the  power  cord  gently  out  of  the  base  as  much  as 
possible.  Fix  the  power  cord  under  the  weighted  base  using  the 
supplied 4pcs M4 nuts. 


Step 7: Raise or retract the top tube to the desired height and tighten 
to the middle tube by screwing knob down. 


Complete! 

OPERATING INSTRUCTIONS


Connect the power cable to a 13 amp supply that is located in a safe, 
dry area. 

WARNING: The heater must be properly installed before it is used


.This unit is equipped with one heat setting On 

Off.


Plug the Patio Heater into a grounded 220V-240V,50-60Hz 
power outlet


Only operate the heater when it is in the upright position.


Our Electric Patio Heater is equipped with Three heat settings 
power of the heater.


Press on the On/Off switch to activate the heater


A.   To operate the heater on low power (900W), press on the left 

side button of the remote control


B.   To operate the heater on high (1200W), press on the right 

side button of the remote control


C.   Press on both the left and right side button of the remote 

control for maximum power (2100W)


Touch Switch


A.   Press on the button once to operate the heater on low (900W) 

power. 

B.   Press  on  the  button  twice  to  operate  the  heater  on  high 

(1200W) power. 

C.   Press  on  the  button  third  times  to  operate  the  heater  on 

(2100W) power. 

D.   Press on the button four times to shut the light and heat off. 


Although  the  patio  heater  is  shower  proof,  do  not  use  when 
raining or in wet conditions. 


Always  disconnect  the  power  cable  from  the  electrical  supply, 
when the patio heater is not in use. 

Summary of Contents for 748261UK

Page 1: ...re stored 5 Do not push any items through obstruct or cover the grill of the heater head 6 Do not leave turned on and unattended especially when children and or animals are in the vicinity 7 The indication of the different positions of switches shall be visible from a distance of 1M 8 The Marking concerning covering shall be visible after the heater has been installed It shall not be placed on the...

Page 2: ...ded that it has been placed or installed in its intended normal operating position and they have been given supervision or instruction concerning use of the appliance in a safe way and understand the hazards involved Children aged from 3 years and less than 8 years shall not plug in regulate and clean the appliance or perform user maintenance 28 CAUTION Some parts of this product can become very h...

Page 3: ...pped with Three heat settings power of the heater Press on the On Off switch to activate the heater A To operate the heater on low power 900W press on the left side button of the remote control B To operate the heater on high 1200W press on the right side button of the remote control C Press on both the left and right side button of the remote control for maximum power 2100W Touch Switch A Press o...

Page 4: ... polish or rough brushes to clean the heater This may cause damage or deterioration to the surface of the heater Although this heater is outdoor approved DO NOT immerse the heater in water for your safety Wait until the unit is completely dry before use STORAGE If the heater will not be used for a long period of time store it in a cool dry location when not in use To prevent dust and dirt build up...

Page 5: ...ncendida ni desatendida especialmente cuando haya niños o animales cerca 7 La posición de los interruptores debe ser visible desde una distancia de 1m 8 La etiqueta de advertencia debería ser visible después de la instalación de la estufa de pie No se debería colocar en la parte trasera de los calentadores portátiles 9 La estufa de pie debe colocarse de forma segura sobre una superficie horizontal...

Page 6: ...namiento normal Los niños de entre 3 y 8 años no deben enchufar regular o limpiar el aparato ni realizar ningún tipo de mantenimiento del mismo 24 PRECAUCIÓN Algunas partes de la estufa de pie pueden calentarse mucho y causar quemaduras 25 Debe prestarse especial atención cuando niños o personas vulnerables estén presentes Proceso de montaje Paso 1 Conecte el tubo inferior a la base atornillándolo...

Page 7: ... tierra Utilice la estufa de pie solo cuando esté en posición vertical Nuestra estufa de pie eléctrica está equipado con tres configuraciones de calor Presione el interruptor de encendido apagado para activar el calentador A Para operar el calentador a baja potencia 900W presione el botón del lado izquierdo del mando a distancia B Para operar el calentador en alta 1200W presione el botón del lado ...

Page 8: ... superficie de la estufa Aunque la estufa de pie está aprobada para uso exterior NO sumerja la estufa en agua por su seguridad Espere hasta que la estufa de pie esté completamente seca antes de usarla ALMACENAMIENTO Si la estufa de pie no se utilizará durante un período de tiempo prolongado guárdela en un lugar fresco y seco cuando no esté en uso Para evitar la acumulación de polvo y suciedad util...

Reviews: