AIR COMPRESSOR - OWNER'S MANUAL
15
AIR COMPRESSOR - OWNER'S MANUAL
34
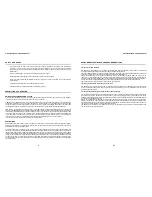
VALVES -
on clean dry surfaces
The compressor pump has a set of reed valves manufactured from the highest quality stainless steel. These
valves and the valve plates that hold them in place need to be maintained in order for the pump to work at it's normal
capacity. Once the valves become caked with carbonized dirt and oil they loose their ability to open and close properly and
the amount of air that the compressor can make is dramatically compromised. Before starting this maintenance procedure
you should make sure that you have a set of the gaskets you need to replace when you open up the pump.
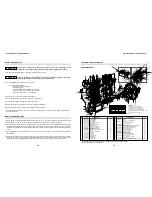
1. Remove the air inlet assembly, inter cooler, and after cooler from the cylinder head of the pump.
2. Remove the cylinder head bolts after loosening all of them evenly , from the center out.
3. Remove the cylinder head and valve plates from the cylinder. Separate the head from the valve plates taking care to note
the position of the valve plates for re-assembly. Use caution when separating the parts as the gaskets may be stuck
together. Inspect the condition of the cylinder and piston for damage.
4. Clean the valves and valve plates with a stiff bristle brush or other suitable device. Do not use a steel wire brush as severe
damage may result to the valve seat or valve.
5. Use clean safety solvent to loosen carbon deposits. NEVER use gasoline, thinners or other flammable solutions to clean
valves or related parts. Remove all broken or defective gasket material.
6. To re-assemble the valve plates, a small amount of light grease or petroleum jelly can be used
,
to
hold the reed valves in place while they are assembled. Reserve the order to complete this operation and follow the
recommended torque settings for the head bolts. Use a crosshatch pattem when tightening the head bolts.
7.
Turn the pump over by hand several revolutions to make sure there are no problems. Review the START-UP
CHECKLIST and follow the recommended BREAK-IN PROCEDURES. Re-torque the head bolts and check for leaks
after one hour of running.
MAINTENANCE SCHEDULE
CAUTION
!
Never attempt to change or fill the oil while the compressor is running. Do not work on the
pump while it is hot as some parts of the pump can cause severe burns to unprotected skin.
Never use flammable solvents to clean the pump or the intake system.
AIR FILTER
DRAIN THE TANK
- To service the air filter, remove the wing nut and cover that hold the element on to the intake assembly. Inspect
the element and clean or replace as needed. Paper filters can be tapped out and back flushed with low-pressure air several
times before they must be replace. Fiber (Micronite) filters can be washed out with soapy water, rinsed, and reused until the
element material starts to deteriorate. Never use solvents to clean the filter or inlet parts. Always keep extra filter elements
on hand. NEVER RUN THE COMPRESSOR WITHOUTA FILTER. Clean all parts and re-assemble in reverse order.
To drain the moisture from the tank you should first reduce the air pressure in the tank and air lines to a
safe pressure, around 20 psi. Open the drain valve and drain the moisture into a suitable container for disposal. All piston
pumps have some level of oil bypass the rings and get pumped into the tank. This oil is measured in parts per million (PPM)
and mixes with the moisture in the tank to form a whitish
“
mayonnaise
”
like substance.
Check with local codes concerning the discharge of this fluid directly into the sewer system.
Compressors used in commercial applications should be drained at least once a day. If you only run your compressor
occasionally, it should be drained after each time you use it. Shops that run multiple shifts a day should have automatic
drains to help reduce the moisture build up in the tank. A 5 HP compressor can dump as much as a gallon of moisture a day
into the tank.
-
Change the oil when the compressor is warm so that the oil will drain out of the crankcase easier. Carefully open the plug on
the crankcase drain, open the ball valve and drain the oil into a suitable container. Remove the crankcase fill plug to make
the oil flow out faster. Allow the crankcase to drain completely. Replace the plug, and fill the crankcase to the proper level.
Check the level carefully after the first day of use. Please recycle the used oil.
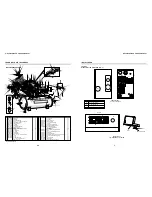
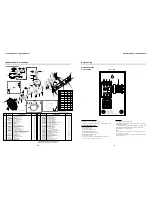
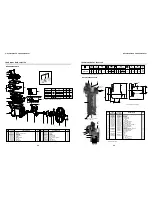
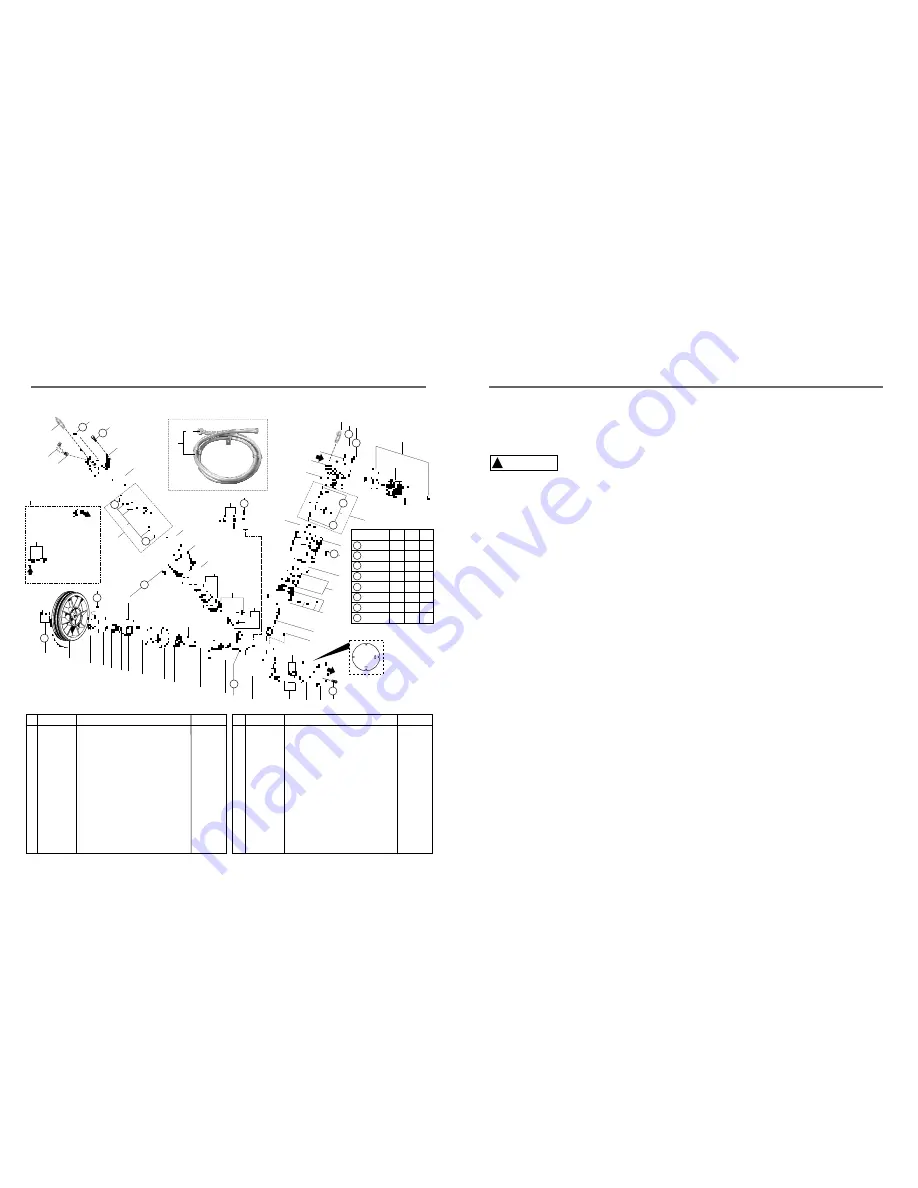
TECHNICAL DATA 7.580HV30X
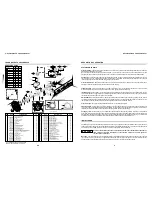
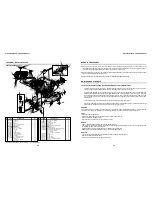
BARE PUMP PARTS
8
47
9
5
10
11
31
30
32
33
1
12
13
14
16
17
19
18
15
5
5
34
25
25
20
21
25
25
26
24
27
46
7
29
5
22
23
24
47
39
41
42
38
DETAIL OF THE
ASSEMBLY OF
GASKET IN A
CRANKCASE
COVER
1
4
5
6
3
2
37
36
35
43
44
38
40
28
1
27
Upper gasket kit
LP 120mm cylinder cover
M6 x 1,0 x 55 Allen head bolt
Air filter
Filter element
HP connecting rod with needle bearing
Needle bearing
HP Ø 2.1/2" piston
HP 2.1/2" ring kit
HP 2.1/2" cylinder
HP 2.1/2" valve plate
HP valve plate kit
HP 2.1/2" cylinder cover
Intercooler kit
90 MF 3/4" elbow
UNC 5/16" x 5/8" LT head bolt
3/4" x 3/4" straight connection
3/4" nut for intercooler
Crankase breather tube
NPT 1/8" x 1/4" elbow
HP 1/8" ASME safety valve
LP 1/8" ASME safety valve
UNC 3/8" x 1" LT head bolt
0
01
01
03
01
01
01
01
01
01
01
01
01
01
01
02
01
02
02
01
02
01
01
14
25
26
27
28
29
30
31
32
33
34
35
36
37
38
39
40
41
42
43
44
45
46
47
830.0956-0/NA
709.1272-0
*
809.1085-0
007.0118-0
830.0632-0
019.0028-0
830.0608-0
830.0982-0
709.1193-0
809.1029-0
830.0957-0
709.1389-0
709.0283-4
003.0111-6
*
21011002
21011004
830.0340-5
003.0005-5
022.0215-0
022.0177-0
*
Crankshaft
Flywheel
UNC 1/4" x 3/4" LT head bolt
Flange cover
Crankcase gasket kit
Oil seal
UNC 3/8" x 1.1/2" LT head bolt
6208 bearing
Flange
6309 bearing
Key
Counter weight
UNC 3/16" x 7/8" LT Allen head bolt
Crankcase
Oil drain tube
Crankcase cover
3/4" oil level sight
1/4" plug
LP connecting rod
LP Ø 120mm piston
LP 120mm ring kit
LP 120mm cylinder
LP 120mm valve plate
LP valve plate kit
01
01
08
01
01
01
11
01
01
01
01
01
02
01
01
01
01
01
01
01
01
01
01
01
1
2
3
4
5
6
7
8
9
10
11
12
13
14
15
16
17
18
19
20
21
22
23
24
830.0609-9
709.1277-0
*
709.0139-0
830.0954-0/NA
023.0099-0
*
019.0006-4
709.1221-0
382.0028-3
709.0147-1
709.0930-8
013.0467-4
709.1191-0
830.0205-0
709.1273-0
830.0775-0
003.0028-4
709.0732-1
016.0004-4
830.0981-0
709.1192-0
809.1028-0
830.0955-0
CODE
CODE
QTY
QTY
DENOMINATION
DENOMINATION
No.
No.
A
A
B
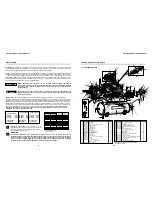
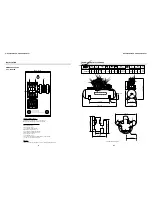
TABLE 1 - TORQUE
ESPECIFICATION FOR BOLTS
T7
T6
T5
T8
T4
T3
T2
T1
Position
lbf.in
ft.lb
304
25
7 - 47
141
11.8
27
19
1.6
LP-HP 24 - 36
44
3.6
LP 24
70
5.8
3
149
12
41
1,128
94
1
63
5
13
34
16
2.2
5
8
17
127
7.2
N.m
45
7
T1
T2
T3
T3
T1
T8
B
T3
T2
T1
T4
T1
3
T5
T7
T6
T5
* Part available in the market - not sold by Schulz.
HP = high pressure LP = low pressure

