background image

Please check the user manual for complete instructions - Before any operation, read the safety instructions. 
The images presented are for illustration purpose only. Schulz reserves the right to make technical and design 
changes without prior notice, preserving the product quality. 

2

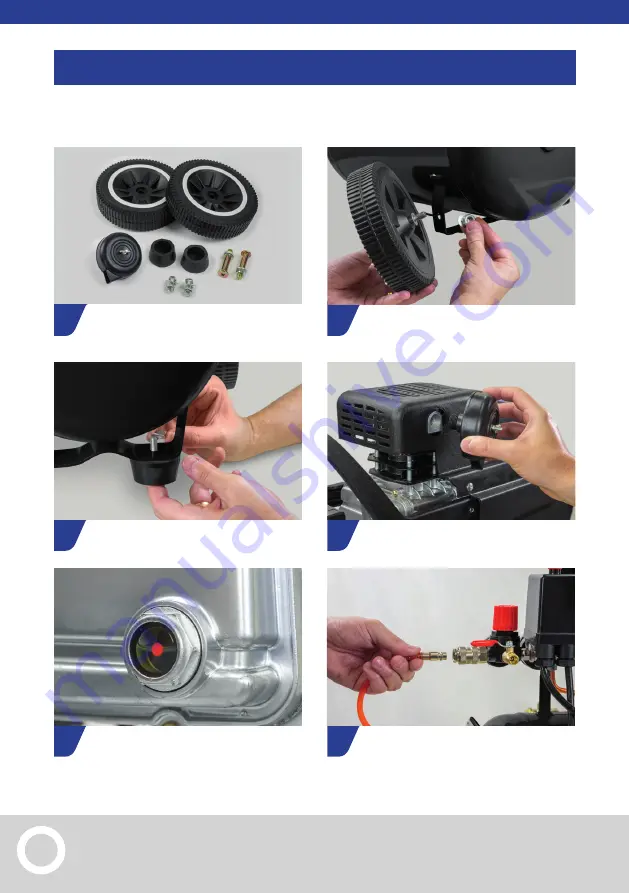
Check out below the step by step to use your AIR PRO Schulz Compressor.

Vea a seguir el paso a paso para utilizar su Compresor AIR PRO Schulz.

The product comes with accessories;

Assemble the wheels;

Assemble the damper;

Check the oil level before 

starting the Compressor;

Assemble the air filter;

Connect the hose to the air outlet 

to use the pneumatic tool;

El producto acompaña accesorios;

Monte las ruedas;

Monte el tope de goma;

Verifique el nivel de aceite antes 

de encender el Compresor;

Monte el filtro de aire;

Conecte la manguera a la salida de aire 

para utilizar la herramienta neumática;

1

5

2

6

3

4

02. FIRST USE 

Primer uso

Summary of Contents for MSI 8,5/25 AIR PRO

Page 1: ...serious future problems Performing preventive maintenance of your Compressor is essential to maintain air quality and increase equipment durability Sab a que con acciones simples es posible prolongar...

Page 2: ...ea a seguir el paso a paso para utilizar su Compresor AIR PRO Schulz The product comes with accessories Assemble the wheels Assemble the damper Check the oil level before starting the Compressor Assem...

Page 3: ...t the desired pressure When completing the service do not forget to turn off the product by pressing the pressure switch again Conecte el equipo al tomacorrientes Espere que el reservatorio de aire se...

Page 4: ...butterfly screw again to lock Clean or replace the air filter Suelte la tuerca mariposa del filtro de aire para retirar la capa de protecci n Cierre la protecci n y apriete nuevamente la tuerca marip...

Page 5: ...nes t cnicas y de dise o sin aviso previo preservando la calidad del producto 5 Unplug the compressor from the electrical outlet Remove the screw from the crankcase Open the oil plug Let the oil drain...

Page 6: ...uct with neutral detergent Clean the air filter If the filter element is blocked replace it P 5 Antes de encender el Compresor verifi que el nivel de aceite y compl telo si es necesario realice el 1 c...

Page 7: ...3 months or every 300 hours whichever comes first Verifique el funcionamiento del presos tato visualizando si el mismo se apaga autom ticamente al alcanzar la presi n indicada en el reservatorio de a...

Page 8: ...zed Distributor The use of original parts ensures SAFETY and PERFORMANCE for your product Utilice siempre repuestos originales En caso de mantenimiento reparo y sustituci n de piezas del compresor con...

Reviews: