3.
2
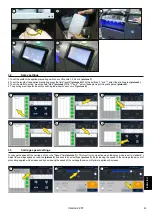
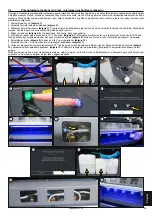
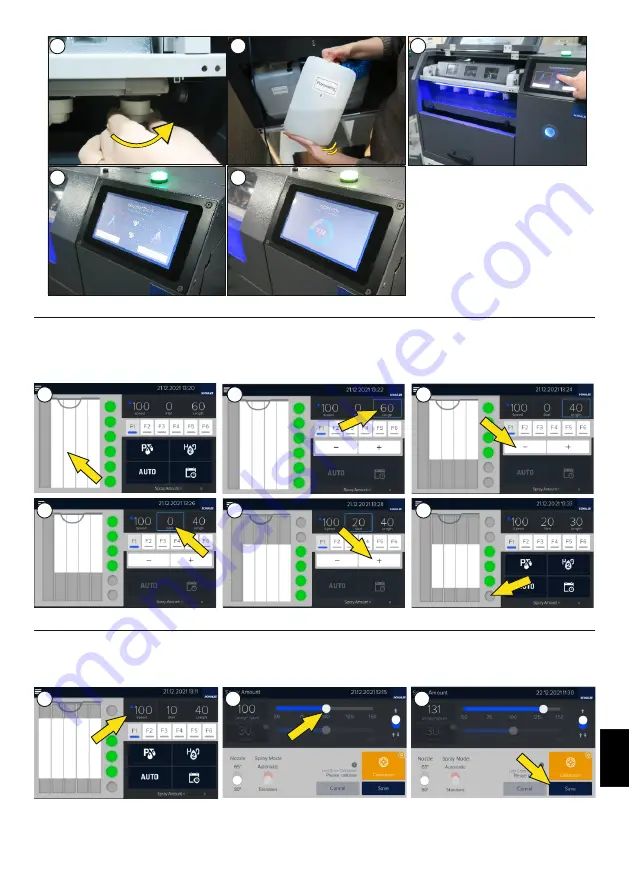
Spray settings
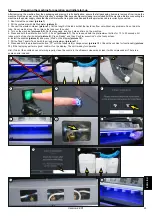
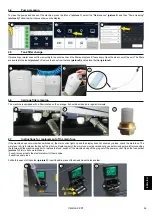
2. To set the length of the applied precoating, press the field "length"
(picture 2).
With the butttons "+" and "-" select the printing area
(picture 3).
1. To set the width of the applied precoating, switch on or off nozzle 1,2,3,4 or 5
(picture 1)
.
3. To set the start of printing, press the field "start"
(picture 4)
. With "+" and "-" select the beginning of the printing area
(picture 5).
4. The printing area can also be set by switching individual zones on or off
(picture 6).
3.
3
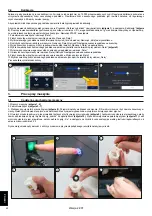
Carriage speed settings
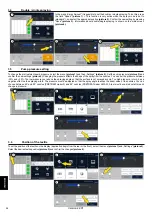
To change the speed of the carriage, click on the "Speed" field
(picture 1)
< This function is only active when the spray mode is set to „standard” >
Adjust the carriage speed as required
(picture 2)
and save the new settings
(picture 3).
By increasing the speed of the carriage the amount of
precoating applied will decrease and by decreasing the speed of the carriage the amount of primer applied will increase.
Version
2
2
.0
1
E
N
G
L
IS
H
25
7
8
9
1
4
2
5
3
6
1
2
3
10
11
Summary of Contents for PRETREATmaker 5
Page 2: ......
Page 17: ...5 3 Schaltplan Version 22 01 17 DEUTSCH ...
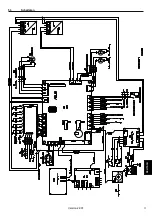
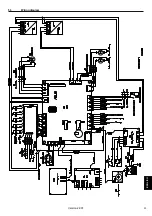
Page 33: ...5 3 Wiring diagram Version 22 01 ENGLISH 33 ...
Page 49: ...5 3 Schemat połączeń 49 POLSKI Wersja 22 01 ...
Page 51: ......
Page 52: ......


