• 8 •
5.2
CHARGING THE JUMP STARTER WITH INCLUDED CHARGER
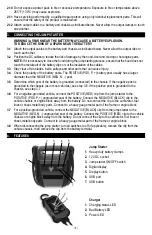
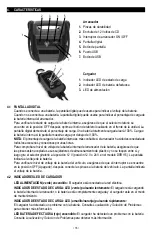
1. Make sure the charger and jump starter are placed on a dry, nonflammable surface. To charge the jump
starter, plug the charger into the charging port on the front of the jump starter.
2. Confirm the AC outlet voltage matches the input voltage of the charger.
3. Connect the charger to the AC wall outlet and confirm that the green Power LED on the charger turns on.
4. Check that the green Charging Status LED on the charger is pulsing slowly, to indicate that charge process
has started. To see the status of the charge, check the percentage shown on the jump starter display.
5. When the jump starter display shows
100
(%), the internal battery is fully charged and the jump starter
is ready to use. Complete charging may take up to 24 hours.
NOTE: The green Charging Status LED will remain pulsing after the display shows 100%, as the charger
automatically goes into Maintain mode and maintains the battery at full charge without damaging it.
6. After the charge is complete, disconnect the charger from the AC outlet, then disconnect the charger
from jump starter.
5.3
CHARGER MODES
Automatic charging mode
When an automatic charge is performed, the charger switches to maintain mode automatically after the
battery is charged.
Aborted Charge
If charging cannot be completed normally, charging will abort. When charging aborts, the charger’s
output is shut off. The Bad Battery (red) LED will light. Do not continue attempting to charge the battery.
Check the battery and replace, if necessary.
Desulfation Mode
Desulfation could take 8 to 10 hours. If desulfation fails, charging will abort. The red Bad Battery LED will
light and the yellow/orange Charging Status LED will flash.
Completion of Charge
When the internal battery is fully charged, the jump starter’s display will show “
100
”.
Maintain Mode (Float Mode Monitoring)
When the internal battery is fully charged and the jump starter display shows “
100
”, the charger has
started maintain mode. In this mode, the charger keeps the battery fully charged by delivering a small
current when necessary. If the charger has to provide its maximum maintain current for a continuous
12 hour period, it will go into abort mode (see Aborted Charge). This is usually an indication of a bad
battery; have the jump starter checked.
5.4
CHARGING THE INTERNAL BATTERY WHILE DRIVING
You may also charge the internal battery while driving, using a male-to-male charger cable (part number
94500109 – sold separately).
IMPORTANT: WHEN USING A 12V PORT CHARGING CABLE, DO NOT CHARGE THE INTERNAL
BATTERY FOR MORE THAN 30 MINUTES OR LEAVE THE BATTERY UNATTENDED. IT COULD
EXPLODE, CAUSING PROPERTY DAMAGE OR PERSONAL INJURY.
1. Make sure the car is running.
2. Insert one end of the accessory cable into the 12V DC power outlet.
3. Insert the other end of the accessory cable into the vehicle’s accessory outlet (lighter socket).
NOTE: Using this method to charge the battery overrides the maintain mode and the battery can be overcharged.
4. Monitor the progress of the charge by pressing the Percentage of Charge button on the front of the unit.
Do not leave the battery unattended or it could explode, causing property damage and personal injury.
When the battery is fully charged, disconnect the accessory cable from the jump starter, and then from
the lighter socket of the vehicle.
NOTE: Completely disconnect the charger cable when the engine is not running.

