background image


5


7.4  LED Indicators:

Battery Status LEDs

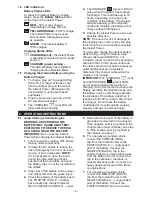
To check the internal battery’s charge 

status, press the 

Battery Status

 button 

on the front of the Instant Power.


RED – 

50% or less charge;  


immediately recharge the unit.


YELLOW/ORANGE –

 50-75% charge.  


The Instant Power may be used,  


but should be recharged as soon  


as possible.


GREEN 

– The internal battery is  


100% charged.

Charging Status LEDs


CHARGING (red) –

 the Instant Power  


is charging (connected to an AC power  

 source.) 


CHARGED (green) pulsing – 


The internal battery has completed  


charging and is in Maintain Mode.

7.5  Charging the Internal Battery using the 

Built-In Charger:

1. 

To charge, plug an 18 gauge (AWG) 

[0.82 mm

2

] or larger extension cord 

into the charger plug on the side of 

the Instant Power. (Extension cord 

not included; must be purchased 

separately.)

2. 

Plug the extension cord into a 120V 

AC electrical wall outlet. 

3. 

The CHARGING 

 (red) LED will 

glow, indicating charging.

4. 

The CHARGED 

 (green) LED will 

pulse when the battery has reached 

full charge. This could take up to 72 

hours, depending on the age and 

condition of the battery. The charger 

will automatically go into maintain 

mode and maintain the battery at full 

charge without damaging it.

5. 

Charge the Instant Power as soon as 

possible after use.

NOTE:

 To reduce the risk of damage to 

the electric plug or cord, pull by the plug 

rather than the cord when disconnecting 

the Instant Power.

You may also charge the internal battery 

while driving, using the male-to-male 

charger cable (p/n 94500109 – not 

included). Insert one end of the accessory 

cable into the 12V DC power outlet and 

the other end into the vehicle’s accessory 

outlet (lighter socket). Completely 

disconnect the charger cable when the 

engine is not running. 

IMPORTANT!

 The CHARGING 

 (red) 

and the CHARGED 

 (green) LEDs 

do not operate during this method of 

charging. Using this method to charge the 

battery overrides the maintain mode and 

the battery can be overcharged. Monitor 

the progress of the battery and when it 

reaches a full (100%) charge, disconnect 

the charger. Do not leave the battery 

unattended or it could explode causing 

property damage or personal injury. 

8.  OPERATING INSTRUCTIONS

8.1  Jump Starting a Vehicle Engine

WARNING! A SPARK NEAR THE 

BATTERY MAY CAUSE A BATTERY 

EXPLOSION. TO REDUCE THE RISK 

OF A SPARK NEAR THE BATTERY:

IMPORTANT: 

Do not use the Instant 

Power while charging the internal battery.

1. 

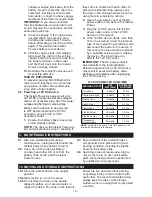
Turn the vehicle’s ignition OFF before 

making cable connections.

2. 

Position the DC cables to reduce the 

risk of damage by the hood, door and 

moving or hot engine parts. 

NOTE:


If it is necessary to close the hood 

during the jump starting process, 

ensure that the hood does not touch 

the battery clips or cut the insulation of 

the cables.

3. 

Stay clear of fan blades, belts, pulleys 

and other parts that can cause injury.

4. 

Check the polarity of the battery posts. 

The POSITIVE (POS, P, +) battery 

post usually has a larger diameter 

than the NEGATIVE (NEG, N, -) post.

5. 

Determine which post of the battery is 

grounded (connected) to the chassis. 

If the negative post is grounded to the 

chassis (as in most vehicles), see step 

6. If the positive post is grounded to 

the chassis, see step 7.

6. 

For a negative-grounded vehicle, 

connect the POSITIVE (RED) 

clip from the Instant Power to the 

POSITIVE (POS, P, +) ungrounded 

post of the battery. Connect the 

NEGATIVE (BLACK) clip to the 

vehicle chassis or engine block away 

from the battery. Do not connect the 

clip to the carburetor, fuel lines or 

sheet-metal body parts. Connect to a 

heavy gauge metal part of the frame 

or engine block.

7. 

For a positive-grounded vehicle, 

connect the NEGATIVE (BLACK) 

clip from the Instant Power to the 

NEGATIVE (NEG, N, -) ungrounded 

post of the battery. Connect the 

POSITIVE (RED) clip to the vehicle 

Summary of Contents for ip-75

Page 1: ... Power safely and effectively Please read and follow these instructions and precautions carefully POR FAVOR GUARDE ESTE MANUAL DEL PROPIETARIO Y LEER ANTES DE CADA USO En este manual se explica cómo utilizar el Instant Power segura y efectiva Por favor lea y siga las siguientes instrucciones y precauciones ESSAYER DE GARDER LE MANUEL D INSTRUCTIONS ET LE LIRE AVANT CHAQUE UTILISATION Ce manuel exp...

Page 2: ...ENT WARNING Possible explosion hazard Contact with battery acid may cause severe burns and blindness Keep out of reach of children ADVERTENCIA Posible Riesgo de una explosión El contacto con una batería de ácido puede causar quemaduras y ceguera Manténgase alejado de los niños AVERTISSEMENT Hasard d explosion possible Contact avec l acide de batterie peut provoquer sévère brûle et la cécité Ne le ...

Page 3: ... any equipment you intend to use in the vicinity of the battery Review the cautionary markings on these products and on the engine 1 12 This Instant Power employs parts such as circuit breakers that tend to produce arcs and sparks If used in a garage locate this Instant Power 18 inches 46 cm or more above floor level 2 PERSONAL PRECAUTIONS WARNING RISK OF EXPLOSIVE GASES A SPARK NEAR THE BATTERY M...

Page 4: ...ursuant to Canadian Regulations use of an adapter plug is not allowed in Canada Use of an adapter plug in the United States is not recommended and should not be used 5 INSTALLATION INSTRUCTIONS 5 1 Remove all cord wraps and uncoil the cables prior to using the Instant Power 6 FEATURES 1 Charged Charging LEDs 2 Battery Status LEDs 3 Battery Status Button 4 12V DC outlet 1 2 3 4 7 CHARGING THE INTER...

Page 5: ...D green LEDs do not operate during this method of charging Using this method to charge the battery overrides the maintain mode and the battery can be overcharged Monitor the progress of the battery and when it reaches a full 100 charge disconnect the charger Do not leave the battery unattended or it could explode causing property damage or personal injury 8 OPERATING INSTRUCTIONS 8 1 Jump Starting...

Page 6: ...if required 4 If the 12V DC device draws more than 15A or has a short circuit the internal fuse of the Instant Power will blow and disconnect the power to the device If this occurs the fuse must be replaced by a qualified service person Unplug the device The blown fuse only affects the 12V DC socket IMPORTANT The DC power outlet is wired directly to the internal battery Extended operation of a 12V...

Page 7: ...nections are reversed The Instant Power s battery is not charged The vehicle s battery is defective Check for poor connection to battery and frame Make sure connection points are clean Disconnect the Instant Power and reverse the clamps Press the Battery Status button on the front of the unit The LEDs will indicate the status of charge Have the battery checked The Instant Power won t power my 12V ...

Page 8: ...n and approved for use with this product This Limited Warranty is void if the product is misused subjected to careless handling repaired or modified by anyone other than Manufacturer or if this unit is resold through an unauthorized retailer Manufacturer makes no other warranties including but not limited to express implied or statutory warranties including without limitation any implied warranty ...

Page 9: ...CCIONES CADA VEZ QUE UTILIZA EL INSTANT POWER 1 11 Para reducir el riesgo de explosión de una batería siga estas instrucciones y aquellas publicadas por el fabricante de la batería y por el fabricante de cualquier equipo que intente utilizar en la proximidad de la batería Revise las pautas de precaución en estos productos y en el motor 1 12 Este Instant Power está equipado con partes tales como co...

Page 10: ... ayudar a eliminar la corrosión producida por aire No toque ojos nariz o boca 3 3 Determine el voltaje de la batería consultando el manual del usuario del vehículo y asegúrese de que la tensión de salida del voltaje el aparato sea la correcta 3 4 Asegúrese de que las pinzas del Instant Power se encuentren firmemente conectadas 4 CONEXIONES DEL CARGADOR Y DEL CABLE DE ALIMENTACIÓN DE CA ADVERTENCIA...

Page 11: ...A rojo el Instant Power está cargando conectado a una fuente de poder de CA CARGADA verde La batería interna se ha completado carga y está en Modo de mantenimiento 7 5 Cargando la batería interna con el cargador Interno Adaptado 1 Para cargar enchufe un cable de calibre 18 AWG 0 82 mm2 o una extensión larga en la clavija localizada en el lado del Instant Power El cordón de extensión no viene con l...

Page 12: ...a al borne NEGATIVO NEG N sin descarga a tierra de la batería Conecte el gancho POSITIVO ROJO al chasis del vehículo o al bloque motor alejado de la batería No conecte al carburador líneas de combustible o cuerpos metálicos Conecte a una pieza metálica de calibre grueso del marco o del bloque motor IMPORTANTE Si ha conectado las pinzas al revés escuchará un sonido de alarma Conecte los cables a la...

Page 13: ...ndiciones para su función incluyendo los protectores de plástico de las pinzas de la batería 9 4 Para realizar mantenimiento no es necesario abrir la unidad ya que no existen piezas a las cuales puede realizarle mantenimiento el usuario Cualquier otro servicio debe realizarse por personal calificado en el ramo 10 INSTRUCCIONES PARA EL MANEJO Y ALMACENAMIENTO 10 1 Guarde el Instant Power desenchufa...

Page 14: ...a batería de la fuente de poder no está cargada El aparato de 12V absorbe más de 15A o tiene un corto circuito Encienda el aparato de 12V Verifique la condición de carga de la batería girando el interruptor situado enfrente de la fuente de poder Haga que un técnico calificado reemplace el fusible La batería de la fuente de poder no retiene la carga La batería está en malas condiciones No recibirá ...

Page 15: ...ada será nula si el producto se utiliza en forma errónea se trata de manera inadecuada es reparado o modificado por personas que nos sean el Fabricante o si esta unidad es revendida a través de un vendedor minorista no autorizado El Fabricante no realiza ninguna otra garantía incluidas a título enunciativo las garantías expresas implícitas o legales incluidas a modo de ejemplo las garantías implíc...

Page 16: ...t celles publiées par le fabricant de la batterie et du fabricant de tout autre appareil que vous pensez utiliser au voisinage de la batterie Examinez les avertissements inscrits sur ces produits et sur le moteur 1 12 Ce chargeur emploie des pièces comme les disjoncteurs qui ont tendance à produire des arcs et des étincelles Si utilisé dans un garage placer ce chargeur 18 inch 46 cm ou plus au des...

Page 17: ...z pas les yeux le nez ou la bouche 3 3 Déterminez la tension de la batterie en vous référant au guide d utilisation de votre véhicule et assurez vous que le tension de sortie correspond à la tension voulue de l Instant Power 3 4 Assurez vous que les pinces des câbles du Instant Power sont fermement connectées 4 CHARGEUR ET LES CONNEXIONS DU CORDON D ALIMENTATION AVERTISSEMENT RISQUE DE CHOC ÉLECTR...

Page 18: ...erne est entièrement chargée et est en mode Maintenir 7 5 Charge de la batterie interne à l aide du chargeur intégré 1 Pour charger brancher un 18 calibre AWG 0 82 mm2 ou la plus grande corde d extension dans le chargeur se connecte sur le côté de l Instant Power Immédiat La corde d extension non incluse doit être acheté séparément 2 Branchez la rallonge dans une prise électrique de 120 V CA 3 Le ...

Page 19: ...N non mise à la masse Connectez la pince POSITIVE ROUGE au chassis du véhicule ou au bloc moteur à l écart de la batterie Ne pas connecter la pince au carburateur à la canalisation d essence ou à des pièces en tôle Connectez à une grosse pièce de métal de la carrosserie ou du bloc moteur IMPORTANT Si vous avez raccordé les pinces à l envers une alarme audio retentira Inverser les branchements et l...

Page 20: ...la batterie ainsi que la saleté ou l huile sur les broches les câbles et le boîtier du Instant Power 9 3 Garantissez que toutes les composantes de Instant Power sont dans l endroit et dans la bonne condition de travail en incluant les bottes de plastique sur les clips de batterie 9 4 L entretien courant ne nécessite pas l ouverture de l appareil car il ne contient aucune pièce que l utilisateur pu...

Page 21: ...le bouton d état de la batterie Contactez un technicien qualifié pour remplacer le fusible La batterie interne ne garde pas la charge La batterie est défectueuse n accepte pas de charge Remplacer la batterie 12 AVANT DE RETOURNER POUR LES RÉPARATIONS Si ces solutions ne permettent pas d éliminer le problème ou pour plus d informations sur le dépannage contacter le service technique au services sch...

Page 22: ...ré ou modifié par une personne autre que le fabricant ou si cet appareil est revendu par un détaillant non autorisé Le fabricant ne fait aucune autre garantie y compris mais sans limiter garantie expresse implicite ou légale y compris sans limitation toute garantie implicite de valeur marchande ou la garantie implicite d adéquation à un usage particulier De plus le fabricant ne sera pas responsabl...

Page 23: ...____________________ Esta es la única garantía limitada expresa y el productor no autoriza ni otorga a alguien a realizar alguna otra obligación No existe ninguna otra garantía más que la descrita en el manual del dueño La tarjeta de garantía debe enviarse durante los primeros 30 días después de la compra El cliente debe mantener el recibo de compra ORIGINAL como comprobante el cual le otorga todo...

Page 24: ...NAL puisqu il sera requis pour une éventuelle réclamation au titre de la garantie Cette garantie n est pas transférable Envoyer la carte de garantie seulement NE PAS ENVOYER L UNITÉ À CETTE ADRESSE POUR RÉPARATION Envoyer cette carte à Schumacher Electric Corporation 801 Business Center Drive Mount Prospect IL 60056 2179 É U Nom________________________________________________________________ Adres...

Reviews: