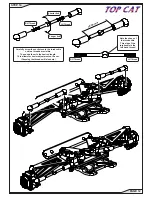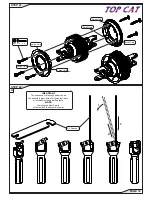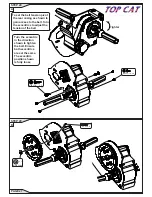
Note the shape of
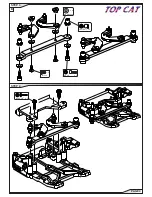
the turnbuckle.
This side of the
turnbuckle is the
left hand thread.
LH Thread
RH Thread
LH Thread
RH Thread
Longer link
Shorter link
Carefully screw the sockets onto the turnbuckle
until no threads are visible.
Then undo them to the desired length.
This allows for easier adjustment on the car.
(Greasing the threads will also help)
35.00mm
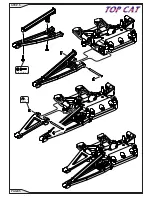
STEP 14
PAGE 12
Summary of Contents for TOP CAT
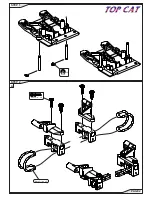
Page 3: ...e clip x 2 Black O ring x 2 No4 x 3 8 x 4 A STEP 1 PAGE 2 STEP 2...
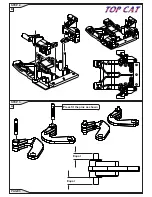
Page 4: ...Equal Equal Press fit the pins as shown STEP 2 PAGE 3 STEP 3 B A...
Page 5: ...M3 x 6 x 2 No4 x 3 8 x 2 Pivot Ball x 2 M3 Washer x 4 M3 x 8 x 2 B STEP 3 PAGE 4 STEP 4...
Page 6: ...e clip x 4 No2 x 5 16 x 2 STEP 5 PAGE 5...
Page 7: ...e clip x 4 No2 x 5 16 x 2 STEP 6 PAGE 6...
Page 9: ...Pivot Ball x 2 M3 x 8 x 2 e clip x 2 B STEP 8 PAGE 8...
Page 14: ...M3 x 8 x 5 M3 Nut x 5 STEP 15 PAGE 13...
Page 17: ...1 6 mm Washer x 1 M3 Nyloc x 1 M3 x 16 x 1 Now tighten these two screws B STEP 18 PAGE 16...
Page 21: ...No2 x 3 8 x 2 No2 x 3 16 x 4 No4 x 3 8 x 2 STEP 25 PAGE 20 STEP 26...
Page 27: ...No2 x 3 8 x 2 No4 x 3 8 x 2 No2 x 3 16 x 4 STEP 27 PAGE 26 STEP 28...
Page 29: ...No4 x 1 2 x 2 No4 x 3 8 x 2 No4 x 3 8 x 4 STEP 30 PAGE 28...
Page 31: ...17 50mm e clip x 2 Pivot Ball x 1 M3 x 16 x 1 A STEP 33 PAGE 30...
Page 33: ...e clip x 2 Pivot Ball x 1 M3 x 16 x 1 1 7 5 0 m m B STEP 35 PAGE 32 STEP 36...
Page 34: ...No4 x 3 8 x 2 M3 x 16 x 2 M3 Nut x 2 No4 x 1 2 x 4 STEP 37 PAGE 33 B STEP 37 A...
Page 36: ...No4 x 3 8 x 2 M3 Washer x 2 M3 x 3 x 1 Now tighten these two nuts and screws STEP 39 PAGE 35...
Page 48: ...STEP 53 PAGE 47 B...

