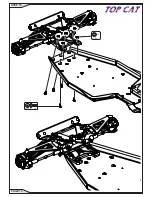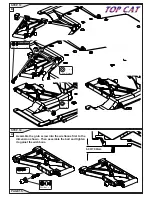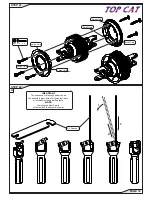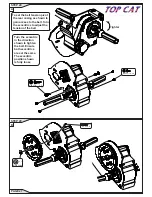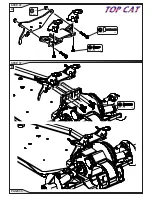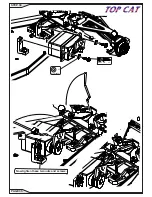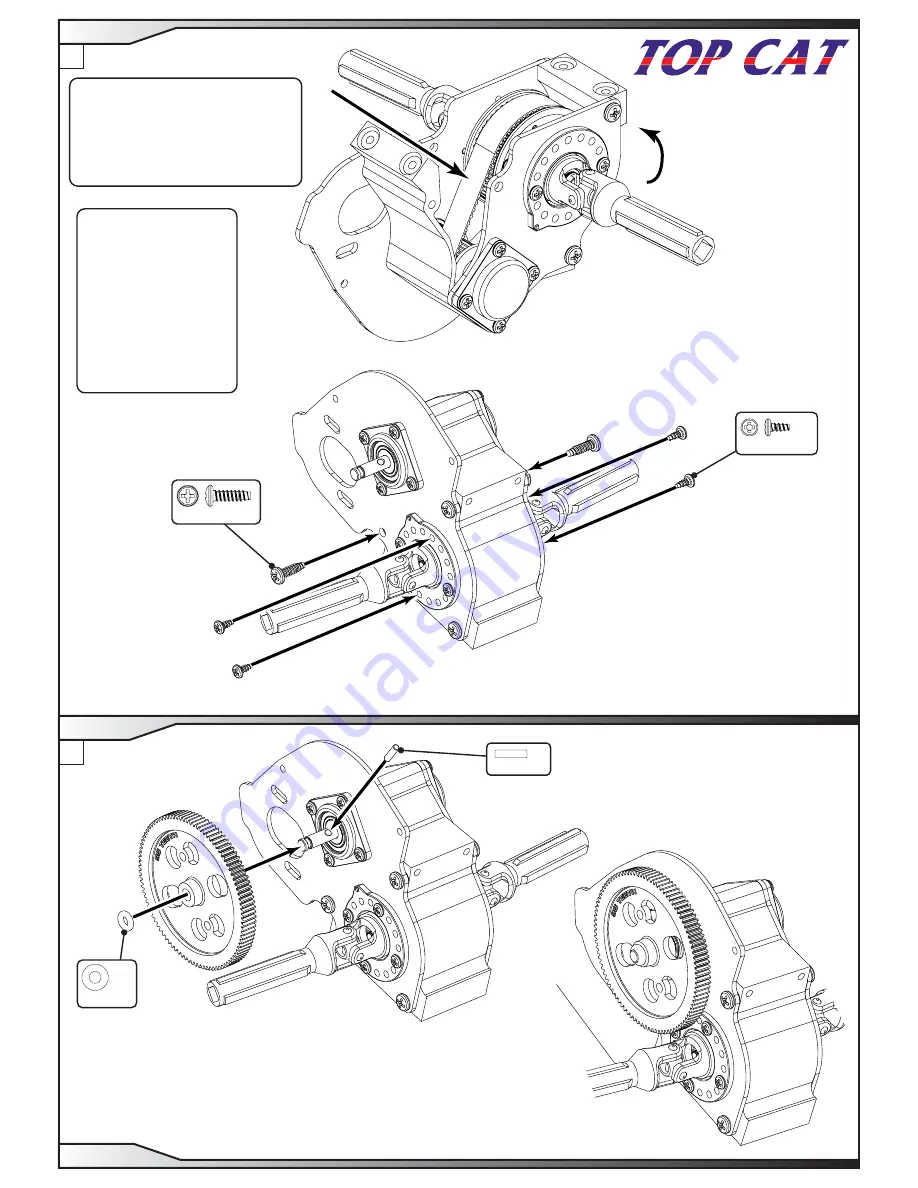
To set the belt tension pivot
the rear casing as shown to
gain access to the belt. Turn
the eccentrics to adjust the
tension of the belt
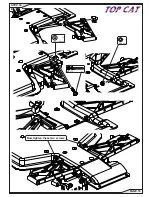
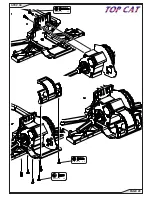
Turn the eccentric
in the direction
shown to tighten
the belt. Ensure
both eccentrics
are set the same.
The eccentric
position shown
is fully loose
Tighter
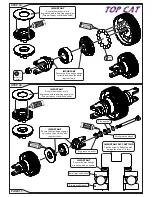
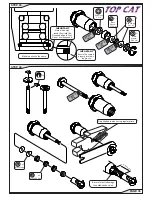
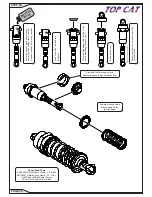
ø2.0 x 7.8
x 1
No4 x 3/8”
x 2
No2 x 3/16” x 4
Black O’ring
x 1
STEP 29
PAGE 27
B
A
STEP 29
Summary of Contents for TOP CAT
Page 3: ...e clip x 2 Black O ring x 2 No4 x 3 8 x 4 A STEP 1 PAGE 2 STEP 2...
Page 4: ...Equal Equal Press fit the pins as shown STEP 2 PAGE 3 STEP 3 B A...
Page 5: ...M3 x 6 x 2 No4 x 3 8 x 2 Pivot Ball x 2 M3 Washer x 4 M3 x 8 x 2 B STEP 3 PAGE 4 STEP 4...
Page 6: ...e clip x 4 No2 x 5 16 x 2 STEP 5 PAGE 5...
Page 7: ...e clip x 4 No2 x 5 16 x 2 STEP 6 PAGE 6...
Page 9: ...Pivot Ball x 2 M3 x 8 x 2 e clip x 2 B STEP 8 PAGE 8...
Page 14: ...M3 x 8 x 5 M3 Nut x 5 STEP 15 PAGE 13...
Page 17: ...1 6 mm Washer x 1 M3 Nyloc x 1 M3 x 16 x 1 Now tighten these two screws B STEP 18 PAGE 16...
Page 21: ...No2 x 3 8 x 2 No2 x 3 16 x 4 No4 x 3 8 x 2 STEP 25 PAGE 20 STEP 26...
Page 27: ...No2 x 3 8 x 2 No4 x 3 8 x 2 No2 x 3 16 x 4 STEP 27 PAGE 26 STEP 28...
Page 29: ...No4 x 1 2 x 2 No4 x 3 8 x 2 No4 x 3 8 x 4 STEP 30 PAGE 28...
Page 31: ...17 50mm e clip x 2 Pivot Ball x 1 M3 x 16 x 1 A STEP 33 PAGE 30...
Page 33: ...e clip x 2 Pivot Ball x 1 M3 x 16 x 1 1 7 5 0 m m B STEP 35 PAGE 32 STEP 36...
Page 34: ...No4 x 3 8 x 2 M3 x 16 x 2 M3 Nut x 2 No4 x 1 2 x 4 STEP 37 PAGE 33 B STEP 37 A...
Page 36: ...No4 x 3 8 x 2 M3 Washer x 2 M3 x 3 x 1 Now tighten these two nuts and screws STEP 39 PAGE 35...
Page 48: ...STEP 53 PAGE 47 B...

