background image

• 5 •

2.  PERSONAL SAFETY PRECAUTIONS

• Wear complete eye protection and 

protective clothing when working 

near lead-acid batteries. Always have 

someone nearby for help.

• Have plenty of fresh water, soap and 

baking soda nearby for use, in case 

battery acid contacts your eyes, skin, or 

clothing. Wash immediately with soap 

and water and seek medical attention.

• If battery acid comes in contact with eyes, 

flush eyes immediately for a minimum 10 

minutes and get medical attention.

• Neutralize any acid spills thoroughly with 

baking soda before attempting to clean up. 

• Remove all personal metal items from your 

body, such as rings, bracelets, necklaces 

and watches. A battery can produce a short 

circuit current high enough to weld a ring to 

metal, causing a severe burn.

• Never smoke or allow a spark or flame in 

the vicinity of the battery or engine. 

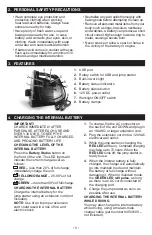
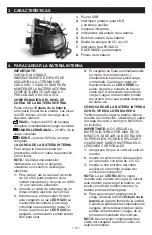
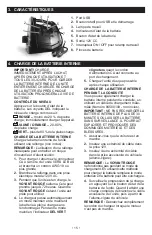
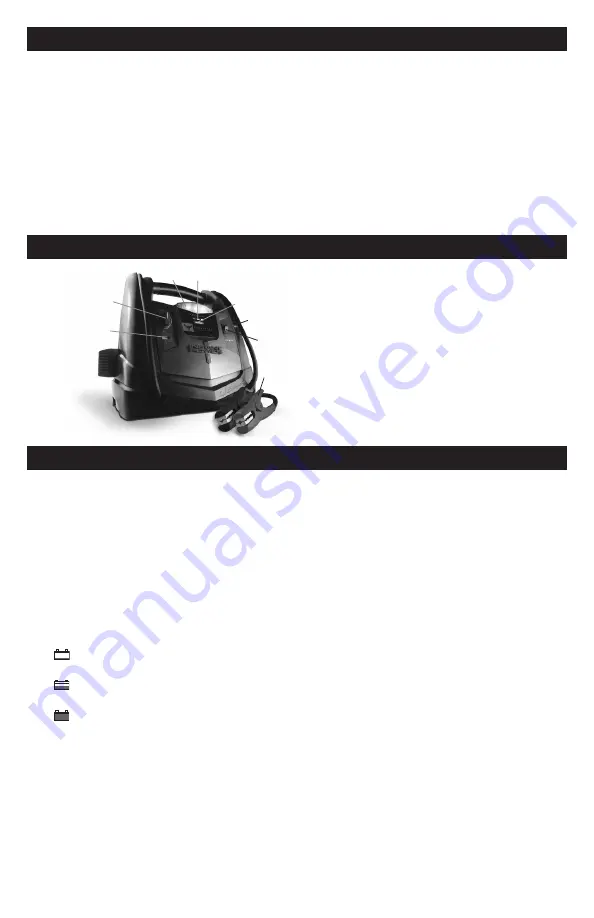
3.  FEATURES

6

4

3

5

7

8

1

2

1. 

USB port

2. 

Rotary switch for USB and jump starter

3. 

Built-in work light

4. 

Battery status indicators

5. 

Battery status button

6. 

12V DC power outlet

7. 

Worklight ON/OFF switch

8. 

Battery clamps

4.  CHARGING THE INTERNAL BATTERY

IMPORTANT!


CHARGE IMMEDIATELY AFTER 

PURCHASE, AFTER EACH USE AND 

EVERY 30 DAYS, TO KEEP THE 

INTERNAL BATTERY FULLY CHARGED 

AND PROLONG BATTERY LIFE.

CHECKING THE LEVEL OF THE 

INTERNAL BATTERY

Press the 

Battery Status

 button on 

the front of the unit. The LED lights will 

indicate the current charge level as 

follows:

 RED –

 less than 20% of full charge; 

immediately charge the unit.

 YELLOW/ORANGE –

 20-80% of full 

charge. 

 GREEN –

 more than 80% of full charge.

CHARGING THE INTERNAL BATTERY

Charge the internal battery for the  

jump starter using an extension cord (not 

included).

NOTE:

 Use of an improper extension  

cord could result in a risk of fire and 

electric shock. 

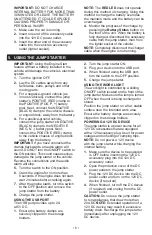
1. 

To charge, flip the AC connector on  

the back of the unit DOWN and plug in 

an 18 AWG or larger extension cord.

2. 

Plug the extension cord into a 120VAC 

electrical wall outlet.

3. 

While the jump starter is charging, the 

RED LED

 will be on. Complete charging 

may take up to 72 hours. When the 

RED LED

 turns off, the jump starter is 

ready to use.

4. 

When the internal battery is fully 

charged, the charger will automatically 

go into maintain mode and maintain 

the battery at full charge without 

damaging it. When in maintain mode, 

the 

GREEN LED will pulse

, as long 

as there is an AC cord connected to 

the charging port.

5. 

Charge the jump starter as soon as 

possible after use.

CHARGING THE INTERNAL BATTERY 

WHILE DRIVING

You may also charge the internal battery 

while driving, using a male-to-male  

charger cable (part number 94500109 –  

not included). 

Summary of Contents for FR01241

Page 1: ...and effectively Please read and follow these instructions and precautions carefully POR FAVOR CONSERVE ESTE MANUAL DEL USUARIO Y LEALO ANTES DE CADA USO En este manual le explica c mo utilizar el arr...

Page 2: ...FICATIONS 8 ACCESSORIES 8 LIMITED WARRANTY 8 WARRANTY CARD 19 CONTENIDOS INSTRUCCIONES IMPORTANTES DE SEGURIDAD 9 PRECAUCIONES DE SEGURIDAD PERSONAL 9 CARACTER STICAS 10 PARA CARGAR LA BATERIA INTERNA...

Page 3: ...S CURIT PERSONNELLE 14 CARACT RISTIQUES 15 CHARGE DE LA BATTERIE INTERNE 15 UTILISATION DE LE D MARREUR 16 MAINTENANCE ET ENTRETIEN 17 D PANNAGE 17 AVANT DE RETOURNER POUR LES R PARATIONS 17 SP CIFIC...

Page 4: ...starter Take it to a qualified service professional if service or repair is required Incorrect assembly may result in fire or electrical shock Do not use the jump starter to jump a vehicle while char...

Page 5: ...ATTERY FULLY CHARGED AND PROLONG BATTERY LIFE CHECKING THE LEVEL OF THE INTERNAL BATTERY Press the Battery Status button on the front of the unit The LED lights will indicate the current charge level...

Page 6: ...age to the jump starter or the vehicle Reverse the connections and the audio alarm will stop 5 Turn the switch to the ON position 6 Crank the engine for no more than 8 seconds If the engine does not s...

Page 7: ...arter won t jump start my car Clamps are not making a good connection to the battery Connections are reversed The jump starter s battery is not charged The vehicle s battery is defective The jump star...

Page 8: ...cturer does not provide any warranty for any accessories used with this product that are not manufactured by Schumacher Electric Corporation and approved for use with this product This Limited Warrant...

Page 9: ...do ni vendido por Schumacher Electric Corporation puede ocasionar da os en la unidad o lesiones corporales Nunca opere el arrancador si est da ado Si otra persona usa el arrancador aseg rese de que es...

Page 10: ...ROJO se mantendr encendida Una carga completa se puede tardar hasta 72 horas Cuando la luz LED ROJO se apagar el arrancador port til estar listo para usar 4 El cargador se fijar autom ticamente en mo...

Page 11: ...O UTILIZAR LA LUZ DE TRABAJO La luz de trabajo se controla mediante un interruptor deslizante de Encendido Apagado ON OFF situado en la parte frontal del arrancador Aseg rese de que la l mpara est apa...

Page 12: ...nte de poder Consulte la secci n de Indicadores LED en este manual Haga un chequeo de la bater a Gire el interruptor arrancador ON OFF a la posici n de encendido La fuente de poder no pone a funcionar...

Page 13: ...ada es reparado o modificado por personas que nos sean el Fabricante o si esta unidad es revendida a trav s de un vendedor minorista no autorizado El fabricante pudiera anular esta Garant a Limitada s...

Page 14: ...s dommages l appareil ou des blessures corporelle Ne jamais utiliser l unit si elle est endommag e Si quelqu un d autre utilise l unit assurez vous qu ils sont bien inform s sur la fa on de l utiliser...

Page 15: ...rendre jusqu a 72 heures Quand le VOYANT ROUGE s teint l unit est pr te pour utiliser 4 Le chargeur passe automatiquement en mode maintien et de maintenir la batterie pleine charge sans l endommager P...

Page 16: ...ion OFF 5 Chargez l unit UTILISATION DE LA LAMPE La lumi re de travail est command par un s lecteur ON OFF situ en avant de l unit Assurez vous que la lampe est teinte lorsque l appareil est en cours...

Page 17: ...at de charge Faites v rifiez la batterie Mettez le sel cteur ON OFF sur la position ON L unit n allume pas mon appareil de 12V Le dispositif de 12V n est pas activ La batterie Interne n est pas charg...

Page 18: ...oumis une manipulation imprudente r par ou modifi par une personne autre que le fabricant ou si cet appareil est revendu par un d taillant non autoris Le fabricant peut annuler la garantie si l tiquet...

Page 19: ...___________________ Esta es la nica garant a limitada expresa y el productor no autoriza ni otorga a alguien a realizar alguna otra obligaci n No existe ninguna otra garant a m s que la descrita en el...

Page 20: ...RIGINAL puisqu il sera requis pour une ventuelle r clamation au titre de la garantie Cette garantie n est pas transf rable Envoyer la carte de garantie seulement NE PAS ENVOYER L UNIT CETTE ADRESSE PO...

Reviews: