background image

 4 

CHARGING THE INTERNAL BATTERY OF THE INSTANT POWER™

6. 

IMPORTANT: CHARGE IMMEDIATELY AFTER PURCHASE, AFTER EACH USE  

AND EVERY 30 DAYS TO KEEP THE INSTANT POWER™ INTERNAL BATTERY 

FULLY CHARGED. 
LED Indicators

6.1 

To check the internal battery’s status, press the Battery Status button on the front of the 

Instant Power™.
The LED lights will indicate the charge level as follows: 

A red LED indicates a 50% or less charge, and you should immediately recharge the 

• 

Instant Power™.
A yellow LED indicates a 50 to 75% charge. The Instant Power™ may be used, but 

• 

should be recharged as soon as possible.
A green LED indicates the internal battery is fully charged.

• 

NOTE:

 The internal battery’s percent of charge is most accurate when the Instant 

Power™ has been disconnected from all devices and charging sources for a few hours.

Charging the Internal Battery using the Built-In Charger

6.2 

To charge, flip the AC connector on the back of the Instant Power™ up and plug an 

1. 

18 gauge (AWG) (0.82 mm

2

) or larger extension cord onto it. (Extension cord not 

included; must be purchased separately.)
Plug the other end of the extension cord into a 120V AC electrical wall outlet.

2. 

The RED LED will light indicating charging.

3. 

The GREEN LED will light when the battery has reached full charge. This could 

4. 

take up to 72 hours, due to the age and condition of the battery. The charger will 

automatically go into maintain mode and maintain the battery at full charge without 

damaging it.
Charge the Instant Power™ as soon as possible after each use.

5. 

Do not use the Instant Power™ while charging the internal battery.

You may also charge the internal battery while driving, using a male-to-male charger 

cable (p/n 94500109 – not included). Insert one end of the charger cable into the 12V 

DC power outlet and the other end into the vehicle’s accessory outlet (lighter socket). 

Completely disconnect the charger cable when the engine is not running. 

The RED LED and the GREEN LED do not indicate charging status 

during this method of charging. Using this method to charge the battery overrides the 

maintain mode and the battery can be overcharged. Monitor the progress of the battery, 

and when it reaches a full (100%) charge, disconnect the charger. Do not charge it for 

more than four hours and do not leave the battery unattended or it could explode, 

causing property damage or personal injury.

OPERATING INSTRUCTIONS

7. 

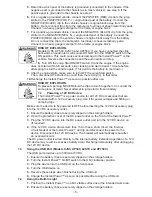
Jump Starting a Vehicle Engine

7.1 

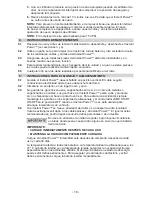
A SPARK NEAR THE BATTERY MAY CAUSE 

A BATTERY EXPLOSION. TO REDUCE THE 

RISK OF A SPARK NEAR THE BATTERY:


Do not use the Instant 

Power™ while charging the 

internal battery.

Turn the vehicle’s ignition OFF before making cable connections.

1. 

Position the DC cables to reduce the risk of damage by the hood, door and moving 

2. 

or hot engine parts. 

NOTE:

 If it is necessary to close the hood during the jump 

starting process, ensure that the hood does not touch the metal part of the battery 

clips or cut the insulation of the cables.
Stay clear of fan blades, belts, pulleys and other parts that can cause injury.

3. 

Check the polarity of the battery posts. The POSITIVE (POS, P, +) battery post 

4. 

usually has a larger diameter than the NEGATIVE (NEG, N, -) post.

Summary of Contents for INSTANT POWER XJS4

Page 1: ...THIS PRODUCT FAILURE TO DO SO COULD RESULT IN SERIOUS INJURY OR DEATH LEA EL MANUAL COMPLETO ANTES DE UTILIZAR ESTE PRODUCTO CUALQUIER FALLA PODR A RESULTAR EN SERIAS LESIONES O PODR A SER MORTAL OWNE...

Page 2: ...o derramable que debe desecharse apropiadamente WARNING Possible explosion hazard Contact with battery acid may cause severe burns and blindness Keep out of reach of children ADVERTENCIA Posible Riesg...

Page 3: ...IRE Read the entire manual before using this product 1 1 Failure to do so could result in serious injury or death Keep out of reach of children 1 2 Do not put fingers or hands into any of the Instant...

Page 4: ...ng near the battery If battery acid contacts your skin or clothing immediately wash the area with soap and 2 9 water If acid enters your eye immediately flood the eye with cold running water for at le...

Page 5: ...ilt In Worklight 6 Worklight ON OFF Switch 7 Air Compressor Hose 8 Battery Clips 9 Internal Battery Charger Plug 10 not shown Air Compressor ON OFF Switch 11 not shown Air Compressor Gauge not shown 1...

Page 6: ...Power as soon as possible after each use 5 Do not use the Instant Power while charging the internal battery You may also charge the internal battery while driving using a male to male charger cable p...

Page 7: ...tant Power as soon as possible after use 10 RISK OF EXPLOSION To prevent sparking NEVER allow the clips to touch together or to contact the same piece of metal Never attempt to jump start a frozen bat...

Page 8: ...as built in thermal protection that will turn the compressor off before it overheats If the compressor shuts off wait a few minutes and it will automatically restart when the compressor cools NOTE The...

Page 9: ...rse the clips Check the battery charge status by pressing the button on the front of the Instant Power See LED Indicators section of this manual Have the battery checked Turn the Instant Power on off...

Page 10: ...id Nominal Voltage 12V DC DC Power Output Maximum Continuous Load 15A Battery Hookup Cables with Clamps 8 gauge AWG 18 45 72 cm Long Dimensions H x W x D 10 x 10 25 x 5 25 25 4 cm x 26 cm x 13 3 cm We...

Page 11: ...mited to express implied or statutory warranties including without limitation any implied warranty of merchantability or implied warranty of fitness for a particular purpose Further Manufacturer shall...

Page 12: ...__________________ Serial Number________________________ SEE PRODUCT PROGRAMA DE REGISTRO DE 1 A O DE GARANT A LIMITADA MODELO ___________________ DESCRIPCI N ___________________________ Esta es la ni...

Page 13: ...importancia EL RIESGO DE DESCARGA EL CTRICA O INCENDIO Lea el manual completo antes de utilizar este 1 1 producto Cualquier falla podr a resultar en serias lesiones o podr a ser mortal Mant ngase alej...

Page 14: ...que alguna persona se encuentre cerca suyo para poder ayudarlo 2 6 cuando trabaje en forma cercana a una bater a de plomo cido Cuente con una gran cantidad de agua potable y jab n a mano en caso de qu...

Page 15: ...e la bater a como lo permitan los cables de CC Nunca ubique el Instant Power 4 2 directamente por encima de la bater a que se arranca los gases de la bater a corroer n y da ar n el Instant Power No ut...

Page 16: ...o mayor extensi n en la misma El cable de extensi n no est incluido se vende por separado Conecte el otro extremo del cable de extensi n en una toma de corriente el ctrica 2 de 120 V de la pared El LE...

Page 17: ...qu borne de la bater a hace descarga a tierra se encuentra conectado 5 con el chasis Si el borne negativo hace descarga a tierra con el chasis como en la mayor parte de los veh culos ver el paso 6 Si...

Page 18: ...e la perilla de Apague y encienda ON OFF del Instant Power a la posici n ON 3 Encienda el aparato USB 4 Una vez terminado el uso del USB desconecte en forma reversible 5 Cargue el Instant Power tan pr...

Page 19: ...enchufado en posici n vertical El cable seguir 9 1 conduciendo electricidad hasta que se desenchufe del toma Almacene en el interior en un lugar fresco y seco 9 2 No guarde los ganchos en asas enganch...

Page 20: ...Gire el interruptor Instant Power ON OFF a la posici n de encendido La fuente de poder no pone a funcionar mi aparato de 12V El aparato de 12V no enciende La bater a de la fuente de poder no est carga...

Page 21: ...Acido Volaje Nominal De CC y 12V Salida de Energ a de CC Carga M xima Cont nua 15A Cables de Conexi n de Bater a con Pinzas Calibre 8 AWG 18 45 72 cm de Largo Dimensiones A x A x P 10 x 10 25 x 5 25 2...

Page 22: ...tas o legales incluidas a modo de ejemplo las garant as impl citas de comerciabilidad o adecuaci n a un fin espec fico Asimismo el Fabricante no ser responsable ante reclamos por da os accidentales es...

Reviews: