background image

• 7 •

Using the USB Port 

The USB port provides up to 2.1A at 5V DC.

1. 

Plug the device into the USB port.

2. 

Press and hold the ON/OFF switch to turn the inverter on. (The internal speaker will 

make a brief “beep”. This is normal.).

3. 

Turn the USB device on.

4. 

Reverse these steps when finished using the USB port.

Using the Inverter to Operate a TV or Audio Device: 

The inverter is shielded and filtered to minimize signal interference. Despite this, some 

interference may occur with your television picture, especially with weak signals. Below are 

some suggestions to try and improve reception.

1. 

Make sure the television antenna produces a clear signal under normal operating 

conditions (i.e. at home plugged into a standard 120 volt AC wall outlet). Also, ensure 

that the antenna cable is adequately shielded and of good quality.

2. 

Try altering the position of the inverter, antenna cables, and television power cord. 

Add an extension cord from the inverter to the TV so as to isolate its power cord and 

antenna cables from the 12 volt power source.

3. 

Try coiling the television power cord and the input cables running from the 12 volt 

power source to the inverter.

4. 

Affix one or several “Ferrite Data Line Filters” to the television power cord. Ferrite Data 

Line Filters can be purchased at most electronic supply stores.

5. 

Try grounding the inverter with a minimum 18 gauge (AWG) (0.75mm

2

) wire, using as 

short a length as possible.

NOTE:

 You may hear a “buzzing” sound being emitted from inexpensive sound systems 

when operated with the inverter. This is due to ineffective filters in the sound system’s 

power supply. Unfortunately, this problem can only be resolved by purchasing a sound 

system with a higher quality power supply or higher quality filter.

7.  POWER SOURCE

When operating a device that draws approximately 60 watts, your average automobile 

or marine battery at full charge will provide an ample power supply to the inverter for 

approximately 3 hours when the engine is off. The actual length of time the inverter will 

function depends on the age and condition of the battery and the power demand being 

placed by the device being operated with the inverter.

If you decide to use the inverter while the engine is off, we recommend you turn OFF the 

device plugged into the inverter before starting the engine. To maintain battery power, start 

the engine regularly and let it run for approximately 15 to 20 minutes to recharge the battery.

Although it is not necessary to disconnect the inverter when turning over the engine, it may 

briefly cease to operate as the battery voltage decreases. While the inverter draws very 

low amperage when not in use, it should be unplugged to avoid battery drain.

8.  LED INDICATOR AND SHUTDOWN PROTECTION

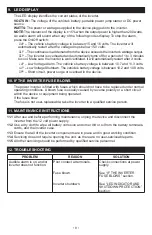
The LED lights automatically when plugged into a 12 volt DC power source, but will not 

light under the following conditions:

1. 

When the power input from the vehicle’s battery drops to approximately 10.5 volts,  

low battery shutdown occurs and the inverter shuts off.  

Solution: Recharge or Replace the battery.

2. 

When the power input from the vehicle’s battery exceeds 15 volts, high voltage 

overload protection occurs.  

Solution: Reduce the voltage range to between 12 volts and 14 volts.

3. 

The continuous load demand from the equipment or device being operated exceeds 

the continuous load rating of the inverter being used.  

Solution: Use a higher capacity inverter or lower rated device.

4. 

The case temperature becomes hot (exceeds 145°F).  

Solution: Allow the inverter to cool. Do not block the cooling slots or air flow over and 

through the inverter. Reduce the load on the inverter to the continuous rated output.

RESET:

 To reset after shutdown occurs, press the On/Off button to turn the inverter OFF 

and press the reset button. Check the source of the problem and correct. Press the On/Off 

button to turn the inverter ON.

Summary of Contents for PIF-2000

Page 1: ...DE GARDER LE MANUEL D INSTRUCTIONS ET LE LIRE AVANT CHAQUE UTILISATION Ce manuel explique comment utiliser l unit d une fa on s re et efficace S il vous pla t lisez et suivez ces instructions et pr c...

Page 2: ...PECIFICATIONS 9 LIMITED WARRANTY 10 WARRANTY CARD 19 TABLE DES MATI RES INSTRUCTIONS IMPORTANTES CONCERNANT LA S CURIT 11 CARACT RISTIQUES DE L ONDULEUR 12 AVANT D UTILISER VOTRE ONDULEUR 12 FIXATION...

Page 3: ...l source of flammable fumes gases or clothing 1 4 Do not place the inverter in areas such as battery compartments or engine compartments where fumes or gases may accumulate 1 5 Keep the inverter dry 1...

Page 4: ...2 3 4 5 6 7 8 3 BEFORE USING YOUR POWER INVERTER NOTE Do not use the inverter with a product that draws a higher wattage than the inverter can provide as this may cause damage to the inverter and pro...

Page 5: ...ace the back of the inverter with the mounting bracket against a flat secure surface 3 Attach the inverter to the flat surface using corrosion resistant screws 5 CONNECTING INVERTER CABLES The inverte...

Page 6: ...ATING INSTRUCTIONS 1 Connect the inverter see CONNECTING INVERTER CABLES section 2 Switch the inverter On Off switch to the ON position 3 The LED indicator will light verifying the inverter is receivi...

Page 7: ...e automobile or marine battery at full charge will provide an ample power supply to the inverter for approximately 3 hours when the engine is off The actual length of time the inverter will function d...

Page 8: ...OPP Short circuit power surge or overload in the device 10 IF THE INVERTER FUSE BLOWS The power inverter is fitted with fuses which should not have to be replaced under normal operating conditions A b...

Page 9: ...omer Service at Schumacher Electric Corporation 15 SPECIFICATIONS Maximum continuous power 2000 Watts Surge capability peak power 4000 Watts No load current draw 1A Output wave form Modified Sine Wave...

Page 10: ...epaired or modified by anyone other than Manufacturer or if this unit is resold through an unauthorized retailer Manufacturer makes no other warranties including but not limited to express implied or...

Page 11: ...1 3 S assurer que l onduleur ne se trouve pas proximit d une source potentielle de fum es gaz ou de v tements inflammables 1 4 Ne pas mettre l onduleur dans des emplacements tels que des compartiments...

Page 12: ...as l onduleur avec un produit ayant une puissance plus lev e que l onduleur peut fournir toute modification peut entra ner des dommages l onduleur et au produit 2 CARACT RISTIQUES DE L ONDULEUR 1 Vent...

Page 13: ...r sans transformateur 4 FIXATION DE L ONDULEUR SUR UNE SURFACE PLATE Pour votre convenance l onduleur peut tre fix sur une surface plate horizontalement ou verticalement La zone o l onduleur est fix d...

Page 14: ...ateur MARCHE ARR T On Off de l onduleur sur la position ON 3 Le voyant lumineux DE s allumera pour v rifier que l onduleur est aliment en courant 4 Basculez le commutateur MARCHE ARR T On Off de l ond...

Page 15: ...t ou ayant un meilleur filtre 7 SOURCE D ALIMENTATION Lorsque vous utilisez un appareil ayant une puissance d environ 60 watts votre batterie marine ou automobile habituelle pleine charge apportera su...

Page 16: ...tomatiquement de 1 3 minutes pour refroidir S assurer que l onduleur soit bien ventil Il red marrera automatiquement une fois refroidi UP Alarme de basse tension La tension de la batterie du v hicule...

Page 17: ...niquer avec le Service la Client le au 1 800 621 5485 NE PAS ENVOYER L UNIT jusqu ce que vous recevez une AUTORISATION DE RETOUR RMA aupr s de Service la client le Schumacher Electric Corporation 15 C...

Page 18: ...par une personne autre que le fabricant ou si cet appareil est revendu au travers d un d taillant non autoris Le fabricant ne fait aucune autre garantie y compris mais sans y tre limit expresse impli...

Page 19: ..._______ Date of Purchase__________ Store Location_____________________ UPC Number_________________________ Serial Number_______________________________________ SEE PRODUCT For faster warranty activati...

Reviews: