4
D.
ConneCTIng InVerTer CABleS
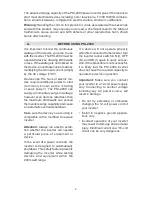
The inverter and the power source must
be in the OFF mode.
InVerTer ConneCTIon:
1. Locate the positive and negative
plastic terminals located on the left
side of the inverter. Using a flathead
or standard screwdriver, unscrew
the positive (red) and negative
(black) terminal screws just enough
to be able to insert the bare end of
the connector cables.
2. Insert the bare end of the positive
(red) cable into the positive terminal
and bare end of the negative (black)
cable into the negative terminal.
Tighten each terminal screw so the
cable cannot come loose.
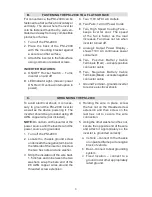
To TUrn on:
1. Push the rocker switch, located
on the right side, to the “ON” (I)
position. The LED indicator light
should glow GREEN verifying the
inverter is receiving power and can
deliver power to your device. (A brief
audio alarm may sound or red LED
may flash. This is normal.)
2. Turn on the power source or device
to be powered.
noTe:
If more than two devices are to
be powered, start one device at a time to
avoid a power surge and overloading the
inverter. The surge load of each device
should not exceed 2000 watts.
You can use an extension cord from
the inverter to the device without sig-
nificantly decreasing the power being
generated by the inverter. For best
operating results, the extension cord
should be no longer than 50 feet.
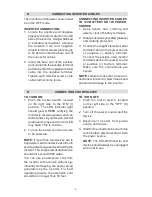
ConneCTIng InVerTer CABleS
To 12V BATTery or 12V PoWer
SoUrCe
1. Keep hands, hair, clothing and
jewelry clear of battery terminals.
2. Wear protective eye (safety glasses)
and clothing protection.
3. Connect the negative (black) inverter
terminal cable to the power source
or negative (-) battery terminal.
Connect the positive (red) inverter
terminal cable to the power source
or positive (+) battery terminal.
Make sure the connections are
secure.
noTe
: Failure to make the correct con-
nections will result in blown fuses and
permanent damage to the inverter.
e.
ConneCTIng yoUr PSI-2000
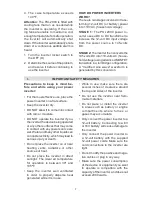
To TUrn off:
1. Push the rocker switch, located
on the right side, to the “OFF” (O)
position.
2. Turn off the power source and the
device.
3. Disconnect inverter from power
source and device.
4. Wait for the inverter to be cool to the
touch before disconnecting it from
the power source.
noTe:
The PSI-2000 inverter and
device should always be unplugged
when not in use.


