background image

0099002114E-00

Jump Starter/ 

Power Pack

Arrancador /  

Pack de energía

Aide de Démarrage /  

Bloc d’alimentation

OWNER’S MANUAL / MANUAL DEL USUARIO

MANUEL D’UTILISATION

PLEASE SAVE THIS OWNER’S MANUAL AND READ BEFORE 

EACH USE. This manual will explain how to use the unit safely 

and effectively. Please read and follow these instructions and 

precautions carefully.
POR FAVOR GUARDE ESTE MANUAL DEL PROPIETARIO Y 

LEER ANTES DE CADA USO. En este manual se explica cómo 

utilizar la unidad segura y efectiva. Por favor, lea y siga las siguientes 

instrucciones y precauciones.
ESSAYER DE GARDER LE MANUEL D’INSTRUCTIONS ET LE 

LIRE AVANT CHAQUE UTILISATION. Ce manuel explique comment 

utiliser l’unité d’une façon sûre et efficace. S’il vous plaît lisez et suivez 

ces instructions et précautions.

BASE MODEL / MODELO BASE / VERSION DE BASE


SL010

Summary of Contents for SL010

Page 1: ... these instructions and precautions carefully POR FAVOR GUARDE ESTE MANUAL DEL PROPIETARIO Y LEER ANTES DE CADA USO En este manual se explica cómo utilizar la unidad segura y efectiva Por favor lea y siga las siguientes instrucciones y precauciones ESSAYER DE GARDER LE MANUEL D INSTRUCTIONS ET LE LIREAVANT CHAQUE UTILISATION Ce manuel explique comment utiliser l unité d une façon sûre et efficace ...

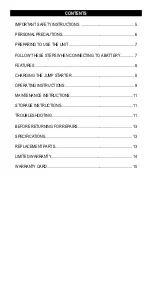
Page 2: ... FOLLOW THESE STEPS WHEN CONNECTING TO A BATTERY 7 FEATURES 8 CHARGING THE JUMP STARTER 8 OPERATING INSTRUCTIONS 9 MAINTENANCE INSTRUCTIONS 11 STORAGE INSTRUCTIONS 11 TROUBLESHOOTING 11 BEFORE RETURNING FOR REPAIRS 13 SPECIFICATIONS 13 REPLACEMENT PARTS 13 LIMITED WARRANTY 14 WARRANTY CARD 15 ...

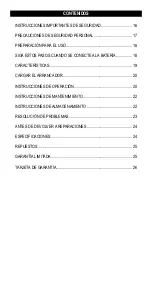
Page 3: ...STOS PASOS CUANDO SE CONECTE A LA BATERÍA 18 CARACTERÍSTICAS 19 CARGAR ELARRANCADOR 20 INSTRUCCIONES DE OPERACIÓN 20 INSTRUCCIONES DE MANTENIMIENTO 22 INSTRUCCIONES DE ALMACENAMIENTO 22 RESOLUCIÓN DE PROBLEMAS 23 ANTES DE DEVOLVER A REPARACIONES 24 ESPECIFICACIONES 24 REPUESTOS 25 GARANTÍA LIMITADA 25 TARJETA DE GARANTÍA 26 ...

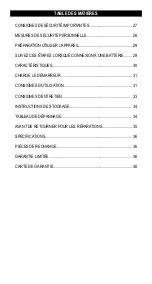
Page 4: ...9 SUIVEZ CES ÉTAPES LORSQUE CONNEXION À UNE BATTERIE 29 CARACTÉRISTIQUES 30 CHARGE LE DÉMARREUR 31 CONSIGNES D UTILISATION 31 CONSIGNES D ENTRETIEN 33 INSTRUCTIONS DE STOCKAGE 34 TABLEAU DE DÉPANNAGE 34 AVANT DE RETOURNER POUR LES RÉPARATIONS 35 SPÉCIFICATIONS 36 PIÈCES DE RECHANGE 36 GARANTIE LIMITÉE 36 CARTE DE GARANTIE 38 ...

Page 5: ...sk of damage to the electric plug or cord pull by the adaptor rather than the cord when disconnecting the unit 1 7 Do not operate the unit with damaged cables or clamps 1 8 Do not operate the unit if it has received a sharp blow been dropped or otherwise damaged in any way take it to a qualified service person 1 9 Do not disassemble the unit take it to a qualified service person when service or re...

Page 6: ...ng soda nearby for use in case battery acid contacts your eyes skin or clothing 2 8 Wear complete eye and body protection including safety goggles and protective clothing Avoid touching your eyes while working near the battery 2 9 If battery acid contacts your skin or clothing immediately wash the area with soap and water If acid enters your eye immediately flood the eye with cold running water fo...

Page 7: ...tal part of the battery clips or cut the insulation of the cables 4 3 Stay clear of fan blades belts pulleys and other parts that can cause injury 4 4 Check the polarity of the battery posts The POSITIVE POS P battery post usually has a larger diameter than the NEGATIVE NEG N post 4 5 Determine which post of the battery is grounded connected to the chassis If the negative post is grounded to the c...

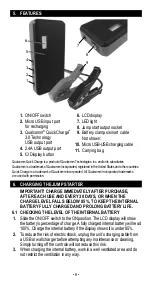
Page 8: ...11 Carrying bag 6 CHARGING THE JUMP STARTER IMPORTANT CHARGE IMMEDIATELY AFTER PURCHASE AFTER EACH USE AND EVERY 30 DAYS OR WHEN THE CHARGE LEVEL FALLS BELOW 85 TO KEEP THE INTERNAL BATTERY FULLY CHARGED AND PROLONG BATTERY LIFE 6 1 CHECKING THE LEVEL OF THE INTERNAL BATTERY 1 Slide the ON OFF switch to the ON position The LCD display will show the battery s percentage of charge Afully charged int...

Page 9: ...cable into the jump starter s output socket 3 Lay the DC cables away from any fan blades belts pulleys and other moving parts Make sure all of the vehicle s electrical devices are turned off 4 For a negative grounded vehicle connect the POSITIVE RED clamp from the jump starter to the POSITIVE POS P ungrounded post of the battery Connect the NEGATIVE BLACK clamp to the vehicle chassis or engine blo...

Page 10: ...e vehicle will not start after three attempts consult a service technician 8 After the engine starts unplug the battery clamps from the jump starter socket and then disconnect the black clamp and the red clamp in that order Slide the ON OFF switch to the OFF position 9 Recharge the unit as soon as possible after each use 7 2 CHARGING A MOBILE DEVICE USING THE USB PORTS The unit includes two USB po...

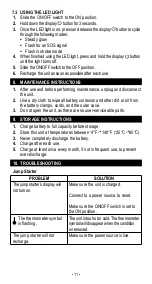
Page 11: ...nd other dirt or oil from the battery clamps cords and the outer case 3 Do not open the unit as there are no user serviceable parts 9 STORAGE INSTRUCTIONS 1 Charge battery to full capacity before storage 2 Store this unit at temperatures between 4 F 140 F 20 C 60 C 3 Never completely discharge the battery 4 Charge after each use 5 Charge at least once every month if not in frequent use to prevent ...

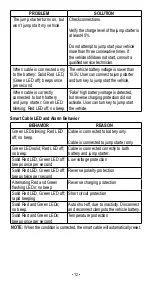
Page 12: ...ction did not activate User can turn key to jump start the vehicle Smart Cable LED and Alarm Behavior BEHAVIOR REASON Green LED blinking Red LED off no beep Cable is connected to battery only Cable is connected to jump starter only Green LED solid Red LED off no beep Cable is connected correctly to both battery and jump starter Solid Red LED Green LED off beeps once per second Low voltage protecti...

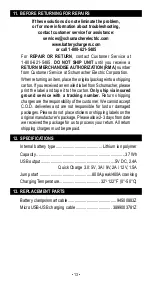
Page 13: ...ase print the label and tape it to the carton Only ship via insured ground service with a tracking number Return shipping charges are the responsibility of the customer We cannot accept C O D deliveries and are not responsible for lost or damaged packages Please do not place stickers or shipping labels on the original manufacturer s package Please allow 2 3 days from date we received the package f...

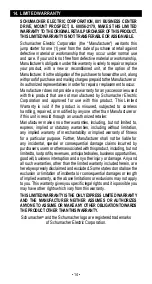
Page 14: ...dified by anyone other than Manufacturer or if this unit is resold through an unauthorized retailer Manufacturer makes no other warranties including but not limited to express implied or statutory warranties including without limitation any implied warranty of merchantability or implied warranty of fitness for a particular purpose Further Manufacturer shall not be liable for any incidental special...

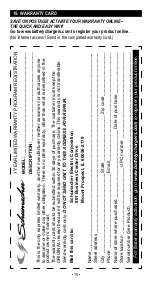
Page 15: ...y claims This warranty is not transferable Send warranty card only DO NOT SEND UNIT TO THIS ADDRESS FOR REPAIR Mail this card to Schumacher Electric Corporation 801 Business Center Drive Mount Prospect IL 60056 2179 Name________________________________________________________________________________ Street address_________________________________________________________________________ City_______...

Page 16: ...esiones a personas o daño a la propiedad 1 6 Para reducir el riesgo de daños al enchufe o cable eléctrico jale del adaptador en lugar de jalar del cable al desconectar la unidad 1 7 No utilice la unidad si el mismo posee los cables o las pinzas dañado 1 8 No utilice la unidad si el mismo recibió un golpe fuerte si se cayó o si sufrió daños de cualquier otra forma hágalo revisar por una persona cap...

Page 17: ... para poder ayudarlo cuando trabaje en forma cercana a una batería de plomo ácido 2 7 Cuente con una gran cantidad de agua potable y jabón a mano en caso de que el ácido de la batería tenga contacto con su piel ropa u ojos 2 8 Utilice protección visual y corporal completa incluyendo gafas de seguridad y prendas de protección Evite tocar sus ojos mientras trabaje en forma cercana a la batería 2 9 S...

Page 18: ...icado abajo Nunca permita que las pinzas hagan contacto una con el otra 4 2 Ubique los cables de C C para reducir el riesgo de daños a la cubierta a la puerta y a las piezas móviles o calientes del motor NOTA Si es necesario cerrar el cofre durante el proceso de arranca asegúrese que el cofre no toque parte metálica de la batería o pele los cables 4 3 Manténgase alejado de las paletas del ventilad...

Page 19: ... Desconecte las pinzas desde la unidad 5 CARACTERÍSTICAS 1 Interruptor ON OFF 2 Puerto de entrada Micro USB para recargar 3 Puerto de salida de USB Qualcomm Quick Charge 3 0 Tecnología 4 Puerto USB 2 4A 5 Botón de pantalla 6 Pantalla LCD 7 Luz LED 8 Toma de salida del arrancador 9 Pinzas de la batería cable inteligente No mostrada 10 Cable de carga micro USB USB 11 Bolsa de transporte Qualcomm Qui...

Page 20: ... carga 1 Conecte el extremo Micro USB del cable de carga en el puerto de entrada A continuación conecte el extremo USB del cable de carga en el puerto USB de un cargador 2 Conectar el cargador a una toma de alimentación de CA o CC en vivo 3 La pantalla LCD se iluminará el dígito comenzará a parpadear y mostrará IN indicando que la carga ha comenzado 4 El arrancador cargará completamente en 4 5 hor...

Page 21: ... segundos deje de arranque y espere al menos 1 minuto antes de intentar arrancar el vehículo nuevo NOTA Si el coche no arranca por segunda vez compruebe el cable inteligente para ver si el LED verde está encendido Si oye un pitido o y el LED parpadea consulte la sección 10 Resolución de Problemas Cuando se corrige la condición el cable inteligente se reajustará automáticamente NOTA El clima frío p...

Page 22: ...áticamente después de 30 segundos 7 3 UTILIZANDO LA LUZ LED 1 Deslice el interruptor ON OFF a la posición ON 2 Mantenga presionado el botón de pantalla durante 3 segundos 3 Una vez que la luz LED está encendido presione y suelte el botón para cambiar entre los siguientes modos Resplandor de constante Parpadeará como una señal de SOS Parpadeará como una de luz estroboscópica 4 Cuando termine de usa...

Page 23: ...do Cuando el cable está conectado solamente a la batería El LED rojo estará sólido El LED verde estará apagado Pita una vez por segundo El voltaje de la batería del vehículo es inferior a 10 5V El usuario puede conectar el arrancador y girar la llave para arrancar el motor del vehículo Cuando el cable está conectado correctamente a la batería y al arrancador El LED verde estará parpadeando el LED ...

Page 24: ...al Cliente al 1 800 621 5485 NO ENVÍE LA UNIDAD hasta que usted reciba AUTORIZACIÓN DE DEVOLUCIÓN de Mercancía RMA de Servicios al Cliente de Schumacher Electric Corporation Al devolver un artículo coloque el paquete original en una caja de envío Si ha recibido una etiqueta de envío por correo electrónico de Schumacher por favor imprima la etiqueta y péguela a la caja de cartón Sólo se debe enviar...

Page 25: ...o o modificado por personas que nos sean el Fabricante o si esta unidad es revendida a través de un vendedor minorista no autorizado El Fabricante no realiza ninguna otra garantía incluidas a título enunciativo lasgarantíasexpresas implícitasolegales incluidas amodo deejemplo lasgarantíasimplícitasdecomerciabilidadoadecuaciónaun finespecífico Asimismo elFabricantenoseráresponsableantereclamos por ...

Page 26: ...clamo de garantía Esta garantía no es transferible Envie tarjeta de garantía solamente Envie tarjeta de garantía solamente NO ENVÍE LA UNIDAD A ESTA DIRECCIÓN PARA SU REPARACIÓN Enviar esta tarjeta a Schumacher Electric Corporation 801 Business Center Drive Mount Prospect IL 60056 2179 Nombre______________________________________________________________________________ Dirección___________________...

Page 27: ...ut s ensuivre dans la blessure sérieuse ou la mort 1 2 Ne le laissez pas a la portée des enfants 1 3 Ne pas mettre les doigts ou les mains dans l un des points de sortie de l appareil 1 4 Ne pas exposer l unité à la pluie ou la neige 1 5 N utilisez que les accessoires recommandés SA883 câble de démarrage L utilisation d accessoires non recommandés ou vendus par le fabricant pour l unité peut engen...

Page 28: ...e ou produire un court circuit à la batterie ou à d autres parties électriques et pourrait produire une explosion 2 4 Veillez à ce que la batterie interne ne gèle pas Ne tentez jamais de recharger une batterie gelée 2 5 Pour éviter les étincelles NE JAMAIS laisser pinces se toucher ensemble ou contacter la même pièce de métal 2 6 Considérez d être assez proche d une personne quand vous travaillez ...

Page 29: ...ilisation de votre véhicule et assurez vous que le tension de sortie est de 12V 3 4 Assurez vous que les pinces des câbles du l unité sont fermement connectées 4 SUIVEZ CES ÉTAPES LORSQUE CONNEXION À UNE BATTERIE AVERTISSEMENT UNE ÉTINCELLE PRÈS DE BATTERIE PEUT CAUSER SON EXPLOSION POUR RÉDUIRE LES RISQUES D ÉTINCELLE PRÈS DE LA BATTERIE 4 1 Branchez les pinces dans l unité puis fixez les câbles ...

Page 30: ... du moteur en tôle de forte 4 8 Lorsque vous avez terminé avec le démarreur retirer la pince du châssis du véhicule puis retirer la pince de la borne de la batterie Débrancher les pinces de l appareil 5 CARACTÉRISTIQUES 1 2 3 4 5 6 9 7 8 1 Interrupteur ON OFF 2 Port d entrée Micro USB pour recharger 3 Port de sortie USB Qualcomm 3 0 Quick Charge Technologie 4 2 4A Port de sortie USB 5 Bouton pour ...

Page 31: ... l extrémité Micro USB du câble de chargement dans le port d entrée Ensuite branchez l extrémité USB du câble de chargement dans le port USB d un chargeur 2 Branchez votre chargeur dans une prise de courantAC ou CC en direct 3 L écran LCD s allume le chiffre commencera à clignoter et montre IN indiquant que le chargement a commencé 4 Le démarreur charger complètement en 4 5 heures Lorsque l appare...

Page 32: ... a nouveau NOTE Si la voiture ne démarre pas une seconde fois vérifiez le câble intelligent pour voir si le voyant vert est allumé Si vous entendez des bips sonores ou si le voyant clignote reportez vous à la section 10 Dépannage Lorsque la condition est corrigée le câble intelligent se réinitialise automatiquement NOTE Le temps froid peut affecter la performance de la batterie au lithium de démar...

Page 33: ...possible après l avoir utilisé NOTE Si un périphérique USB est pas connecté l alimentation des ports USB sera automatiquement coupée après 30 secondes 7 3 UTILISATION DE LA LAMPE LED 1 Mettez l interrupteur ON OFF sur la position ON 2 Maintenez enfoncé le bouton d affichage pendant 3 secondes 3 Une fois que la lumière LED est allumé appuyez et relâchez le bouton d affichage pour faire défiler les ...

Page 34: ... Le démarreur ne se recharge pas Assurez vous que la source d alimentation est sous tension Le démarreur s allume mais ne sera pas démarrer mon véhicule Vérifiez les connexions Vérifiez le niveau de charge du démarreur est d au moins 40 Ne tentez pas de faire démarrer votre véhicule plus de trois fois consécutives Si le véhicule ne démarre toujours pas consultez un technicien qualifié Lorsque le c...

Page 35: ...es et vertes solides Émet un bip une fois par seconde Protection contre haute température NOTE Lorsque la condition est corrigée le câble intelligent se réinitialise automatiquement 11 AVANT DE RETOURNER POUR LES RÉPARATIONS Si ces solutions ne permettent pas d éliminer le problème ou pour plus d informations sur le dépannage contacter le service technique au services schumacherelectric com www ba...

Page 36: ...ctric Corporation le Fabricant garantit ce aide demarrage pour un 1 an à partir de la date d achat contre les défauts de matériaux ou de fabrication qui peuvent survenir dans des conditions normales d utilisation et d entretien Si votre appareil n est pas sans défauts de matériaux ou de fabrication la seule obligation du Fabricant sous cette garantie est de réparer ou de remplacer votre produit av...

Page 37: ...préjudice ou dommage Chacune et toutes ces garanties autres que les garanties limitées incluses dans la présente sont expressément déclinées et exclues Certains états ne permettent pas l exclusion ou les limites sur les dommages indirects ou consécutifs ou la durée de la garantie implicite Les limites ou exclusions ci dessus peuvent donc ne pas s appliquer à votre cas Cette garantie vous donne des...

Page 38: ...éclamation au titre de la garantie Cette garantie n est pas transférable Envoyer la carte de garantie seulement NE PAS ENVOYER L UNITÉ À CETTE ADRESSE POUR RÉPARATION Envoyer cette carte à Schumacher Electric Corporation 801 Business Center Drive Mount Prospect IL 60056 2179 Nom_________________________________________________________________________________ Adresse________________________________...

Reviews: