


Assembly
26
06.00|PZB-plus |en
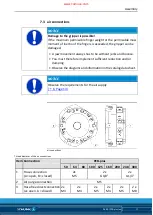
Type
dimension
l
1
dimension
l
2
Type
dimension
l
1
dimension
l
2
PZB-plus 50
15.4
24.3
PZB-plus 125
25.6
34.5
PZB-plus 50 AS
25.4
34.3
PZB-plus 125 AS
52.0
60.9
PZB-plus 50 IS
25.1
34.0
PZB-plus 125 IS
52.0
60.9
PZB-plus 64
17.4
26.3
PZB-plus 160
31.2
40.1
PZB-plus 64 AS
30.9
39.8
PZB-plus 160 AS
58.5
67.4
PZB-plus 64 IS
30.2
39.1
PZB-plus 160 IS
58.7
67.6
PZB-plus 80
20.6
29.5
PZB-plus 200
33.7
42.6
PZB-plus 80 AS
35.8
44.7
PZB-plus 200 AS
71.0
79.9
PZB-plus 80 IS
35.3
44.2
PZB-plus 200 IS
69.7
78.6
PZB-plus 100
22.7
32.6
PZB-plus 100 AS
44.7
53.6
PZB-plus 100 IS
43.7
52.6
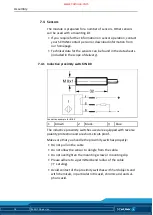
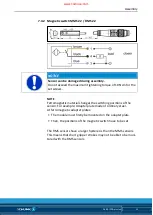
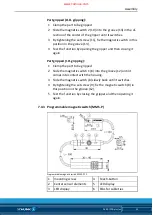
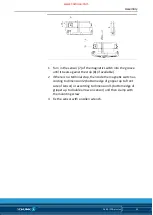
1 For pull relief, the electronic has to be fixed with a cable clip (7).
There are ribs (6) on the electronic of the sensor for fixing them.
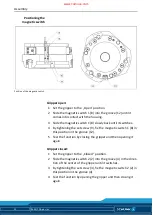
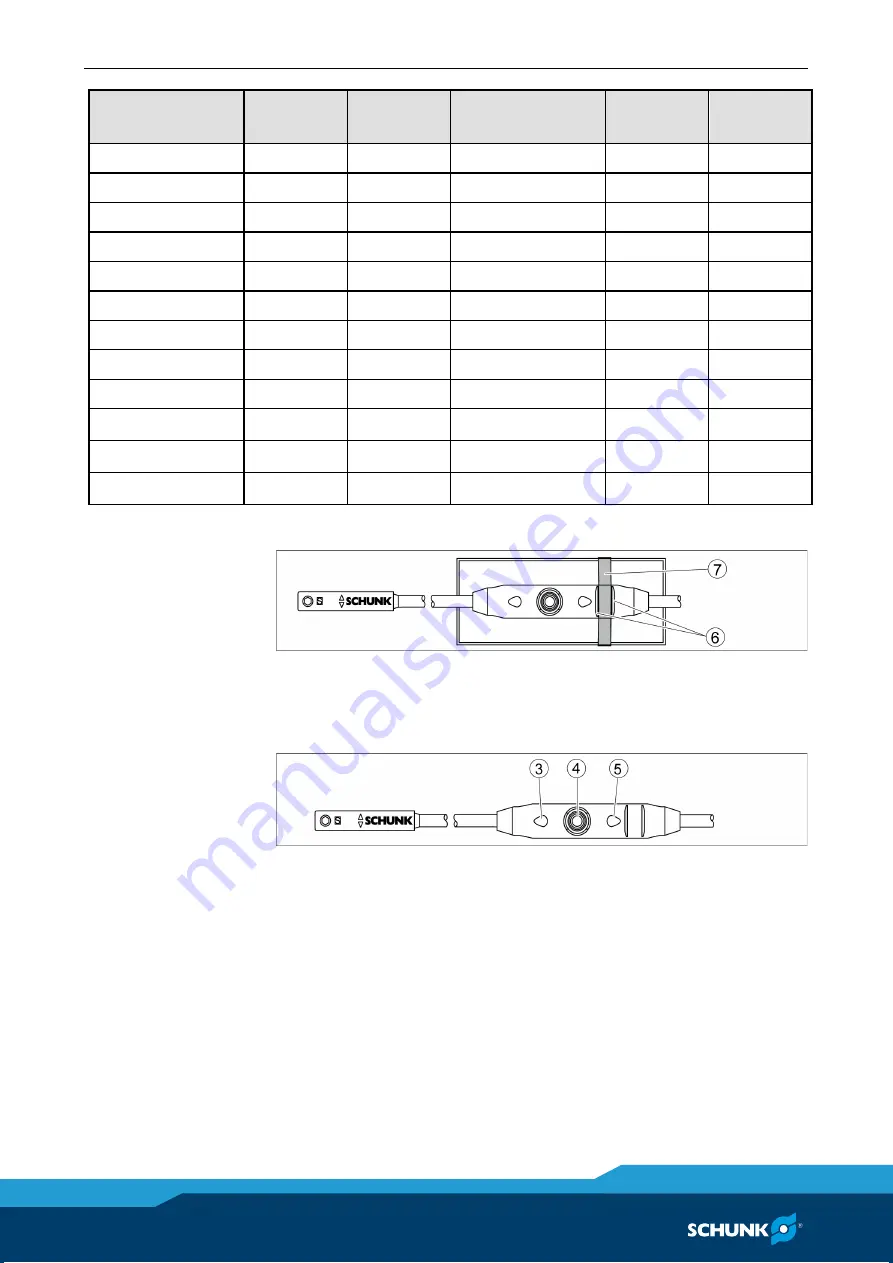
1 Keep the Teach-Button (4) pressed for 2 seconds.
After 2 seconds flashing LED 1 (3).
2 Move the gripper into position 1 (e.g."O-position")
3 Press the Teach-Button (4) briefly.
LED 1 (3) lights up and LED 2 (5) is flashing.
4 Move the gripper manually into position 2 (e.g. "-2mm").
LED 1 (3) should turn out as soon as the switching point 1 is left.
5 Press the Teach-Button (4) briefly.
LED 2 (5) lights up.
The switching points are set.
Adjustment of the
switching point
www.comoso.com


