background image

Technical data

20

06.00 | ROTA THW3 | Power Chuck | en | 1440828

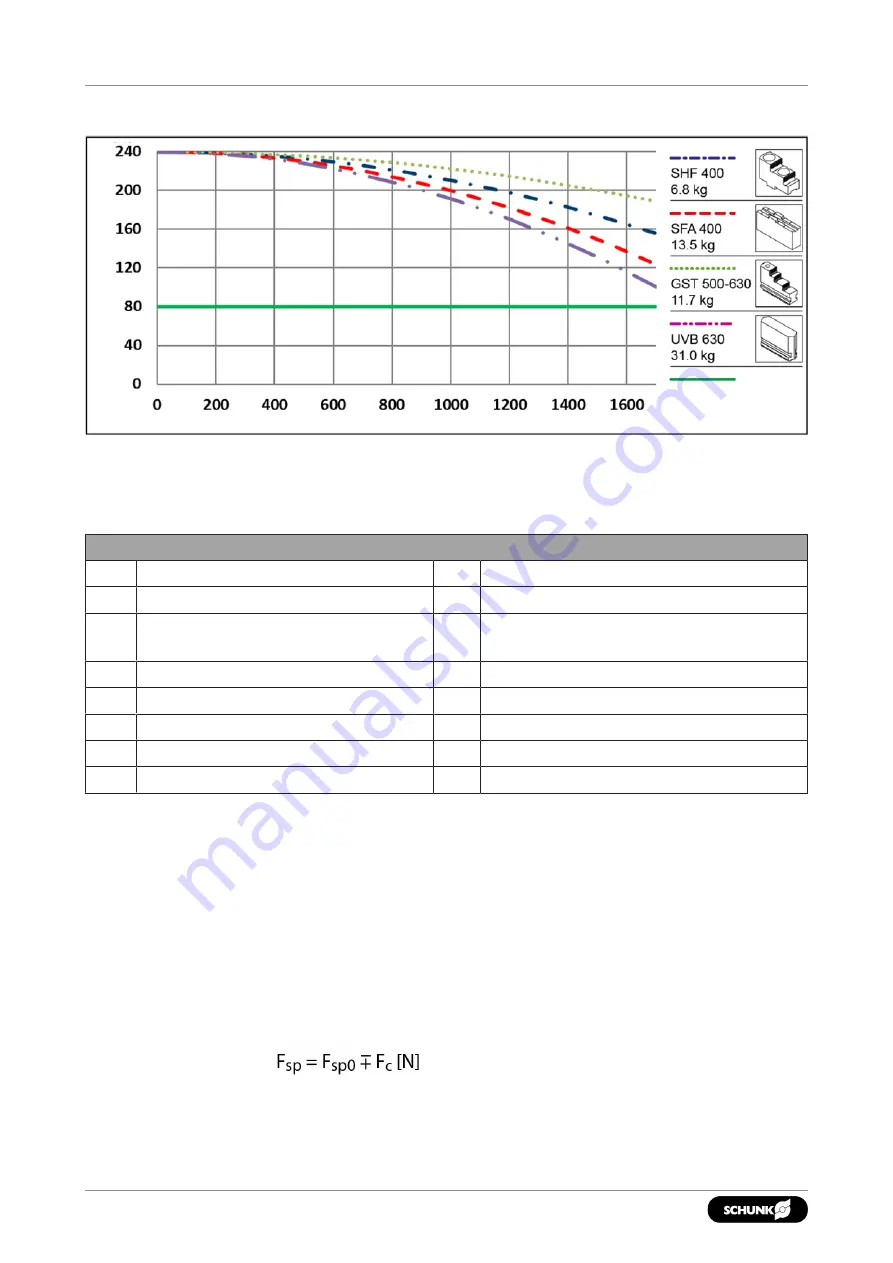
Clamping force/RPM diagram for ROTA THW3 630-165

Speed of rotation n [RPM]

Clamping force Fsp [kN]

Minimum required 
clamping force 33%

-1

3.3 Calculations for clamping force and speed

Missing information or specifications can be requested from the
manufacturer.

Legend

F

c

Total centrifugal force [N]

M

cAB

Centrifugal torque of top jaws [Kgm]

F

sp

Effective clamping force [N]

M

cGB

Centrifugal torque of base jaws [Kgm]

F

spmin

Minimum required clamping force
[N]

n

Speed [rpm]

F

sp0

Initial clamping force [N]

r

s

Center of gravity radius [m]

F

spz

Cutting force [N]

r

sAB

Center of gravity radius of top jaw [m]

m

AB

Mass of one top jaw [kg]

s

sp

Safety factor for clamping force

m

B

Mass of chuck jaw set [kg]

s

z

Safety factor for machining

M

c

Centrifugal force torque [Kgm]

Σ

s

Max. clamping force of chuck [N]

3.3.1 Calculation of the required clamping force in case of a given rpm

The 

initial clamping force F

sp0

 is the total force impacting radially

on the workpiece via the jaws due to actuation of the lathe chuck
during shutdown. Under the influence of rotation, the jaw mass
generates an additional centrifugal force. The centrifugal force
reduces or increases the initial clamping force depending on
whether gripping is from the outside inwards or from the inside
outwards. 
The sum of the initial clamping force 

F

sp0

 and the 

total centrifugal

force F

c

 is 

the effective clamping force F

sp

.

(–)

 for gripping from the outside inwards

(+)

 for gripping from the inside outwards

Summary of Contents for ROTA THW3

Page 1: ...Translation of Original Operating Manual Power Chuck ROTA THW3 Assembly and Operating Manual ...

Page 2: ...2022 en Dear Customer Thank you for trusting our products and our family owned company the leading technology supplier of robots and production machines Our team is always available to answer any questions on this product and other solutions Ask us questions and challenge us We will find a solution Best regards Your SCHUNK team Customer Management Tel 49 7572 7614 1300 Fax 49 7572 7614 1039 custom...

Page 3: ... 12 2 13 Fundamental dangers 12 2 13 1 Protection during handling and assembly 12 2 13 2 Protection during commissioning and operation 13 2 13 3 Protection against dangerous movements 13 2 13 4 Notes on particular risks 13 3 Technical data 16 3 1 Chuck data 16 3 2 Clamping force RPM diagrams 17 3 3 Calculations for clamping force and speed 20 3 3 1 Calculation of the required clamping force in cas...

Page 4: ...ange 33 6 Function 34 6 1 Function and handling 34 6 2 Base jaw position 35 6 3 Replacement or renewal of jaws 35 6 4 Functional testing 36 7 Maintenance 37 7 1 Lubrication 37 7 2 Technical condition 38 7 3 Maintenance intervals 39 7 4 Disassembling and assembling the chuck 40 8 Spare parts 44 9 Drawing 46 10 Declaration of Incorporation 50 11 Appendix on Declaration of Incorporation as per 2006 4...

Page 5: ... documents listed under 1 1 2 6 are applicable NOTE The illustrations in this manual are intended to provide a basic understanding and may deviate from the actual version 1 1 1 Presentation of Warning Labels To make risks clear the following signal words and symbols are used for safety notes DANGER Dangers for persons Non observance will inevitably cause irreversible injury or death WARNING Danger...

Page 6: ... 165 ROTA THW3 630 165 1 2 Warranty The warranty period is 24 months after delivery date from factory or 500 000 cycles if it is used as intended under the following conditions Observe the applicable documents 1 1 2 6 Observe the ambient conditions and operating conditions 2 6 9 Observe the specified maintenance and lubrication intervals 7 37 Parts touching the workpiece and wear parts are not inc...

Page 7: ...ical data 3 16 2 2 Not intended use A not intended use of the product is for example It is used as a press a punch a toolholder a load handling device or as lifting equipment the product is used for unintended machines or workpieces the technical data is exceeded when using the product 3 16 if workpieces are not clamped properly paying particular attention to the clamping forces specified by the m...

Page 8: ...ck face clamping points at a greater distance lead to greater surface pressure in the jaw guidance and can significantly reduce the clamping force If for design reasons the special chuck jaws are heavier than the top jaws assigned to the lathe chuck greater centrifugal forces must be taken into account when defining the required clamping force and the recommended speed of rotation The maximum reco...

Page 9: ...n period of operation 7 1 37 With the smallest possible actuating pressure hydraulic cylinder the base jaws should move evenly This method only provides a limited indication and is not a substitute for measuring the clamping force If the clamping force has dropped too much or if the base jaws and piston no longer move properly the chuck must be disassembled cleaned and relubricated 7 37 2 7 Person...

Page 10: ...ervice personnel of the manufacturer Due to its technical training knowledge and experience service personnel of the manufacturer is able to perform the delegated tasks and to recognize and avoid possible dangers 2 8 Personal protective equipment Use of personal protective equipment Personal protective equipment serves to protect staff against danger which may interfere with their health or safety...

Page 11: ...s regarding the product s application field 2 10 Transport Handling during transport Incorrect handling during transport may impair the product s safety and cause serious injuries and considerable material damage When handling heavy weights use lifting equipment to lift the product and transport it by appropriate means Secure the product against falling during transportation and handling Stand cle...

Page 12: ...tem If the energy supply is connected do not move any parts by hand Do not reach into the open mechanism or movement area of the product during operation 2 13 1 Protection during handling and assembly Incorrect handling and assembly Incorrect handling and assembly may impair the product s safety and cause serious injuries and considerable material damage Have all work carried out by appropriately ...

Page 13: ...ive Perform maintenance work modifications and attachments outside the danger zone defined by the movement range To avoid accidents and or material damage human access to the movement range of the machine must be restricted Limit prevent accidental access for people in this area due through technical safety measures The protective cover and protective fence must be rigid enough to withstand the ma...

Page 14: ...il the machine comes to a standstill and the workpiece can be secured e g using a crane or suitable lifting equipment The machines and equipment must fulfill the minimum requirements of the EC Machinery Directive specifically they must have effective technical measures to protect against potential mechanical hazards Perform regular maintenance DANGER Possible risk of fatal injury to operating pers...

Page 15: ...hine and the lathe chuck CAUTION Risk of limbs being crushed when opening and closing the chuck jaws during manual loading or unloading or when exchanging moving parts Do not reach between the chuck jaws Wear protective gloves Follow the safety and accident prevention regulations when operating the chuck especially when working with machine tools and other technical equipment CAUTION Risk of damag...

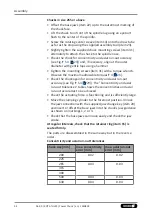
Page 16: ...4 No 8 43 3 58 1 ISO 702 1 No 8 46 3 61 1 ISO 702 4 No 11 103 2 ISO 702 1 No 11 110 3 225 1 ISO 702 1 No 15 199 1 ISO 702 1 No 15 129 2 209 3 ISO 702 4 No 20 292 The specified centrifugal torque of the base jaw has been calculated in the radially outermost position of the base jaw For other positions it is necessary to specifically determine this data Calculation examples can be found in the Techn...

Page 17: ...employers mutual insurance association 3 2 Clamping force RPM diagrams Clamping force RPM curves have been calculated using the corresponding standard top jaws stepped jaws and monoblock jaws In the determination process the maximum actuating force was applied and the jaws were set flush with the outer diameter of the chuck The chuck is in perfect condition and lubricated with SCHUNK LINOMAX plus ...

Page 18: ...amping force 33 Speed of rotation n RPM Clamping force Fsp kN 1 Clamping force RPM diagram for ROTA THW3 225 66 Minimum required clamping force 33 Clamping force Fsp kN Speed of rotation n RPM 1 Clamping force RPM diagram for ROTA THW3 265 81 Minimum required clamping force 33 Clamping force Fsp kN Speed of rotation n RPM 1 ...

Page 19: ...d of rotation n RPM 1 Clamping force RPM diagram for ROTA THW3 400 128 Speed of rotation n RPM Clamping force Fsp kN Minimum required clamping force 33 1 Clamping force RPM diagram for ROTA THW3 500 165 Speed of rotation n RPM Clamping force Fsp kN Minimum required clamping force 33 1 19 06 00 ROTA THW3 Power Chuck en 1440828 ...

Page 20: ... Mass of one top jaw kg ssp Safety factor for clamping force mB Mass of chuck jaw set kg sz Safety factor for machining Mc Centrifugal force torque Kgm Σs Max clamping force of chuck N 3 3 1 Calculation of the required clamping force in case of a given rpm The initial clamping force Fsp0 is the total force impacting radially on the workpiece via the jaws due to actuation of the lathe chuck during ...

Page 21: ...will be uncontrollably released in this area Speed of rotation Clamping force Centrifugal force Effective clamping force Minimum required clamping force Initial clamping force during shutdown Reduction in effective clamping force by the magnitude of the total centrifugal force for gripping from the outside inwards The required effective clamping force for machining Fsp is calculated from the produ...

Page 22: ...radius and the rpm NOTICE For safety reasons in accordance with DIN EN 1550 the centrifugal force may be a maximum of 67 of the initial clamping force The formula for the calculation of the total centrifugal force Fc is For this n is the given speed of rotation in RPM The product mB rs is referred to as the centrifugal force torque Mc In case of toolholders with split chuck jaws i e with base jaws...

Page 23: ...ety factor Ssp 1 5 according to VDI 3106 Note Masses of the jaw mounting screws and T nuts are not taken into account First the required effective clamping force Fsp is calculated using the machining force stated Initial clamping force during shutdown Calculation of total centrifugal force For two part chuck jaws the following applies Centrifugal torque of base jaw and top jaw specified in Chuck d...

Page 24: ...for a given effective clamping force The following data is known from previous calculations Initial clamping force during shutdown Fsp0 17723 N Machining force for machining job Fspz 3000 N application specific Total centrifugal torque of all jaws Mc 2 668 kgm Safety factor Sz 1 5 according to VDI 3106 Safety factor Ssp 1 5 according to VDI 3106 NOTE Masses of the jaw mounting screws and T nuts ar...

Page 25: ...quality class 6 3 according to DIN ISO 21940 11 Residual imbalance risks may arise due to insufficient rotation compensation being achieved see DIN EN ISO 21940 11 This applies particularly to high RPM asymmetrical workpieces or the use of various top jaws as well as uneven lubrication In order to prevent damage resulting from these residual risks the entire rotor must be dynamically balanced in a...

Page 26: ...hnical equipment screw quality 10 9 Screw size M6 M8 M10 M12 M14 M16 M18 M20 M22 M24 M27 M30 7 16 1 2 5 8 3 4 7 8 1 Tightening torques MA Nm 13 28 50 88 120 160 200 290 400 500 1050 1500 Tightening torques for mounting screws used to attach top jaws onto the lathe chuck screw quality 12 9 Screw size M6 M8 M10 M12 M16 M20 M24 Tightening torques MA Nm 16 25 60 80 100 180 230 ...

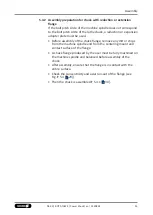
Page 27: ...product Switch off the power supply and secure against restarting Make sure that no residual energy remains in the system 1 Check the connection thread or adapter 2 Checking the spindle nose for mounting the chuck flange 5 3 29 3 Chuck assembly Chuck assembly with cylindrical recess 5 4 1 30 if required Assembly preparation for the chuck with reduction or expansion adapter plate 5 4 2 33 4 Perform...

Page 28: ...pter must be used A B C D E F G O ring ROTA THW3 200 52 M64 1 5 13 0 52 62 0 2 4 58 3 5 62 x 1 5 ROTA THW3 225 66 M78 x 1 5 13 0 66 76 0 2 4 70 3 5 76 x 1 5 ROTA THW3 265 81 M90 x 2 0 16 0 81 87 4 2 4 84 86 x 2 0 ROTA THW3 315 104 M115 x 2 0 18 0 104 109 5 3 2 107 110 x 3 0 ROTA THW3 400 128 M140 x 2 0 20 1 128 135 0 3 2 131 135 x 3 0 ROTA THW3 500 165 M175 x 2 0 20 1 165 170 3 2 168 170 x 3 0 ROT...

Page 29: ...city error in the centering of the mount of 0 01 mm and a maximum axial run out error in the contact surfaces of 0 01 mm The flat surface of the spindle must also be checked for flatness using a straight edge Make sure that the surface area of the flat surface is deburred at the bore holes and is clean 5 4 Assembly Lathe chuck assembly Chuck assembly with cylindrical recess 5 4 1 30 Assembly prepa...

Page 30: ...e fastened to the eye bolt provided see Fig Lathe chuck assembly C 5 4 29 The eye bolt must be removed prior to commissioning The eye bolt is included in the scope of delivery from size 225 Chuck assembly Move the draw tube to its foremost position by actuating the clamping cylinder Piston in foremost position R1 Push the chuck piston to its foremost position and measure with a depth gauge R2 R1 0...

Page 31: ...r concentricity and axial run out accuracy see Fig 5 4 29 and if necessary align at the outer diameter with gentle taps using a hammer Tighten the mounting screws item 31 with a torque wrench Observe the maximum admissible torques 4 26 Check the chuck again for concentricity and axial run out accuracy see Fig 5 4 29 The Concentricity and axial run out tolerances table shows the concentricities and...

Page 32: ...e maximum admissible torques 4 26 Check the chuck again for concentricity and axial run out accuracy see Fig 5 4 29 The Concentricity and axial run out tolerances table shows the concentricities and axial run out accuracies to be achieved Check the actuating force is functioning and is sufficiently large Move the clamping cylinder to the foremost position Unlock the jaw connection with the supplie...

Page 33: ...ck flange remove any dirt or chips from the machine spindle and from the centering mount and contact surface of the flange A chuck flange produced by the user must be fully machined on the machine spindle and balanced before assembly of the chuck After assembly ensure that the flange is in contact with the entire surface Check the concentricity and axial run out of the flange see Fig 5 4 29 Then t...

Page 34: ...on so that there is no risk of injury when inserting the parts The maximum opening gap must be less than 4 mm when the workpiece is in contact with one of the jaws For each jaw guidance an eccentric bolt item 4 with hexagon socket which can be turned using the jaw change key item 20 is arranged on the chuck perimeter Turning the eccentric bolt moves the serration of the chuck axially out of the se...

Page 35: ...se jaw or the unsplit top jaw matches up with the marking line in the jaw change position chuck open NOTICE It is vital that the maximum jaw position is adhered to so that all teeth are engaged for the force transmission from the chuck to the base jaws or top jaws 6 3 Replacement or renewal of jaws Chuck jaws for maximum clamping repeat accuracy must be turned or ground in the chuck under clamping...

Page 36: ...at the front and rear end position The machine spindle may only be started when the clamping piston has passed through the safety zone Only limit switches that meet the requirements for safety limit switches specified in DIN EN 60204 1 may be used When determining the necessary clamping force to machine a workpiece take the centrifugal force acting on the chuck jaws into account according to VDI 3...

Page 37: ...d remove it 3 Check the bore of the air bleed screw for possible blockage If necessary loosen the blockage with a suitable tool 4 With a horizontally assembled chuck position the air bleed screw so it is facing upwards 5 Couple the mouth of the grease gun with the lubrication nipple 6 Fill the chuck with grease until grease is visible at the air bleed screw 7 Close and open the chuck completely se...

Page 38: ...his repeat steps 2 3 7 8 9 Operating conditions Depending on the operating conditions the function and clamping force must be checked after a specific period of operation see Maintenance intervals 7 2 38 Only perform the clamping force test with a calibrated clamping force tester SCHUNK IFT 7 2 Technical condition With the smallest possible actuating pressure hydraulic cylinder the base jaws shoul...

Page 39: ...n the jaw change key to the lock position without the base jaw In the change position the jaw change key cannot be removed NOTICE Only adjust the chuck from the change to the lock position with the jaw correctly inserted Do not apply excessive torque to the jaw change key Risk of damage to the lathe chuck 7 3 Maintenance intervals After one year or after 250 000 clamping cycles the chuck must be d...

Page 40: ...m 2 and the mount item 7 must be pre assembled Remove screws item 32 incl screw seal item 51 from the mount Remove the pre assembled mount item 7 and O ring item 45 from FTK item 1 Assembly Check the chuck body and mount are aligned using the pin item 71 Do not turn the mount otherwise the retrieval element item 16 of the thrust jaw item 2 may get damaged Insert the retrieval elements in the guide...

Page 41: ...flush with the chuck body item 1 so that it can be joined with the thrust jaw Align the threaded holes of the guide ring with the bore holes of the chuck body Align base jaws item 22 with the serration of the driver item 6 Remove the base jaws item 22 from the guideway Remove the wiper item 10 incl the inserted O ring item 41 radially from the guide groove Remove the O ring item 48 from the chuck ...

Page 42: ...etrieval element item 16 incl spring item 75 from the driver item 6 Assembly First insert the driver item 6 into the top of the thrust jaw and only then press in the cylindrical pin item 66 Ensure correct alignment of the retrieval element Remove O ring item 43 from the driver item 6 and push out the cylindrical pin item 66 Remove the pin item 65 from the bore hole and push the monitoring pin item...

Page 43: ...ve the ball item 68 from the bore hole and the O ring item 47 from the groove of the eccentric bolt Assembly Push the eccentric bolt item 4 completely into the bore hole and put in the lock position Only use original SCHUNK spare parts when replacing damaged parts The chuck is assembled in the same way but in reverse order NOTICE When assembling the base jaws make sure that the numbers on the base...

Page 44: ...1 1 1 1 6 Driver 3 3 3 3 3 3 3 7 Mount 1 1 1 1 1 1 1 8 Monitoring pin 3 3 3 3 3 3 3 9 Locking pin 3 3 3 3 3 3 3 10 Wiper 3 3 3 3 3 3 3 14 Center sleeve 0 0 1 1 1 1 1 15 Ring 0 0 1 1 1 1 1 16 Retrieval element 3 3 3 3 3 3 3 20 Jaw change key 1 1 1 1 1 1 1 21 Eye bolt 0 1 1 1 1 1 1 22 Base jaw 3 3 3 3 3 3 3 23 Assembly key 0 0 1 1 1 1 1 30 Screws 6 6 6 6 6 6 6 31 Screws 3 3 3 3 3 3 3 32 Screws 15 15...

Page 45: ... 3 3 3 3 64 Compression spring 3 3 3 3 3 3 3 65 Cylindrical pin 3 3 3 3 3 3 3 66 Cylindrical pin 3 3 3 3 3 3 3 67 Cylindrical pin 3 3 3 3 3 3 3 68 Ball 3 3 3 3 3 3 3 69 Cylindrical pin 3 3 3 3 3 3 3 70 Compression spring 3 3 3 3 3 3 3 71 Cylindrical pin 1 1 1 1 1 1 1 72 Air bleed screw 1 1 1 1 1 1 1 73 Lubrication nipples 1 1 1 1 1 1 1 74 Emblem 1 1 1 1 1 1 1 75 Compression spring 3 3 3 3 3 3 3 45...

Page 46: ...Drawing 46 06 00 ROTA THW3 Power Chuck en 1440828 9 Drawing Full chuck Accessories ...

Page 47: ...Drawing Thrust jaw 47 06 00 ROTA THW3 Power Chuck en 1440828 ...

Page 48: ...Drawing 48 06 00 ROTA THW3 Power Chuck en 1440828 Mount ...

Page 49: ...Drawing Thread lock with Klemm tight 49 06 00 ROTA THW3 Power Chuck en 1440828 ...

Page 50: ...visions of the Machinery Directive 2006 42 EC is confirmed Applied harmonized standards especially DIN EN ISO 12100 2011 03 Safety of machinery General principles for design Risk assessment and risk reduction DIN EN 1550 1997 A1 2008 Machine tools safety Safety requirements for the design and construction of lathe chucks for the workpiece mount DIN EN ISO 4414 2011 04 Fluid technology General rule...

Page 51: ...illed for the scope of the partly completed machine Not relevant 1 1 Essential Requirements 1 1 1 Definitions X 1 1 2 Principles of safety integration X 1 1 3 Materials and products X 1 1 4 Lighting X 1 1 5 Design of machinery to facilitate its handling X 1 1 6 Ergonomics X 1 1 7 Operating positions X 1 1 8 Seating X 1 2 Control Systems 1 2 1 Safety and reliability of control systems X 1 2 2 Contr...

Page 52: ...guards X 1 4 2 2 Interlocking movable guards X 1 4 2 3 Adjustable guards restricting access X 1 4 3 Special requirements for protective devices X 1 5 Risks due to other hazards 1 5 1 Electricity supply X 1 5 2 Static electricity X 1 5 3 Energy supply other than electricity X 1 5 4 Errors of fitting X 1 5 5 Extreme temperatures X 1 45 6 Fire X 1 5 7 Explosion X 1 5 8 Noise X 1 5 9 Vibrations X 1 5 ...

Page 53: ...ies of machinery X 2 1 Foodstuffs machinery and machinery for cosmetics or pharmaceutical products X 2 2 Portable hand held and or guided machinery X 2 2 1 Portable fixing and other impact machinery X 2 3 Machinery for working wood and material with similar physical characteristics X 3 Supplementary essential health and safety requirements to offset hazards due to the mobility of machinery X 4 Sup...

Page 54: ......

Page 55: ......

Page 56: ...ual H D SCHUNK GmbH Co Spanntechnik KG Lothringer Str 23 D 88512 Mengen Tel 49 7572 7614 0 Fax 49 7572 7614 1099 info de schunk com schunk com Folgen Sie uns I Follow us 11 2022 2022 SCHUNK GmbH Co KG 06 00 ROTA THW3 Power Chuck en 1440828 ...

Reviews: