Assembly
NOTICE
Due to the seal, an air cushion can form in the chuck, which
prevents the piston from remaining in the forward position.
This can be remedied by venting the chuck
NOTICE
Due to the seal, an air cushion can form in the chuck, which can
disrupt the jaw change mechanism.
This can be remedied by venting the chuck
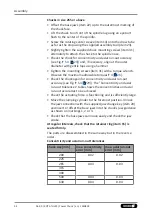
Chucks in sizes 200 and 225
• Offset the base jaws (item 22) so that they do not project over
the outer edge of the chuck.
• Rotate the entire chuck on the draw tube (bar).
• Slightly tighten the supplied chuck mounting screws (item 31)
alternately to attach the chuck to the spindle nose.
• Check the chuck for concentricity and axial run-out accuracy
(see Fig.
) and, if necessary, align at the outer
diameter with gentle taps using a hammer.
• Tighten the mounting screws (item 31) with a torque wrench.
Observe the maximum admissible torques
• Check the chuck again for concentricity and axial run-out
). The "Concentricity and axial
run-out tolerances" table shows the concentricities and axial
run-out accuracies to be achieved.
• Check the actuating force is functioning and is sufficiently large.
• Move the clamping cylinder to the foremost position. Unlock
the jaw connection with the supplied jaw change key (item 20)
and insert or offset the base jaws into the chuck's jaw guidance
as shown on markings 1, 2 or 3.
• Check that the base jaws can move easily and check the jaw
stroke.
31
06.00 | ROTA THW3 | Power Chuck | en | 1440828
Summary of Contents for ROTA THW3
Page 1: ...Translation of Original Operating Manual Power Chuck ROTA THW3 Assembly and Operating Manual ...
Page 46: ...Drawing 46 06 00 ROTA THW3 Power Chuck en 1440828 9 Drawing Full chuck Accessories ...
Page 47: ...Drawing Thrust jaw 47 06 00 ROTA THW3 Power Chuck en 1440828 ...
Page 48: ...Drawing 48 06 00 ROTA THW3 Power Chuck en 1440828 Mount ...
Page 49: ...Drawing Thread lock with Klemm tight 49 06 00 ROTA THW3 Power Chuck en 1440828 ...
Page 54: ......
Page 55: ......


