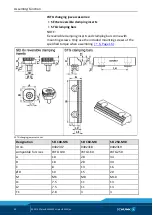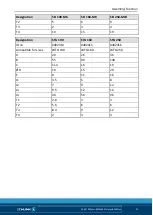
Assembly/Function
02.00|KSPplus-BWM KSP-LHplus-BWM |en
17
Assembly/Function
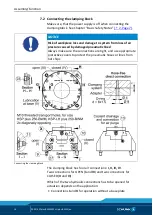
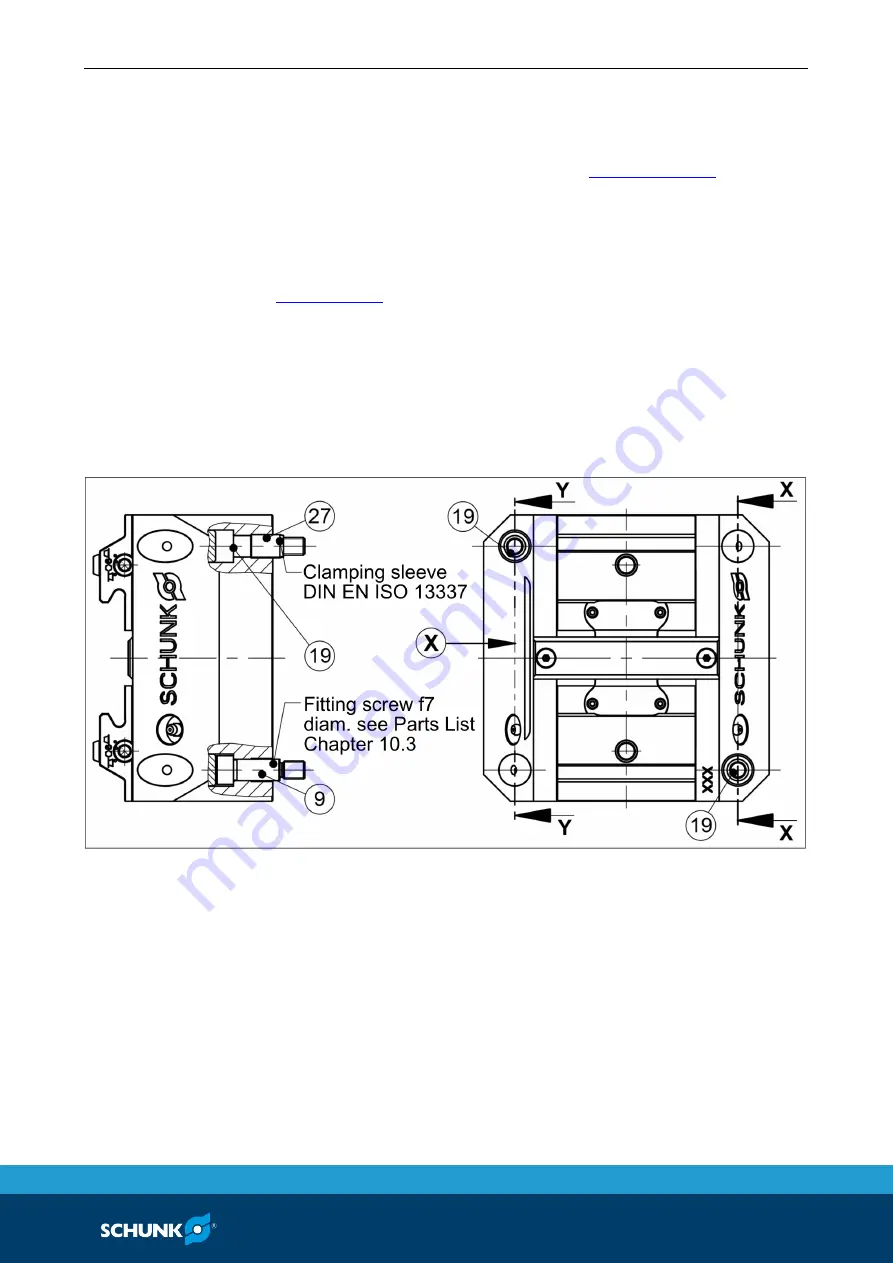
The item numbers specified for the corresponding individual
components relate to chapter drawings
figures "Assembling the clamping block" and "Connecting the
clamping block".
Make sure the power supply for the clamping block is off during
assembly and connection. See Chapter "Basic Safety Notes".
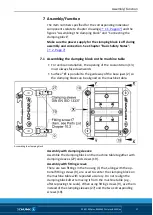
Assembling the clamping block on the machine table
• For vertical installation, the opening of the coolant drain (13)
must always face downwards
• Surface
"X"
is parallel to the guideway of the base jaws (2) so
the clamping block can be aligned on the machine table.
Assembling the clamping block
Assembly with clamping sleeves:
Assemble the clamping block on the machine table together with
clamping sleeves (27) and screws (19).
Assembly with fitting screws:
There are two fittings in the housing (1) that, along with the op-
tional fitting screws (9), are used to center the clamping block on
the machine table with repeated accuracy. Do not realign the
clamping block after removing it from the machine table (e.g.,
after replacing the seals). When using fitting screws (9), use them
instead of the clamping sleeves (27) and the two corresponding
screws (19).
7
7.1

