
Maintenance and care
36
02.00|KSPplus-BWM KSP-LHplus-BWM |en
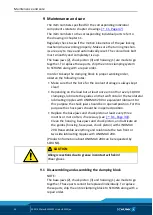
– When assembling the base jaw unit, apply LINO MAX (white)
special grease to all sliding surfaces of any moving compo-
nents.
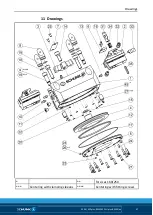
10 To take off the cover (5), all the screws (21) need to be re-
moved first. To take off the cover (5), screw two screws into
the outer threaded holes:
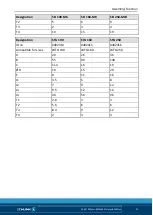
for size 100-BMW, two M3x >25 screws
for size 160-BMW, two M5x >25 screws
for size 250-BMW, two M5x >25 screws.
11 Remove the seals (20, 22).
12 Underlay the clamping block so the cylinder piston (4) can be
pushed out.
13 Remove the seals (12, 15, 17).
14 Clean all the parts thoroughly and check for damage and wear.
Replace damaged and worn parts with original SCHUNK re-
placement parts.
15 Lubricate the new seals (12, 15, 17, 20, 22) with Renolit HLT 2
or requivalent grease.
16 Carefully install the new seals without damaging them.
17 Grease the sliding surfaces of the cylinder and piston with
Renolit HLT 2 or equivalent grease.
18 Place the cylinder piston (4) into the cylinder. Make sure the
cylinder piston (4) is level and not tilted.
19 Gently press the quad ring (12) inward from all sides, so that it
goes more easily over the edge of the housing (1).
20 Press the cylinder piston (4) into the cylinder of the housing (1).
Do not tilt the cylinder piston (4).
21 Place the O-rings (20, 22) in the housing (1) and the O-ring (17)
around the cover (5).
22 Insert the cover (5) into the housing (1), making sure the open-
ings for the pneumatic feed-throughs are aligned.
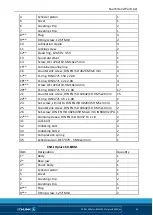
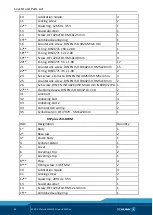
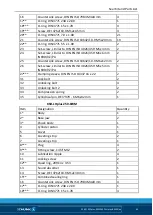
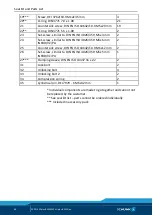
23 Screw the cover (5) onto the housing (1). Use a torque wrench
at the values specified in the table
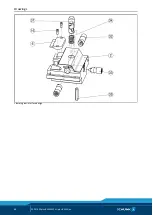
24 If using clamping sleeves (27) for centering, insert them into
the housing (1) at this time.
25 Grease the sliding surfaces of the housing (1), base jaws (2) and
chuck piston (3) with LINO MAX 200.


