Assembly
34
08.00 | NSE3 138, NSE-T3 138 | VERO-S quick-change pallet system | en |
1152197 -NSE3 NSE-T3
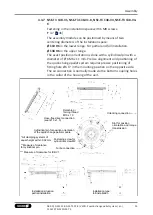
4.3.8 KVS 40 cone seal
To install the cone seal in the NSE3, NSE-T3, the recessed plug
must first be removed from the change interface and replaced
with the supplied cover with sealing ring
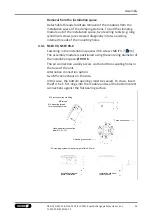
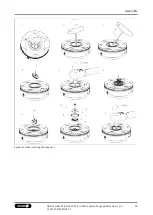
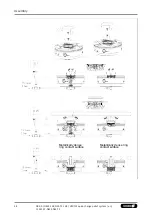
The installation takes place according to the following installation
description and the illustrations
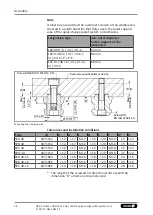
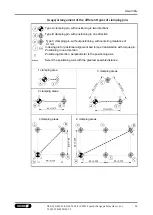
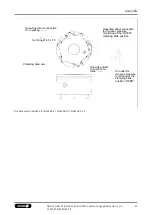
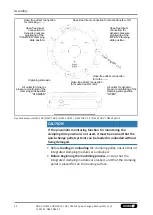
"Operational sequence of
installation of cone seal"
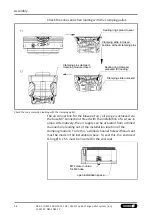
and
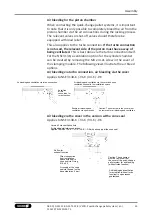
"Checking cone seal when loading
with clamping pallet"
1. Switch module in the installation space so that it remains
depressurized.
2. Unscrew the plug and tip the unit over to remove the plug
from the change interface. To do so, use the tool with a
magnetic insert.
3. Insert the cover including fitted sealing ring diagonally tilted
into the change interface and tighten, observing the tightening
torque,
4. Insert the compression springs.
5. Insert the mounting diagonally into the change interface and
lock it in the guide grooves.
6. Insert the thrust washer on the mounting in the correct
position, turn it until the radial lock engages.
7. Insert the sealing ring, pay attention to the installation
location. Gradations and overhang point towards the module
flat surface.
8. Insert the cover plate.
9. Insert O-ring into the cover plate.
10. Screw in the countersunk screw, observe the tightening
11. Check the proper functioning of the seal by activating the
unlocking function several times.
12. Check the loading with the clamping pallet. The cone seal must
be immersed smoothly into the change interface and be reset
again. When closing the module, the sealing ring must rest on
the sealing point.

