background image

_n_. 

_LH Section_

Page 22

9. 

Specifications

Technical Specifications

Model

WM2190S

Feeding Voltage

220-240V 50Hz

Lamp Power – LED (W)

2 x 3W

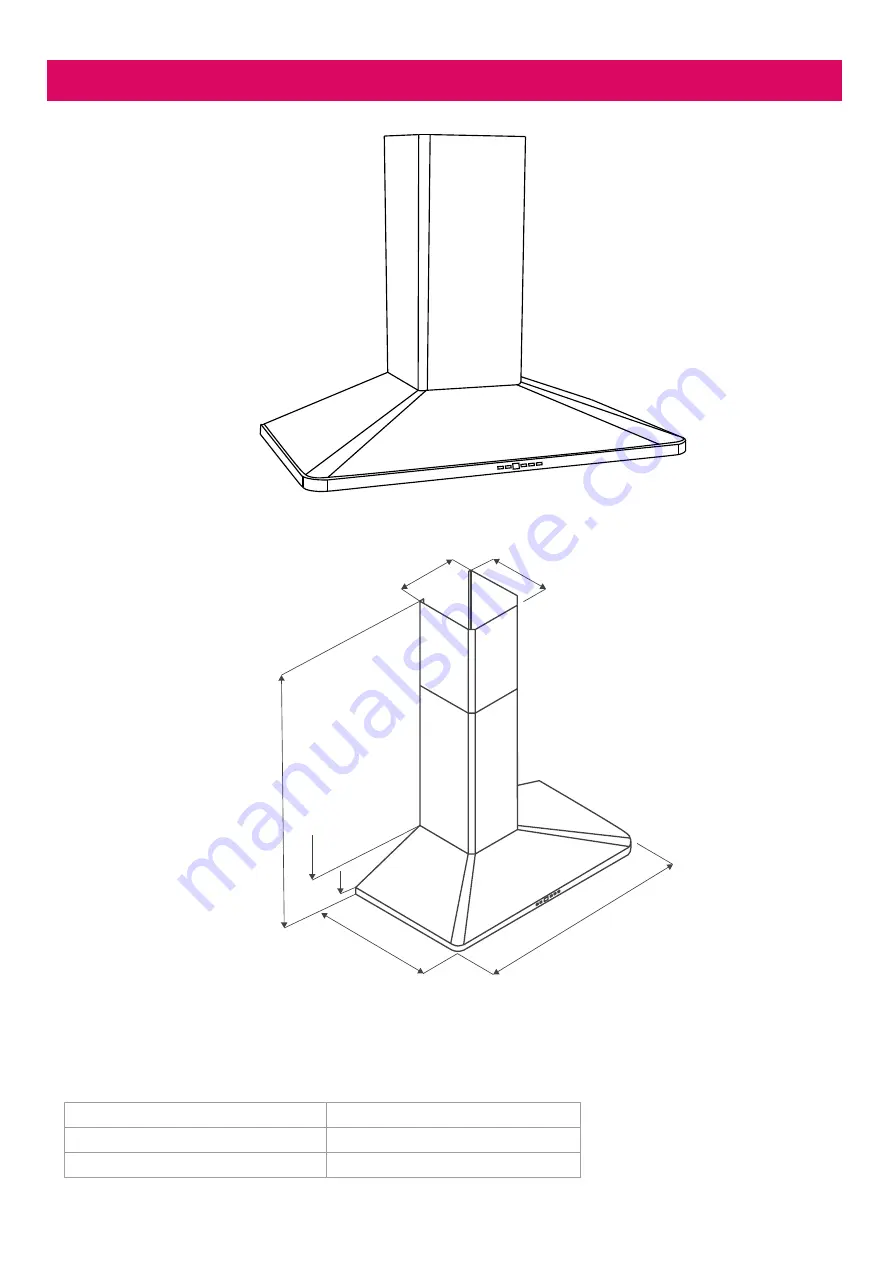
Dimensions

260

252

898

500

28

14

0

Min 720 Max 1190

Summary of Contents for WM2190-6S1

Page 1: ...www schweigen com au RANGEHOOD INSTALLATION GUIDE WM2190S Revision V3 31 01 20 ...

Page 2: ...Interior 9 Cleaning the Exterior 9 Filters 10 Replacing the Lights 11 6 Installation 12 Rangehood Size vs Cooktop Size 12 Mounting Instructions 13 Recommended Installation Height for Induction Cooktop 13 Wall Mount Installation 14 Installation Example 15 Ducting 17 Back Draft Fins For applicable models 17 System Overview 18 7 Condensation Information 19 Cooking with Induction Cooktops 19 8 Trouble...

Page 3: ... website www schweigen com au This appliance and its packaging are produced by processes that minimise waste and respect the environment Please help us to continue this effort to protect the environment by using the appliance efficiently and dispose of the packaging in a responsible manner We trust that you will enjoy your new Schweigen rangehood Your State Regulatory Authority Different Australia...

Page 4: ...y person s including children with reduced physical sensory or mental capabilities or lack of experience and or knowledge Unless the person has been given supervision or instruction concerning the use of the appliance by a person responsible for their safety Children should be supervised to ensure that they do not play with the appliance it is not a toy 8 Exhaust air must not be discharged into an...

Page 5: ...s are made by a qualified technician and that the indicated instructions and local regulations in force are met using materials that are compliant with the applicable legislation 11 The company will not be responsible for installations executed by non qualified staff and installations that fail to heed the applicable legislation on electrical safety with regard to both modes and materials 12 The e...

Page 6: ...iling cavity When a rangehood is ducted only into the ceiling space the collection of humidity and grease can present very real health issues and fire hazards Recirculating or non ducted or filtered rangehoods extract cooking fumes and pass them through filters As the name would suggest they recirculate this air back into the room Recirculating rangehoods are not as effective as removing fumes fro...

Page 7: ...mm 7 Reducer For Isodrive 650 with single outlet only 8 Filters 9 Light NOTE Filter and light quantity may vary from model to model Important Electronics MUST be accessible for service and or maintenance once installed failure to do so will result in any charges involved with accessing the part removal of cabinetry etc being forwarded to the customer 1 2 3 4 5 6 7 8 9 ...

Page 8: ...ight cooking High speed for heavy frying or heavy cooking Cleaning periods of metal filters C Signal Filter should be cleaned when C signal appears on the display on average this is every 4 to 5 weeks or in accordance with the usage frequency In order to remove C signal after the filters are cleaned and placed back to their place press 1 2 3 button for more than 3 seconds when the product is at of...

Page 9: ...ry important for the liquid soap to not contain granules that could scratch the surface First apply the solution to a soft cloth and then rub the cloth over the rangehood It is important to follow the direction of the stained surface with the cloth refer to figure on left Do not pour any liquid directly on to the rangehood The cloth must have no buttons zips or fasteners that could scratch the sur...

Page 10: ...er Dishwasher Put the filter in the dishwasher and select a short program at low temperature NOTE The colour of the metal mesh filters may change after several washes This is normal and it is not necessary to change the filters Please ensure the filters are completely dry before placing them back in position and operating the rangehood Warning If the grease filters are very dirty the motor will ex...

Page 11: ...the pins of the light bulb with the larger holes inside the light holder Once the pins are in place turn clockwise to secure the light bulb Step 1 Remove the filters from the rangehood Danger Always switch off and disconnect power before replacing the lights Failure to do so may cause serious injury Please be aware that the light bulb may retain heat for a short period of time after being switched...

Page 12: ...ize In addition to the size the height of the rangehood above the cooktop is important to obtain the best performance INADEQUATE Rangehood smaller than cooking zone ADEQUATE Rangehood same size as cooking zone OPTIMAL Rangehood larger than cooking zone ...

Page 13: ...hweigen recommends a height between 700 750mm Refer to page 19 for further information IMPORTANT If the user decides to install the rangehood at a distance of less than minimum height above the cooking surface Schweigen declines responsibility for damages suffered by the rangehood due to excess heat or damage to objects people and others caused directly or indirectly by a malfunction breakage or f...

Page 14: ...urface Please ensure that the holes for the two primary mounting points are level before installation 1 Primary Mounting Points 2 Adjust to Level 3 Secondary Mounting Points 17 12 38 34 336 5 298 204 259 170 3 2 1 1 DANGER Always switch off and disconnect the power supply before installing the rangehood Failure to do so may cause serious injury WARNING Please remove filters before installation Fai...

Page 15: ...ehood to the wall using only primary mounting points 1 Check the level of the rangehood and adjust accordingly if necessary 2 Once level continue to secure the rangehood via the secondary mounting points 3 Step 1 Connect the rangehood base and 9 pin connector to the outlet box before fixing to the outlet box with the screws provided 1 2 3 Outlet Box 9 pin connector Installation Example ...

Page 16: ...f the rangehood PLEASE NOTE Only a standard length of stainless steel flue is provided Any additional length will need to be sourced and manufactured by a sheet metal fabricator Step 5 Attach the exterior flue wall mounting bracket to the wall Slide the inside extension flue piece up to the wall mounting bracket and secure 1 2 3 1 2 3 Step 3 Feed through and secure the flexi ducting from the range...

Page 17: ...ble models The supplied ducting has been manufactured with an allowance for the back draft fins to operate without hindrance It is the smooth extended end of the ducting When installing Back Draft Fins please ensure that you insert the Back Draft Fins onto the back draft base which are attached to the top of the motor outlet before installation Then place the smooth extended edge of the ducting in...

Page 18: ... Amp 8 Flexi Ducting must be pulled taut DO NOT crush or kink the ducting 9 Connect flexi ducting to the outlet on rangehood using ring clamp Please DO NOT rip the ducting Pictures are for illustrative purposes only not to scale 1 2 3 4 5 6 7 8 9 DANGER All electrical wiring from the motor to the rangehood should be kept inside the roof space NOTE The Isodrive motor system does not include the roo...

Page 19: ...distance from cooktop to the rangehood Speed of food liquid heating Filter size larger canopy preferred Quality of pots or cookware you are using high quality recommended How to reduce the possibility of condensation forming Ensure the rangehood is installed by a qualified professional carefully following the installation guide Turn on the rangehood 5 10 minutes prior to cooking and leave on for10...

Page 20: ...aning Light bulbs should be firmly in position Check light bulbs Make sure they are not broken or faulty Please make sure there is no obstruction in ducting or with the back draft fins Check the outlet make sure it is not blocked and you have the correct diameter ducting installed Check Isodrive installation manual make sure the flexi ducting is installed correctly eg Length of ducting used keep t...

Page 21: ...cess to the appliance at their expense Service Lodging an Online Service Request In the event that the failure is not due to the faults mentioned in the Troubleshooting section you can lodge an online Service Request To lodge an online Service Request visit our website www schweigen com au service and warranty and click on the link and complete the service request form A service request will requi...

Page 22: ..._n_ _LH Section_ Page 22 9 Specifications Technical Specifications Model WM2190S Feeding Voltage 220 240V 50Hz Lamp Power LED W 2 x 3W Dimensions 260 252 898 500 28 140 Min 720 Max 1190 ...

Page 23: ... be found with the Isodrive Motor or online at schweigen com au Schweigen Home Appliances has presented this information in good faith to all their retailers and distributors to convey before any all purchase s Information is supplied upon the condition that the person s receiving the information will make their own determination as to its suitability for their purpose s prior to use In no event w...

Page 24: ...d Court Mulgrave 3170 Victoria Phone 1300 881 693 Email sales schweigen com au Web www schweigen com au New Zealand 5 Tolich Place Henderson Auckland 0610 Phone 0800 200 510 Email info parex emerson com Web www parex co nz ...

Reviews: