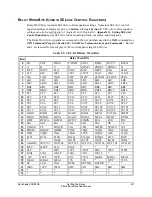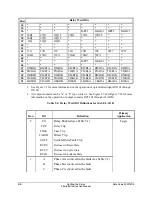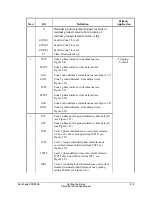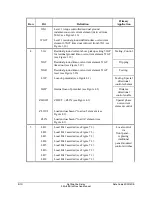
9-2
Setting the Relay
Date Code 20011205
SEL----311B Instruction Manual
S
ETTINGS
C
HANGES VIA THE
S
ERIAL
P
ORT
Note
: In this manual, commands you type appear in bold/uppercase:
METER
. Computer keys
you press appear in bold/uppercase/brackets:
<ENTER>
.
See
Section 10: Serial Port Communications and Commands
for information on serial port
communications and relay access levels. The
SET
commands in Table 9.1 operate at Access
Level 2 (screen prompt: =>>). To change a specific setting, enter the command:
SET
n m s
TERSE
where
n
= L, G, R, T, or P (parameter
n
is not entered for the Relay settings. See Table 9.1).
m
= group (1 . . . 6) or port (1 . . . 3). The relay selects the active group or port if
m
is
not specified.
s
= the name of the specific setting you wish to jump to and begin setting. If
s
is not
entered, the relay starts at the first setting.
TERSE
= instructs the relay to skip the SHOWSET display after the last setting. Use this
parameter to speed up the
SET
command. If you wish to review the settings
before saving, do not use the TERSE option.
When you issue the
SET
command, the relay presents a list of settings, one at a time. Enter a
new setting, or press
<ENTER>
to accept the existing setting. Editing keystrokes are shown in
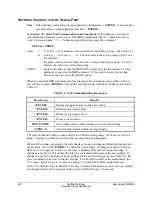
Table 9.2: Set Command Editing Keystrokes
Press Key(s)
Results
<ENTER>
Retains setting and moves to the next setting.
^ <ENTER>
Returns to previous setting.
< <ENTER>
Returns to previous section.
> <ENTER>
Moves to next section.
END<ENTER>
Exits editing session, then prompts you to save the settings.
<CTRL> X
Aborts editing session without saving changes.
The relay checks each entry to ensure that it is within the setting range. If it is not, an “Out of
Range” message is generated, and the relay prompts for the setting again.
When all the settings are entered, the relay displays the new settings and prompts for approval to
enable them. Answer
Y<ENTER>
to enable the new settings. If changes are made to Global,
SER or Text settings (see Table 9.1), the relay is disabled while it saves the new settings. If
changes are made to a Port setting, the relay is not disabled while it saves the new settings. If
changes are made to the Relay or Logic settings for the active setting group (see Table 9.1), the
relay is disabled while it saves the new settings. The ALARM contact closes momentarily (for
“b” contact, opens for an “a” contact; see Figure 7.26) and the EN LED extinguishes (see
Table 5.1) while the relay is disabled. The relay is disabled for about 1 second. If Logic settings
are changed for the active group, the relay can be disabled for up to 15 seconds.
Summary of Contents for SEL-311B
Page 6: ......
Page 8: ......
Page 10: ......
Page 24: ......
Page 26: ......
Page 122: ......
Page 124: ......
Page 138: ......
Page 168: ......
Page 172: ......
Page 254: ......
Page 282: ......
Page 306: ......
Page 348: ......
Page 364: ......
Page 366: ......
Page 448: ......
Page 460: ......
Page 466: ......
Page 476: ......
Page 482: ......
Page 494: ......
Page 500: ......
Page 522: ......
Page 526: ......
Page 528: ......
Page 534: ......
Page 536: ......
Page 550: ......
Page 570: ......
Page 586: ......
Page 600: ......

