2-16
Installation
Date Code 20010625
SEL-311L Instruction Manual
C
IRCUIT
B
OARD
C
ONNECTIONS
Accessing the Relay Circuit Boards
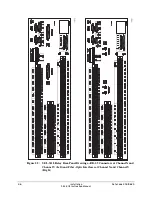
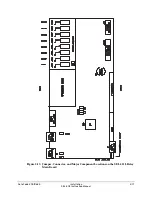
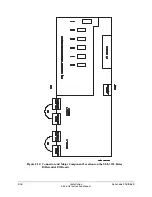
To change circuit board jumpers or replace the clock battery, refer to Figure 2.13 and take the
following steps:
1.
Deenergize the relay.
2.
Remove any cables connected to serial ports or line current differential interfaces on the
front and rear panels.
3.
Remove the EIA-485 connector.
4.
Loosen the six front-panel screws (they remain attached to the front panel), and remove the
relay front panel.
CAUTION
!
The relay contains devices sensitive to Electrostatic Discharge (ESD).
When working on the relay with front or top cover removed, work
surfaces and personnel must be properly grounded or equipment
damage may result.
DANGER
!
Removal of this front panel exposes circuitry which may cause
electrical shock that can result in injury or death.
5.
Each circuit board corresponds to a row of rear-panel terminal blocks or connectors and is
affixed to a drawout tray.
6.
Disconnect circuit board cables as necessary. Removal of the differential board requires
removal of the main board first. Ribbon cables can be removed by pushing the extraction
ears away from the connector. The 6-conductor power cable can be removed by grasping
the power connector wires and pulling away from the circuit board.
7.
Grasp the drawout assembly of the board and pull the assembly from the relay chassis.
8.
Locate the jumper(s) or battery to be changed (refer to Figure 2.13). Make the desired
changes. Note that the output contact jumpers are soldered in place.
9.
When finished, slide the drawout assembly into the relay chassis. Reconnect the cables
removed in Step 6. Replace the relay front-panel cover.
10. Replace any cables previously connected to serial ports or line current differential
interfaces.
11. Reenergize the relay and verify that the ENABLE LED illuminates.
Summary of Contents for SEL-311L
Page 6: ......
Page 8: ......
Page 26: ......
Page 54: ......
Page 144: ......
Page 216: ......
Page 252: ......
Page 302: ......
Page 338: ......
Page 480: ......
Page 484: ......
Page 486: ......
Page 502: ......
Page 532: ...12 28 Standard Event Reports and SER Date Code 20010625 SEL 311L Instruction Manual 4 ...
Page 552: ......
Page 554: ......
Page 574: ......
Page 576: ......
Page 596: ......
Page 602: ......
Page 628: ......
Page 656: ......
Page 662: ......
Page 664: ......
Page 688: ......
Page 700: ......
Page 716: ......
Page 722: ......
Page 734: ......

