B.19
Date Code 20080213
Instruction Manual
SEL-351A Relay
Firmware Upgrade Instructions
Ethernet Port Firmware Upgrade Instructions
Ethernet Port Firmware Upgrade Instructions
Introduction
Perform the firmware upgrade process in the following sequence:
A. Prepare the Relay
B. Establish an FTP Connection
C. Transfer New Firmware
D. Establish a Telnet Connection
E. Verify Firmware Transfer
A new default CID file might have been included with your firmware upgrade.
Do not load this file into your relay if you have already configured your relay
for IEC 61850 communications. Doing so will overwrite your existing
configuration and disrupt communications with the relay as a result.
Performing a firmware upgrade will not overwrite or corrupt the CID file
already stored in your relay.
Required Equipment
Gather the following equipment before starting this firmware upgrade:
➤
Personal computer
➤
FTP client software (e.g., Microsoft Internet Explorer)
➤
Disk containing the communications card firmware upgrade
(.s19) file
➤
Firmware upgrade instructions (these instructions)
Upgrade Procedure
A. Prepare the Relay
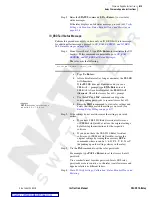
Step 1. If the relay is in use, follow your company practices for
removing a relay from service. Typically, these include
changing settings, or disconnecting external voltage sources or
output contact wiring, to disable relay control functions.
Step 2. Apply power to the relay.
Step 3. These instructions assume that the Ethernet port (
PORT 5
)
settings are set as follows:
IPADDR = 10.201.0.213
SUBNETM = 255.255.0.0
DEFRTR = 10.201.0.1
ETELNET = Y
TPORTC = 1024
EFTPSERV = Y
FTPUSER = 2AC
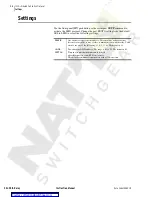
NOTE:
SEL-300 series relays with
Ethernet capability support one CID
file, which should be transferred only
if a change in the relay configuration
is required. If an invalid CID file is
transferred, the relay will no longer
have a valid IEC 61850 configuration,
and the protocol will stop operating.
To restart protocol operation, a valid
CID must be transferred to the relay.
Summary of Contents for SEL-351A
Page 10: ...This page intentionally left blank Courtesy of NationalSwitchgear com ...
Page 16: ...This page intentionally left blank Courtesy of NationalSwitchgear com ...
Page 34: ...This page intentionally left blank Courtesy of NationalSwitchgear com ...
Page 126: ...This page intentionally left blank Courtesy of NationalSwitchgear com ...
Page 184: ...This page intentionally left blank Courtesy of NationalSwitchgear com ...
Page 198: ...This page intentionally left blank Courtesy of NationalSwitchgear com ...
Page 228: ...This page intentionally left blank Courtesy of NationalSwitchgear com ...
Page 278: ...This page intentionally left blank Courtesy of NationalSwitchgear com ...
Page 384: ...This page intentionally left blank Courtesy of NationalSwitchgear com ...
Page 410: ...This page intentionally left blank Courtesy of NationalSwitchgear com ...
Page 450: ...This page intentionally left blank Courtesy of NationalSwitchgear com ...
Page 454: ...This page intentionally left blank Courtesy of NationalSwitchgear com ...
Page 472: ...This page intentionally left blank Courtesy of NationalSwitchgear com ...
Page 504: ...This page intentionally left blank Courtesy of NationalSwitchgear com ...
Page 558: ...This page intentionally left blank Courtesy of NationalSwitchgear com ...
Page 562: ...This page intentionally left blank Courtesy of NationalSwitchgear com ...
Page 586: ...This page intentionally left blank Courtesy of NationalSwitchgear com ...
Page 608: ...This page intentionally left blank Courtesy of NationalSwitchgear com ...
Page 666: ...This page intentionally left blank Courtesy of NationalSwitchgear com ...


