13.11
Date Code 20080213
Instruction Manual
SEL-351A Relay
Testing and Troubleshooting
Relay Troubleshooting
Relay Troubleshooting
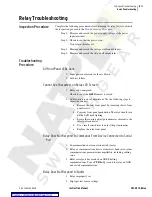
Inspection Procedure
Complete the following procedure before disturbing the relay. After you finish
the inspection, proceed to the
.
Step 1. Measure and record the power supply voltage at the power
input terminals.
Step 2. Check to see that the power is on.
Do not turn the relay off.
Step 3. Measure and record the voltage at all control inputs.
Step 4. Measure and record the state of all output relays.
Troubleshooting
Procedure
All Front-Panel LEDs Dark
1. Input power not present or fuse is blown.
2. Self-test failure.
Cannot See Characters on Relay LCD Screen
1. Relay is de-energized.
Check to see if the
ALARM
contact is closed.
2. LCD contrast is out of adjustment. Use the following steps to
adjust the contrast.
a. Remove the relay front panel by removing the six front-
panel screws.
b. Press any front-panel pushbutton. The relay should turn
on the LCD back lighting.
c. Locate the contrast adjust potentiometer adjacent to the
serial port connector.
d. Use a small screwdriver to adjust the potentiometer.
e. Replace the relay front panel.
Relay Does Not Respond to Commands From Device Connected to Serial
Port
1. Communications device not connected to relay.
2. Relay or communications device at incorrect baud rate or other
communications parameter incompatibility, including cabling
error.
3. Relay serial port has received an XOFF, halting
communications. Type
<CTRL> Q
to send the relay an XON
and restart communications.
Relay Does Not Respond to Faults
1. Relay improperly set.
2. Improper test source settings.
Summary of Contents for SEL-351A
Page 10: ...This page intentionally left blank Courtesy of NationalSwitchgear com ...
Page 16: ...This page intentionally left blank Courtesy of NationalSwitchgear com ...
Page 34: ...This page intentionally left blank Courtesy of NationalSwitchgear com ...
Page 126: ...This page intentionally left blank Courtesy of NationalSwitchgear com ...
Page 184: ...This page intentionally left blank Courtesy of NationalSwitchgear com ...
Page 198: ...This page intentionally left blank Courtesy of NationalSwitchgear com ...
Page 228: ...This page intentionally left blank Courtesy of NationalSwitchgear com ...
Page 278: ...This page intentionally left blank Courtesy of NationalSwitchgear com ...
Page 384: ...This page intentionally left blank Courtesy of NationalSwitchgear com ...
Page 410: ...This page intentionally left blank Courtesy of NationalSwitchgear com ...
Page 450: ...This page intentionally left blank Courtesy of NationalSwitchgear com ...
Page 454: ...This page intentionally left blank Courtesy of NationalSwitchgear com ...
Page 472: ...This page intentionally left blank Courtesy of NationalSwitchgear com ...
Page 504: ...This page intentionally left blank Courtesy of NationalSwitchgear com ...
Page 558: ...This page intentionally left blank Courtesy of NationalSwitchgear com ...
Page 562: ...This page intentionally left blank Courtesy of NationalSwitchgear com ...
Page 586: ...This page intentionally left blank Courtesy of NationalSwitchgear com ...
Page 608: ...This page intentionally left blank Courtesy of NationalSwitchgear com ...
Page 666: ...This page intentionally left blank Courtesy of NationalSwitchgear com ...


