background image

43

Who Is Covered

This warranty is valid only to the original purchaser and is not transferable or applicable to any other person(s).

What Is Covered

Nautilus, Inc. warrants that this product is free from defects in materials and workmanship, when used for the purpose intended, under normal conditions, and provided it receives 

proper care and maintenance as described in the Product’s Assembly and Owner’s manual.  This warranty is good only for authentic, original, legitimate machines manufactured by 

Nautilus, Inc. and sold through an authorized agent and used in the United States or Canada. 

Terms

• 

Frame  


10 years 

• 

Mechanical parts  

2 years

• 

Electronics 


1 year

• 

Labor  


3 months 

           (Labor support does not include the installation of replacement parts involved in the initial product assembly and preventative maintenance services.)

How Nautilus Will Support the Warranty

Throughout the terms of the warranty coverage, Nautilus, Inc. will repair any machine that proves to be defective in materials or workmanship. Nautilus reserves the right to replace 

the product in the event a repair is not possible. When Nautilus determines replacement is the correct remedy, Nautilus may apply a limited credit reimbursement toward another 

Nautilus, Inc. brand Product, at our discretion. This reimbursement may be prorated based on length of ownership. Nautilus, Inc. provides repair service within major metropolitan 

areas. Nautilus, Inc. reserves the right to charge the consumer for travel outside these areas. Nautilus, Inc. is not responsible for dealer labor or maintenance charges beyond the 

applicable warranty period(s) stated herein. Nautilus, Inc. reserves the right to substitute material, parts or products of equal or better quality if identical materials or products are 

not available at the time of service under this warranty. Any replacement of the product under the terms of the Warranty in no way extends the original Warranty period. Any limited 

credit reimbursement may be prorated based on length of ownership. THESE REMEDIES ARE THE EXCLUSIVE AND SOLE REMEDIES FOR ANY BREACH OF WARRANTY.

What You Must Do

• 

Retain appropriate and acceptable Proof of Purchase.

• 

Operate, maintain, and inspect the Product as specified in the Product Documentation (Assembly, Owner’s Manuals, etc.).

• 

Product must be used exclusively for the purpose intended.

• 

Notify Nautilus within 30 days after detecting an issue with the Product.

• 

Install replacement parts or components in accordance with any Nautilus instructions.

• 

Perform diagnostic procedures with a trained Nautilus, Inc representative if requested.

What Is Not Covered

• 

Damage due to abuse, tampering or modification of the Product, failure to properly follow assembly instructions, maintenance instructions, or safety warnings as stated in the 

Product Documentation (Assembly, Owner’s Manuals, etc), damage due to improper storage or the effect of environmental conditions such as moisture or weather, misuse, 

mishandling, accident, natural disasters, power surges.

• 

A machine placed or used in a commercial or institutional setting.  This includes gyms, corporations, work places, clubs, fitness centers and any public or private entity that 

has a machine for use by its members, customers, employees or affiliates.

• 

Damage caused by exceeding maximum user weights as defined in the Product’s Owner’s manual or warning label.

• 

Damage due to normal usage and wear and tear.

• 

This warranty does not extend to any territories or countries outside the United States and Canada.

How to Obtain Service

For Products purchased directly from Nautilus, Inc. contact the Nautilus office listed on the Contacts page of the products Owner’s manual. You may be required to return the 

defective component to a specified address for repair or inspection, at your expense. Standard ground shipping of any warranty replacement parts will be paid by Nautilus, Inc. For 

products purchased from a retailer, you may be asked to contact your retailer for warranty support.

Exclusions

The preceding warranties are the sole and exclusive express warranties made by Nautilus, Inc. They supersede any prior, contrary or additional representations, whether oral or 

written. No agent, representative, dealer, person or employee has the authority to alter or increase the obligations or limitations of this warranty. Any implied warranties, including 

the WARRANTY OF MERCHANTABILITY and any WARRANTY OF FITNESS FOR A PARTICULAR PURPOSE, are limited in duration to the term of the applicable express warranty 

provided above, whichever is longer. Some states do not allow limitations on how long an implied warranty lasts, so the above limitation may not apply to you.

Limitation of Remedies

EXCEPT AS OTHERWISE REQUIRED BY APPLICABLE LAW, THE PURCHASER’S EXCLUSIVE REMEDY IS LIMITED TO REPAIR OR REPLACEMENT OF ANY COMPONENT DEEMED BY 

NAUTILUS, INC. TO BE DEFECTIVE UNDER THE TERMS AND CONDITIONS STATED HEREIN. IN NO EVENT WILL NAUTILUS, INC. BE LIABLE FOR ANY SPECIAL, CONSEQUENTIAL, 

INCIDENTAL, INDIRECT OR ECONOMIC DAMAGES, REGARDLESS OF THE THEORY OF LIABILITY (INCLUDING, WITHOUT LIMITATION, PRODUCT LIABILITY, NEGLIGENCE OR OTHER 

TORT) OR FOR ANY LOST REVENUE, PROFIT, DATA, PRIVACY OR FOR ANY PUNITIVE DAMAGES ARISING OUT OF OR RELATED TO THE USE OF THE FITNESS MACHINE EVEN IF 

NAUTILUS, INC. HAS BEEN ADVISED OF THE POSSIBILITY OF SUCH DAMAGES. THIS EXCLUSION AND LIMITATION SHALL APPLY EVEN IF ANY REMEDY FAILS OF ITS ESSENTIAL 

PURPOSE. SOME STATES DO NOT ALLOW THE EXCLUSION OR LIMITATION OF CONSEQUENTIAL OR INCIDENTAL TYPE DAMAGES SO THE ABOVE LIMITATION MAY NOT APPLY TO 

YOU.

State Laws

This warranty gives you specific legal rights. You may also have other rights, which vary from state to state.

Expirations

If the warranty has expired, Nautilus, Inc. may assist with replacements or repairs to parts and labor, but there will be a charge for these services. Contact a Nautilus® office for 

information on post-warranty parts and services. Nautilus® does not guarantee availability of spare parts after expiration of warranty period.

International Purchases

If you purchased your machine outside of the United States consult your local distributor or dealer for warranty coverage.

WarranTy

Summary of Contents for 230 / Journey 2.0

Page 1: ...ASSEMBLY MANUAL OWNER S MANUAL Manual en Espa ol Latino Americano http www schwinnfitness com 230 430 470...

Page 2: ...aintenance 37 Maintenance Parts 38 Troubleshooting 40 Warranty 43 Nautilus Inc 800 NAUTILUS 800 628 8458 www NautilusInc com Customer Service North America 800 605 3369 csnls nautilus com outside U S...

Page 3: ...promise the safety of this machine and will void the warranty If replacement parts are necessary use only genuine Nautilus replacement parts and hardware Failure to use genuine replacement parts can c...

Page 4: ...more of the following measures Reorient or relocate the receiving antenna Increase the separation between the equipment and receiver Connect the equipment into an outlet on a circuit different from th...

Page 5: ...less instructed otherwise When attaching 2 pieces lightly lift and look through the bolt holes to help insert the bolt through the holes The assembly can require 2 people Maximum User Weight 300 lbs 1...

Page 6: ...er 11 1 Left Pedal 3 1 Seat Back 12 1 Front Stabilizer 4 1 Cover 13 1 Right Pedal 5 1 Seat Frame Assembly 14 1 Upper Shroud 6 1 Seat Bottom 15 1 Shroud Cap 7 1 Seat Adjustment Handle 16 1 Console Mast...

Page 7: ...s Head Screw M5x12 B 10 Button Head Hex Screw M6x12 G 14 Lock Washer M6 C 4 Flat Washer M8 H 4 Curved Washer M6 D 8 Lock Washer M8 I 4 Phillips Head Screw M6x25 E 10 Flat Washer M6 J 4 Curved Washer M...

Page 8: ...8 ASSEMBLY 1 Attach Stabilizers to Frame Note Hardware is pre installed and not on the Hardware Card 6mm 12 8 9 X2 6mm X2...

Page 9: ...9 2 Attach the Seat Frame Assembly to the Seat Rail NOTICE Do not crimp the Heart Rate Cable Once all hardware has been inserted be sure to fully tighten it B E G 4mm X2 5 A C D 6mm X4...

Page 10: ...10 3 Attach Seat Pads to Seat Frame Assembly 3 6 X8 4mm B E G H X4 2 G I...

Page 11: ...11 4 Attach Cover to Frame Assembly 4...

Page 12: ...12 5 Attach Seat Adjustment Handle to Frame Assembly 7...

Page 13: ...13 6 Connect the Cables and Attach the Console Mast to Frame Assembly NOTICE Do not crimp Console Cables 15 A J 6mm X4 16 14 D...

Page 14: ...not crimp the cable Note Hardware is pre installed and not on the Hardware Card X4 8 Connect Cables and Attach Console to Frame Assembly NOTICE Align the clips on the cable connectors and make sure th...

Page 15: ...Frame Assembly NOTICE The Left Pedal is reverse threaded Be sure to attach Pedals on the proper side of the Bike Orientation is based from a seated position on the bike The Left Pedal has an L the Ri...

Page 16: ...16 10 Attach Water Bottle Holder to Frame Assembly Note Hardware is pre installed and not on the Hardware Card 2 X2 F 2...

Page 17: ...sure that all hardware is tight and components are properly assembled Be sure to record the serial number in the field provided at the front of this manual Do not use until the machine has been fully...

Page 18: ...e all physically fit and able to move the machine safely 1 Remove the power cord 2 Use the Transport Handle to carefully lift the machine onto the transport rollers 3 Push the machine into position 4...

Page 19: ...ot To adjust the leveler on the Frame Rail 1 Loosen the upper locking nut 2 Turn the leveler to adjust the height Do not adjust the levelers to such a height that they detach or unscrew from the machi...

Page 20: ...tilus Customer Service for repair information Maximum user weight limit 300 lbs 136 kg Do not use if you are over this weight This machine is for home use only Do not wear loose clothing or jewelry Th...

Page 21: ...nt Knob D Media Tray N Water Bottle Holder E Fan O Adjustable Seat F Speakers P Contact Heart Rate CHR Sensors G Fully Shrouded Flywheel Q Handlebar Side H Power Connector R Pedal I Transport Wheel S...

Page 22: ...nce level Resistance Decrease button Decreases the workout resistance level QUICK START button Begins a Quick Start workout PROGRAMS button Selects a category and workout program PAUSE END button Paus...

Page 23: ...heart rate value falls into for the current User These Heart Rate Zones can be used as a workout guide for a certain target zone anaerobic aerobic or fat burn Consult a physician before you start an e...

Page 24: ...its to English Imperial or metric refer to the Console Setup Mode section in this manual Level The LEVEL display shows the current resistance level in the workout RPM The RPM display field shows the p...

Page 25: ...rference If your heart rate signal ever seems erratic after validation wipe off your hands and the sensors and try again Heart Rate Calculations Your maximum heart rate usually decreases from 220 Beat...

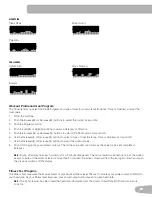
Page 26: ...itness regimens always use your best judgment when you increase your exercise time or intensity 20 24 FAT BURNING TARGET HEART RATE Heart Rate BPM beats per minute Age 25 29 0 50 100 150 200 250 30 34...

Page 27: ...cannot touch the Pedal move the seat forward If your leg is bent too much move the seat toward the back Step off the bike before you adjust the seat 3 Push down on the Seat Adjustment Handle and adju...

Page 28: ...r more than 30 minutes the active column is fixed on the farthest column on the right and pushes the previous columns off the display 1 Sit on the machine 2 Push the Increase Decrease button to select...

Page 29: ...EDIT HEIGHT EDIT GENDER use the Increase Decrease buttons to adjust and push OK to set each entry 6 The Console display shows the SCAN prompt This option controls how the workout values are displayed...

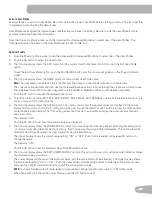
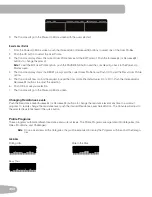
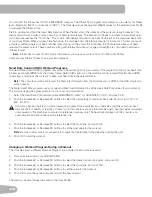
Page 30: ...ode screen Changing Resistance Levels Push the Resistance Level Increase or Decrease buttons to change the resistance level at any time in a workout program To rapidly change the resistance level push...

Page 31: ...l for your workout Distance Time or Calories and set the Goal value 1 Sit on the machine 2 Push the Increase or Decrease buttons to select the correct User profile 3 Push the Programs button 4 Push th...

Page 32: ...nsole must be able to read the heart rate information from the CHR sensors or HRM for the HRC program to work correctly The Target Heart Rate programs use your age and other User information to set th...

Page 33: ...hree channels a TIME total DISTANCE total and CALORIES total b SPEED average RPM average and HEART RATE average c TIME average LEVEL average and CALORIES average Push the Left or Right buttons to move...

Page 34: ...ght value is current The BMI Measurement is a useful tool that shows the relationship between weight and height that is associated with body fat and health risk The table below gives a general rating...

Page 35: ...oad your workout results using a USB Flash Drive and then view and track your achievements over time www SchwinnConnect com also works with MyFitnessPal Simply follow the prompts from the Link to MyFi...

Page 36: ...st the currently active value flashing Push the Left Right buttons to change which segment is the currently active value hour minute AM or PM 5 Push OK to set 6 The Console display shows the Units pro...

Page 37: ...hine Place the power cord in a secure location Daily Before each use examine the exercise machine for loose broken damaged or worn parts Do not use if found in this condition Repair or replace all par...

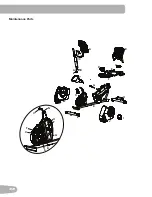
Page 38: ...38 Maintenance Parts A CC Z Y B D C E F H I J K M G X W O P S U T V N Q R AA BB L...

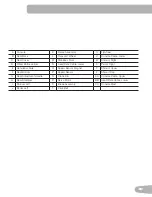
Page 39: ...ter Bottle Holder N Heart Rate Cable Lower X Pedal Right E Handlebar Side O Speed Sensor Magnet Y Shroud Upper F Seat Bottom P Speed Sensor Z Shroud Cap G Seat Adjustment Handle Q Crank Arm AA Console...

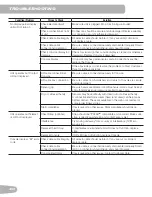
Page 40: ...from handlebars and cable to Console are secure and undamaged Sensor grip Be sure hands are centered on HR sensors Hands must be kept still with relatively equal pressure applied to each side Dry or c...

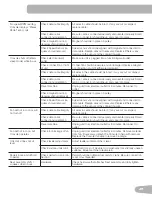
Page 41: ...t to outlet Check magnet position requires shroud removal Magnet should be in place on pulley Check Speed Sensor re quires shroud removal Speed sensor should be aligned with magnet and connected to da...

Page 42: ...42...

Page 43: ...ges A machine placed or used in a commercial or institutional setting This includes gyms corporations work places clubs fitness centers and any public or private entity that has a machine for use by i...

Page 44: ...Nautilus Bowflex Schwinn Fitness Universal 8002152 080113 B EN...

Reviews: