background image

9

AUTOMATIC CHOKE

NOTE: Your new scooter is equipped with an automatic choke. There is no manual choke and in average temperatures
there is no need to apply the throttle while starting.  

KICK START

• In an effort to preserve your new battery life and reduce wear to the new starter during the break-in period, it is

recommended that you kick start the scooter for the first 10-15 rides.

• The center stand must be down in order to use the kick starter. 

NOTE:

Do not attempt to sit on the seat and start the

scooter with the center stand down.   

Retract the side stand. 

NOTE: 

The scooter will not start if the side stand is down.

• Place the key in the ignition and turn it to the ON

position.

• Move the engine stop switch to the ON

position. 

NOTE:

The scooter will not start when the engine stop switch is in

the OFF

position. 

• Stand to the left of the scooter. Grasp the handlebar grip with your left hand and the backrest with your right hand.
• Pull either brake lever. 

NOTE:

The scooter will not start unless one brake is applied while starting.

• Extend the kick starter foot peg. 
• Twist the throttle 3 to 5 times to prime the engine.
• “Kick” down on the kick starter quickly, then allow it to spring back into position. Repeat this procedure until the engine

starts. 

NOTE:

You are forcing fuel up into the carburetor with each “kick”. It may take many “kicks” to start the engine for

the first time. 

• When the engine starts, apply enough throttle to idle the engine for 20 to 30 seconds. 

NOTE: DO NOT

open the throttle

while kick starting. Open the throttle only after the engine has started. 

NOTE:

To prolong engine life, allow the engine to

reach normal operating temperature before driving. This usually takes about 2 to 3 minutes.  

• Retract the kick starter foot peg to its original position before driving. 
• Grasp both handlebar grips and push the scooter forward to retract the center stand under the scooter. Mount the scooter.

• Use the kick starter to start the scooter or prime the engine in the following situations:

- If the scooter has been driven less than 100 miles (160 kilometers).
- In cold or wet weather.
- If the fuel tank has run completely dry (and more fuel has been added).
- If the scooter has been stored for more than two weeks.
- If the scooter fails to start using the electric starter button.
- If the battery is discharged.

COLD START 

(for temperatures less than 40°F).

• In addition to these procedures, in cold temperatures it may be necessary to fully twist the throttle 6-8 times before

attempting to kick start the engine. This will prime the engine and make cold starting quicker. If the scooter stalls after
starting, it may be necessary to apply the throttle lightly until the engine idles normally.

ELECTRIC START

• Retract the center stand and sit on the seat with both feet on ground. 

Retract the side stand. 

NOTE: 

The scooter will not start if the side stand is down.

• Place the key in the ignition and turn it to the ON

position. 

• Move the engine stop switch to the ON

position. 

NOTE:

The scooter will not start when the engine stop switch is in

the OFF

position.

• Pull either brake lever. 

NOTE:

The scooter will not start unless one brake is applied while starting.

• Twist the throttle 3 to 5 times to prime the engine.
• Press the electric starter button

for no more than five (5) seconds until the engine starts. Release the button as soon as

the engine starts. 

NOTE: DO NOT

press the electric starter button continuously for more than five seconds. Damage to

the starter could occur.

• If engine doesn’t start, wait ten (10) seconds and repeat the starting procedure.
• If repeated attempts fail, use the kick starter to start the scooter or prime the engine. See “Kick Start” section above.
• When the engine starts, apply enough throttle to idle the engine for 20 to 30 seconds. 

NOTE: DO NOT

open the throttle

while starting. Open the throttle only after the engine has started. 

NOTE:

To prolong engine life, allow the engine to reach normal operating temperature before driving. This usually takes

about 2 to 3 minutes. 

Starting the Scooter, 

continued

Summary of Contents for hope 50

Page 1: ...do not follow the instructions in this manual Maximum loading 225 lbs 102 kg ALWAYS wear a Department of Transportation DOT approved motorcycle helmet when operating this scooter This scooter is desig...

Page 2: ...the Scooter 8 Automatic Choke 9 Kick Start 9 Cold Start 9 Electric Start 9 Breaking In the Scooter 10 Riding the Scooter 10 Entering Roadways 10 Acceleration and Deceleration 10 Braking 10 Parking 10...

Page 3: ...9...

Page 4: ...ndition Refer to Before Every Ride on page 8 and Routine Care and Maintenance on page 11 NEVER leave the key in the ignition after riding the scooter Keep the key in a safe place to prevent unauthoriz...

Page 5: ...hoes when driving the scooter Wear long sleeves and pants to cover arms and legs for protection Avoid loose clothing that could get caught in the scooter Use gloves designed for use on motorcycles The...

Page 6: ...tures 4 CONTROLS Headlight Seat Luggage Rack Seat Lock left side Fuel Cap and Storage Compartment under seat Muffler Battery Fuse Compartment Engine Oil Cap and Dipstick Engine Oil Drain Plug Center S...

Page 7: ...tion Right Turn Signal Key and Ignition Switch Helmet Storage Hook VIN Badge Right Turn Signal VIN Access Plate Fuel Gauge Odometer Speedometer Turn Signal Indicators High Beam Indicator Air Filter Ho...

Page 8: ...11 for detailed instructions ENGINE STOP SWITCH AND STARTER BUTTON RIGHT HANDLEBAR ON Move the switch to the ON position to allow the engine to start The engine will not start in the OFF position OFF...

Page 9: ...fully extended position To swing the side stand up grasp the handlebars and hold the scooter upright Swing the side stand into the retracted position NOTE The scooter will not start if the side stand...

Page 10: ...the front tire should be inflated to 30 PSI and the rear tire should be inflated to 32 PSI Make sure there are no cuts punctures or excessively worn tread on the tires Refer to Tire Maintenance on pa...

Page 11: ...the kick starter to start the scooter or prime the engine in the following situations If the scooter has been driven less than 100 miles 160 kilometers In cold or wet weather If the fuel tank has run...

Page 12: ...lope or on soft surfaces The scooter could tip over DO NOT park near flammable materials Engage the steering lock to prevent theft see instructions on page 6 Breaking In the Scooter In an effort to pr...

Page 13: ...EADED 87 OCTANE OR HIGHER GASOLINE WITHOUT METHANOL ADDITIVES WARNING GASOLINE AND ITS VAPORS ARE EXTREMELY FLAMMABLE AND EXPLOSIVE AND CAN CAUSE SEVERE BURNS OR DEATH Keep gasoline away from open fla...

Page 14: ...minimum allowed thickness of 0 06 1 5 mm The brake drum must never measure larger than 3 892 99 0 mm in diameter CHECK FRONT DISC BRAKE FLUID LEVEL Locate the front brake master cylinder under the ho...

Page 15: ...uctions on the proper disposal of used oil ADDING TRANSMISSION OIL Inspect the rear drive area for signs of oil leakage If you suspect the level is low you may need to add transmission oil Using a wre...

Page 16: ...y discharged The battery has leaked The battery casing is cracked or damaged Contact your dealer to purchase a new battery Use of an unauthorized battery will void the warranty Follow the instructions...

Page 17: ...cause damage to the scooter s engine Allow the engine to cool before changing the spark plug The spark plug can be accessed from the right side of the scooter Fig 4 Pull the spark plug cover off the...

Page 18: ...ezing one brake lever while starting the scooter The scooter will not start if a brake is not applied 3 Make sure the engine stop switch is in the ON position 4 Make sure the side stand is retracted 5...

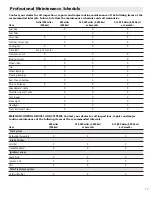
Page 19: ...l X X X Brake Light X X X Headlight X X X Nuts Bolts and Screws X X X EMISSION CONTROL DEVICES AND SYSTEMS Contact your dealer for all inspections repairs and major routine maintenance of the follwing...

Page 20: ...IES OF MERCHANTABILITY AND FITNESS FOR A PARTICULAR PURPOSE THERE ARE NO WARRANTIES THAT EXTEND BEYOND THE DESCRIPTION IN THIS LIMITED WARRANTY THIS WARRANTY GIVES YOU SPECIFIC LEGAL RIGHTS YOU MAY HA...

Page 21: ...so be required to show that you have performed the required maintenance which is related to the alleged defect so you should have detailed receipts indicating that the required periodic maintenance ha...

Page 22: ...T Vehicle Safety Hotline toll free at 1 888 327 4236 TTY 1 800 424 9153 or 1 202 484 5238 or write to NHTSA U S DEPARTMENT of TRANSPORTATION 400 7th Street SW NSA 11 Washington DC 20590 You can also o...

Page 23: ...affect performance...
Page 24: ...of a warranted part your claim for repair to bring your 50cc scooters into compliance with applicable standard may be denied EMISSION RELATED PART NUMBERS Part numbers as stamped on the component not...

Page 25: ...cle Inc A Division of Dorel Industries Pacific Cycle Inc 4902 Hammersley Road Madison WI 53711 2008 Pacific Cycle Inc Made in China Printed 2008 Schwinn is a registered trade mark of Pacific Cycle Inc...

Reviews: