76
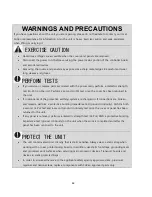
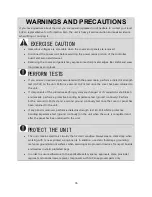
WARNINGS AND PRECAUTIONS
If you have questions about the unit you are repairing, please do not hesitate to contact your local
SciCan representative for information. Also, the unit is heavy. Exercise caution and seek assistance
when lifting or carrying it.
EXERCISE CAUTION
•
Hazardous voltages are accessible when the covers and panels are removed.
•
Disconnect the power cord before servicing the power mains portion of the controller
board and associated devices.
•
Removing the covers and panels may expose some sharp metal edges. Be careful and wear
long sleeves and gloves.
PERFORM TESTS
•
If you service or replace parts associated with the power main, perform a dielectric strength
test (Hi-Pot) on the unit. Perform a second Hi-Pot test once the cover has been returned to
the unit.
•
If components of the protective earthing system are changed or if connections are broken
and remade, perform a protective bonding impedance test (ground continuity). Perform
both a second Hi-Pot test and a second ground continuity test once the cover or panel has
been returned to the unit.
•
If any panel is removed, perform a dielectric strength test (Hi-Pot) AND a protective
bonding impedance test (ground continuity) on the unit when the work is completed and
after the panel has been returned to the unit.
PROTECT THE UNIT
•
The unit contains electronic circuitry that is static sensitive. Always wear a static strap when
working with or near printed wiring boards. In addition, use static footstraps, grounding
mats and grounded work surfaces when servicing microprocessor devices. Transport boards
and devices in static protected bags.
•
In order to ensure adherence to the applicable safety agency approvals, state, provincial,
regional and national laws, replace components with SciCan approved parts only.
Summary of Contents for STATCLAVE G4
Page 5: ...5 Diagram of key systems and components...
Page 6: ...6...
Page 17: ...17 Checking package contents...
Page 18: ...18 Positioning a unit Unit dimensions and operating environment...
Page 20: ...20 Direct to drain connection recommended...
Page 21: ...21 Connecting to a waste bottle...
Page 22: ...22 Connecting to the Internet Connecting to a wired network Connecting to a wireless network...
Page 23: ...23...
Page 25: ...25 Connecting an auxiliary pump...
Page 28: ...28...
Page 30: ...30 Starting and stopping a cycle...
Page 50: ...50 Registering for online access...
Page 51: ...51 First start up...
Page 52: ...52...
Page 58: ...58 Draining the unit for cleaning and shipping...
Page 61: ...61 Replacing the bacteriological filter Replacing the door seal...
Page 75: ...75...
Page 107: ...107 APPENDIX A STATCLAVE G4 plumbing diagram...
Page 108: ...108 APPENDIX B STATCLAVE G4 electrical schematic...


