95
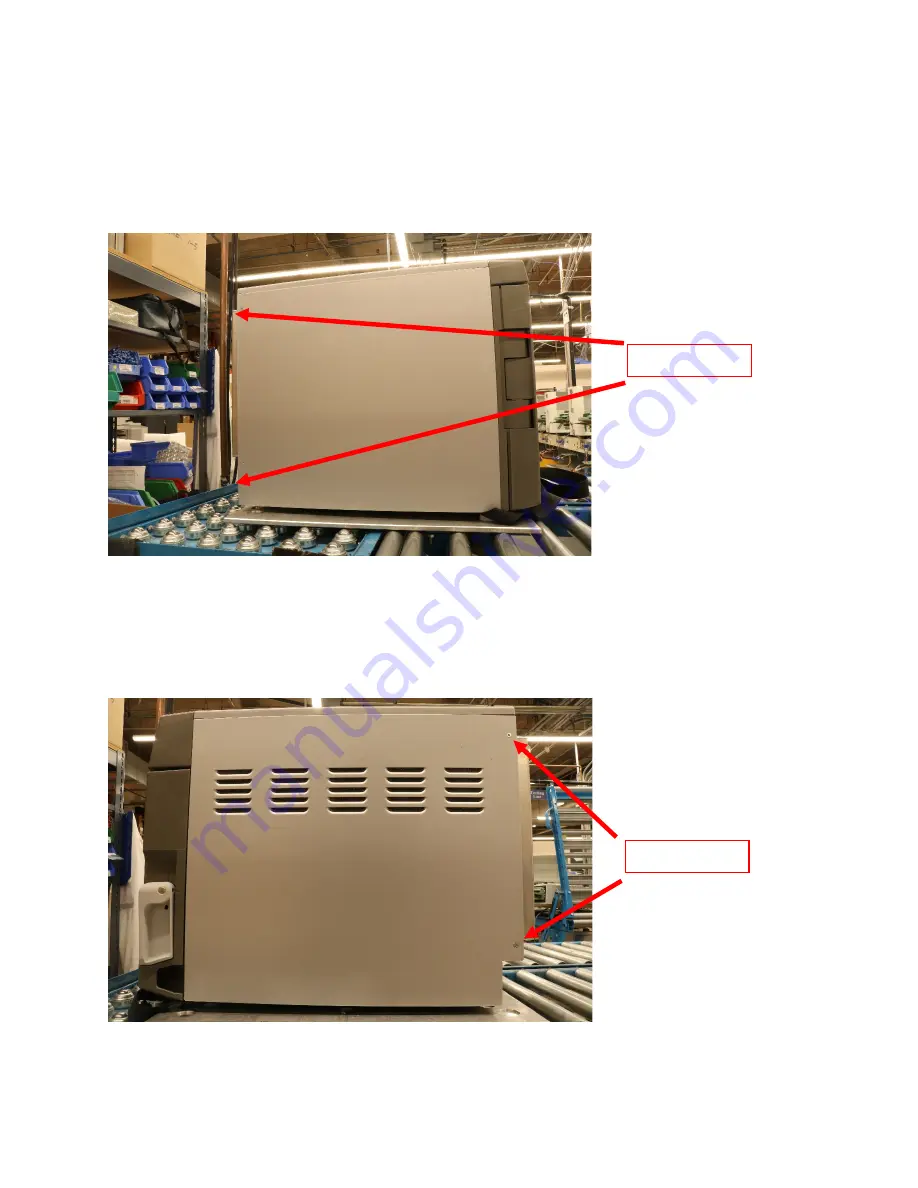
6.1 Removing and reinstalling the left panel
1.
Remove the 2 screws.
2.
Slide the panel to the rear to disengage the tabs at the top and bottom of the panel.
Figure 6.1-1
6.2 Removing and reinstalling the right panel
1.
Remove the 2 screws.
2.
Slide the panel to the rear to disengage the tabs at the top and bottom of the panel.
Figure 6.2-1
Remove X 2
Remove X 2
Summary of Contents for STATCLAVE G4
Page 5: ...5 Diagram of key systems and components...
Page 6: ...6...
Page 17: ...17 Checking package contents...
Page 18: ...18 Positioning a unit Unit dimensions and operating environment...
Page 20: ...20 Direct to drain connection recommended...
Page 21: ...21 Connecting to a waste bottle...
Page 22: ...22 Connecting to the Internet Connecting to a wired network Connecting to a wireless network...
Page 23: ...23...
Page 25: ...25 Connecting an auxiliary pump...
Page 28: ...28...
Page 30: ...30 Starting and stopping a cycle...
Page 50: ...50 Registering for online access...
Page 51: ...51 First start up...
Page 52: ...52...
Page 58: ...58 Draining the unit for cleaning and shipping...
Page 61: ...61 Replacing the bacteriological filter Replacing the door seal...
Page 75: ...75...
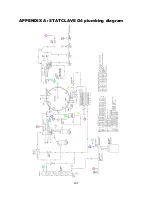
Page 107: ...107 APPENDIX A STATCLAVE G4 plumbing diagram...
Page 108: ...108 APPENDIX B STATCLAVE G4 electrical schematic...

