Page 38
/
7. The Optional Statprinter Cont’d.
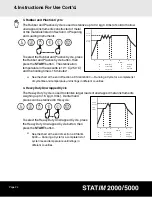
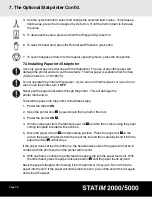
4. Use the cycle buttons to select and change the selected field’s value. To increase a
field’s value, press the Unwrapped Cycle button. Hold the button down to increase
the value.
5. To decrease the value, press and hold the Wrapped Cycle button.
6. To select the next field, press the Rubber and Plastics Cycle button.
7. To save changes and return to the regular operating mode, press the stop button.
7.4 Installing Paper into Statprinter
Use only paper approved for use with the Statprinter. The use of any other paper will
damage the printer and will void the warranty. Thermal paper is available from SciCan
(SciCan order no. 01-101657S).
Do not operate the printer without paper. If you run out of thermal paper, or if you do not
wish to use the printer, turn it
OFF
.
Never pull the paper backwards through the printer. This will damage the
printer mechanism.
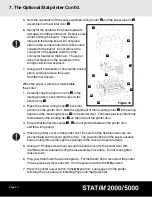
To install the paper into the printer, follow these steps:
1. Power the Statim
ON
.
2. Open the printer door
■
1
by pushing on the top half of the door.
3. Power the printer
ON
■
2
.
4. Unroll some paper from the thermal paper roll
■
3
and trim the corners using the paper
cutting template included with each box.
5. Move the paper roll arm
■
4
into the loading position. Place the paper roll
■
3
on the
arm so the paper strip feeds from the top of the roll and then carefully insert it into the
paper feed slot
■
5
until it stops.
If the paper does not feed from the top, the heat sensitive side of the paper will not be in
contact with the print head and the printer will not print.
6. With one hand, continue to gently feed the paper strip into the paper feed slot. With
the other hand, press the paper advance button
■
6
until the paper feeds by itself.
Keep the paper straight when feeding it into the printer or it may jam. Do not force the
paper into the slot! If the paper will not feed into the slot, pre-cut the end of the roll again
and reload the paper.

