background image

V573_E


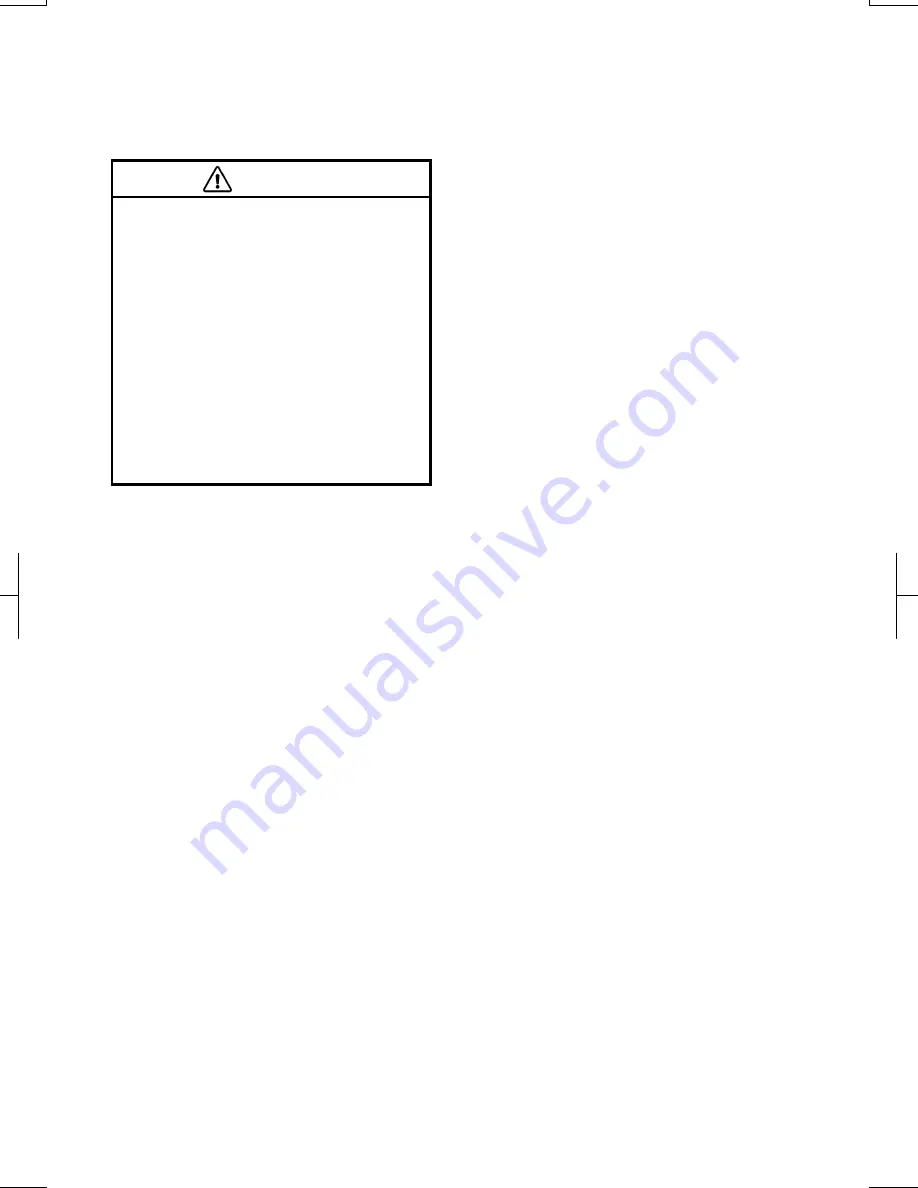
 CAUTION 


For safety, the driver should not 
operate the navigation system 
while he/she is driving. Insuffi-
cient attention to the road and 
traffic may cause an accident. 


While you are driving, be sure to 
obey the traffic regulations and 
maintain awareness of the road 
conditions.  If a traffic sign on 
the road has been changed, route 
guidance may provide wrong in-
formation such as the direction of 
a one way street. 


While driving, listen to the voice instruc-
tions as much as possible and glance at 
the screen briefly and only when it is 
safe.  However, do not totally rely on 
voice guidance.  Use it just for refer-
ence.  If the system cannot determine 
the current vehicle position correctly, 
there is a possibility of incorrect, late, or 
non-voice guidance. 
The data in the system may occasionally 
be incomplete.  Road conditions, in-
cluding driving restrictions (no left turns, 
street closures, etc.) frequently change. 
Therefore, before following any instruc-
tion from the system, look to see whether 
the instruction can be done safely and 
legally.  
This system cannot warn about such 
things as the safety of an area, condition 
of streets, and availability of emergency 
services.  If unsure about the safety of 
an area, do not drive into it.  

Under no 

circumstances is this system a sub-
stitute for the driver’s personal 
judgement. 

Use this system only in locations where it 
is legal to do so. Some states/provinces 
may have laws prohibiting the use of 
video and navigation screens next to the 
driver. 

Summary of Contents for NSDA-W11U

Page 1: ...NSDA W11U...

Page 2: ...n effi cient manner Map database is made based on AISIN AW maps whose information source comes from NAVTEQ maps The calcu lated routes may not be the shortest nor the least traffic congested Your own...

Page 3: ...itations that may affect their ability to perform properly The accuracy of the vehicle s position depends on the satellite condition road configuration vehicle condition or other circum stances For mo...

Page 4: ...ing the destination and if used properly can do so The driver is solely responsible for the safe operation of your vehicle and the safety of your passen gers Do not use any feature of this system to t...

Page 5: ...termine the current vehicle position correctly there is a possibility of incorrect late or non voice guidance The data in the system may occasionally be incomplete Road conditions in cluding driving r...

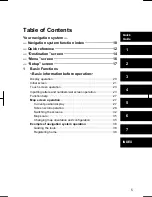
Page 6: ...ay operation 20 Initial screen 21 Touch screen operation 23 Inputting letters and numbers List screen operation 23 Function help 27 Map screen operation 27 Current position display 27 Screen scroll op...

Page 7: ...h by Intersection 58 Destination search by Freeway Ent Exit 59 Destination search by Coordinates 60 Destination search by Phone 60 Starting route guidance 61 3 Route Guidance Route guidance screen 66...

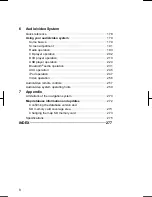
Page 8: ...to avoid 108 Deleting previous points 108 Setup 109 5 Other Functions Maintenance information 120 Maintenance information setting 120 Dealer setting 122 Calendar with memo 124 Adding a memo 126 Editi...

Page 9: ...eration 224 Bluetooth audio operation 231 AUX operation 245 iPod operation 247 Video operation 256 Audio video remote controls 257 Audio video system operating hints 259 7 Appendix Limitations of the...

Page 10: ...9...

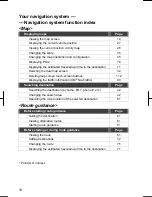
Page 11: ...traffic information XM NavTraffic 90 Searching destination Page Searching the destination by home POI phone etc 42 Changing the search area 42 Operating the map location of the selected destination 6...

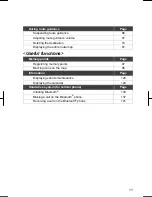
Page 12: ...re route map 81 Useful functions Memory points Page Registering memory points 97 Marking icons on the map 96 Information Page Displaying vehicle maintenance 120 Displaying the calendar 124 Hands free...

Page 13: ...sig nals from the GPS this mark is dis played 270 INFO button Push this button to display the Informa tion screen 120 124 133 174 176 225 234 240 MAP button Push this button to repeat a voice guid anc...

Page 14: ...this touch screen button to obtain a broader view Some of the buttons on the screen are not displayed They reappear by touching the ON 112 Zoom in touch screen button Touch this touch screen button to...

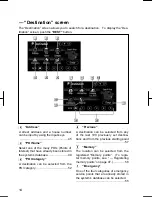
Page 15: ...database 49 POI Category A destination can be selected from the POI category 52 Previous A destination can be selected from any of the last 100 previously set destina tions and from the previous star...

Page 16: ...en button 42 Quick access touch screen but tons One of 5 preset destinations can be se lected by touching the screen directly To use this function it is necessary to set the Quick Access for each memo...

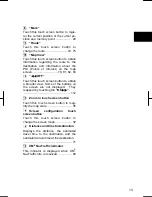
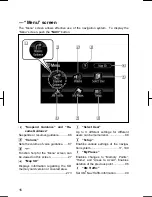
Page 17: ...r the Menu screen can be viewed on this screen 27 Map SD Displays information regarding the SD memory card version or covered area 273 Select User Up to 3 different settings for different users can be...

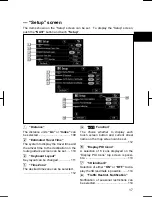
Page 18: ...110 Keyboard Layout Key layout can be changed 111 Time Zone The desired time zone can be selected 112 Function The choice whether to display each touch screen button and current street name on the ma...

Page 19: ...essage Selection of either ON or OFF to display the pop up message is possible 116 Calibration Adjustment of the current vehicle posi tion mark can be done manually or mis calculation by changing tire...

Page 20: ...operation 23 Inputting letters and numbers List screen operation 23 Function help 27 Map screen operation 27 Current position display 27 Screen scroll operation 28 Switching the screens 32 Map scale 3...

Page 21: ...hile it is moving It could damage your navigation system INFORMATION The display can still be opened when tilted When the display is closed it returns to its previous tilted position Vehicles with sma...

Page 22: ...l be dis played and the system will begin operat ing After a few seconds the CAUTION screen will be displayed After about 5 seconds the CAUTION screen automatically switches to the map screen When the...

Page 23: ...again touch Do Not Display This Message Again To register Maintenance information see Maintenance information on page 120 Memo information This system notifies the user about a memo entry At the speci...

Page 24: ...played image may become darker and moving images may be slightly distorted when the display is cold Under extremely cold conditions the map may not be displayed and the data input by a user may be del...

Page 25: ...ain letter entry screens letters can be entered in upper or lower case To enter in upper case To enter in lower case To input numbers and symbols To display the number keys and symbol keys touch 0 9 E...

Page 26: ...e right side of the screen If the number of matching items is more than 9 999 the system displays on the screen List screen operation When a list is displayed use the appro priate touch screen button...

Page 27: ...ation Date To sort in the order of the date Category To sort in the order of the category Icon To sort in the order of the icons Name To sort in the order by name Attribute To sort in the order by at...

Page 28: ...return to this map screen that shows your current position at any time from any screen by pushing the MAP button While driving the current vehicle position mark is fixed on the screen and the map mov...

Page 29: ...ng your actual route and may move off the screen When the MAP button is pushed the current vehicle position mark returns to the cen ter of the screen and the map moves as the vehicle proceeds along th...

Page 30: ...ark When you touch Mark the following screen appears for a few seconds and then the map screen returns The registered point is shown by on the map To change the icon or name etc see Editing memory poi...

Page 31: ...ut an icon set the cursor on it POI INFORMATION When the cursor is set on a POI icon the name and Info are displayed on the top of the screen Touch Info Information such as the name address position a...

Page 32: ...on page 78 MEMORY POINT INFORMATION When the cursor is set on a memory point icon the name and Info are displayed on the top of the screen Touch Info Information such as the name address position and...

Page 33: ...e address position and phone number are dis played To delete a destination touch Delete If is touched the registered tele phone number can be called Any one of the screen configurations can be selecte...

Page 34: ...screen See page 34 To display the turn list screen See page 68 To display the arrow screen See page 68 To display the freeway informa tion screen See page 66 To display the intersection guid ance scre...

Page 35: ...when you complete edit ing The screen returns to the dual map screen COMPASS MODE Current vehicle position is indicated with a compass not with a map While on a different screen touching will display...

Page 36: ...the scale bar di rectly It is not available while driving The map scale is displayed under the North up symbol or Heading up symbol at the top left of the screen INFORMATION When the map scale is at t...

Page 37: ...arrow indicates North 2 5D map symbol The screen appears in 2 5D Heading up orientation Guidance to a destination occurs by specifying the destination using the POI Name 1 Push the DEST button 2 Touch...

Page 38: ...Even if the entered name is incomplete touching List displays the list 4 Select the destination from the displayed list 5 Touch Enter The system starts route search and dis plays recommended routes 6...

Page 39: ...Places 3 Touch Register 4 Touch Address 5 Enter the street name Every touch on a letter key narrows the selection Letters that cannot be selected in the database are dimmed out When there are four or...

Page 40: ...t screen changes to the city list screen Select the city name 8 Touch Enter Registration of home is complete and the Memory Point screen is displayed Registered Home information will be displayed The...

Page 41: ...BASIC FUNCTION 40...

Page 42: ...45 Destination search by POI Name 49 Destination search by POI Category 52 Destination search by Emergency 55 Destination search by Memory 56 Destination search by Previous 57 Destination search by M...

Page 43: ...SELECTING THE SEARCH AREA ON THE DESTINATION SCREEN 1 Push the DEST button 2 Touch Change on the Destina tion screen to display a map of the United States and Canada divided into 14 areas For map dat...

Page 44: ...p database information and updates on page 272 2 Touch one of US1 through PR to select a search area 3 Touch OK and the previous screen returns U S A Button States included in the search area US1 Idah...

Page 45: ...d regions included in the search area CAN All provinces and re gions in Canada in cluded in this button 1 Push the DEST button 2 Touch the home touch screen button on the Destination screen The screen...

Page 46: ...e quick access point and route preference See Starting route guidance on page 61 To use this function it is necessary to set Quick Access for each memory point To register Quick Access see page 100 Th...

Page 47: ...estination and the route preference See Starting route guidance on page 61 3 Input the house number If the house number list screen appears an address range on that screen can be selected If the same...

Page 48: ...cel the city setting touch Any City INPUTTING THE CITY NAME 1 Touch Input City Name 2 Input the city name 3 Touch the touch screen button of the desired city name from the dis played list Map To displ...

Page 49: ...name the screen may change to the screen for inputting a house number or a street map SELECTING FROM THE LAST 5 CITIES Touch the touch screen button of the desired city name If the navigation has neve...

Page 50: ...When inputting the name of a specific Point of Interest and there are two or more sites with the same name the list screen is displayed Touch the touch screen button of the desired destination If the...

Page 51: ...he city name 2 Select from the nearest 5 cities 3 Select from the last 5 cities INFORMATION To change the search area touch Search Area To cancel the city setting touch Any City INPUTTING THE CITY NAM...

Page 52: ...IES 1 Touch Nearest 5 Cities 2 Touch the touch screen button of the desired city name SELECTING FROM THE LAST 5 CITIES Touch the touch screen button of the desired city name If the navigation has neve...

Page 53: ...name input screen is displayed The destination can be set by selecting the search point and the POI category 1 Push the DEST button 2 Touch POI Category on the Destination screen 3 Set the search poi...

Page 54: ...er The search point is set and the POI Category screen will be displayed SETTING THE CURRENT POSITION AS THE SEARCH POINT Touch Current Position The search point is set at the current position and the...

Page 55: ...and the POI Category screen will be displayed To search POIs near the search point When the search point is set the POI Category screen will be displayed Select the desired POI categories List If the...

Page 56: ...the search point On Route When the indicator is illu minated by touching this touch screen button the list of the items searched along the route is displayed 1 Push the DEST button 2 Touch Emergency...

Page 57: ...ide in areas where route guidance is unavailable See page 271 1 Push the DEST button 2 Touch Memory on the Destina tion screen To displays your list of registered mem ory points To register or edit me...

Page 58: ...ed destination and the route preference See Start ing route guidance on page 61 INFORMATION The list of previous destinations can be deleted See Deleting pre vious points on page 108 1 Push the DEST b...

Page 59: ...wo intersecting streets the screen changes and displays the map location of the selected destina tion and the route preference See Starting route guidance on page 61 If the same two streets cross at m...

Page 60: ...tion before the number i e CA 118 3 Select the desired freeway by touching the touch screen button 4 Either a freeway Entrance or Exit can be selected 5 Touch the touch screen button of the desired en...

Page 61: ...61 1 Push the DEST button 2 Touch Phone on the second page of the Destination screen 3 Input a telephone number 4 After inputting a telephone num ber touch OK The screen changes and displays the map l...

Page 62: ...destination Add to and Replace are dis played Add to To add a destination Replace To delete the existing destinations and set a new one Route Preference To change the route preference See page 62 Info...

Page 63: ...you se lected is set as the destination CAUTION Be sure to obey traffic regulations and keep road conditions in mind while driving If a traffic sign on the road has been changed the route guidance may...

Page 64: ...te This route is indicated by an orange line Quick2 Alternative route This route is indicated by a purple line Short A route by which you can reach the destination in the shortest distance This route...

Page 65: ...DESTINATION SEARCH 64...

Page 66: ...ion 71 Setting and deleting destination 72 Adding destinations 72 Reordering destinations 73 Deleting destinations 74 Setting route 75 Search condition 75 Detour setting 76 Route preference 77 Startin...

Page 67: ...road that should not be traveled on When you arrive at your destina tion the destination name will be displayed on the top of the screen Touching OFF clears the display During freeway driving During...

Page 68: ...ion OFF Turns off freeway exit or junction guidance screen To view this screen again push the MAP button or touch the screen con figuration button When approaching an intersec tion When the vehicle ap...

Page 69: ...Next street name or destination name Turn direction Distance to the next turn Current street name ARROW SCREEN On this screen information about next turns on the guidance route can be viewed Touching...

Page 70: ...ight turn Next right INFORMATION On freeways interstates or other highways with higher speed limits the voice guidance will be made at earlier points than on city streets in order to allow time to man...

Page 71: ...s the approach to the final destination In a quarter of a mile your des tination is ahead Your destination is ahead your route guidance is now finished INFORMATION If the system cannot determine the c...

Page 72: ...n The distance the estimated travel time and the estimated arrival time from the current position to the selected destina tion are displayed Estimated travel time is dis played Estimated arrival time...

Page 73: ...Touch Route 2 Touch Add of Destination 3 Input an additional destination in the same way as the destination input See Destination search on page 42 4 Touch the desired Add to de termine the arrival or...

Page 74: ...button Reordered number of arrival is displayed on the right side of the screen Touching Undo will cancel each se lected order number from the previously input number 4 After selecting the destinatio...

Page 75: ...te All To delete all destinations on the list A message appears to confirm the re quest to delete 4 To delete the destination s touch Yes If Yes is touched the data cannot be recovered If No is touche...

Page 76: ...e destination 1 Touch Route 2 Touch Search Condition 3 Touch Quick Quick1 Quick2 or Short and touch OK The entire route from the starting point to the destination is displayed Guide To start guidance...

Page 77: ...the desired detour distance 1 mile km 3 miles km or 5 miles km Touch one of these touch screen buttons to start the detour proc ess After detouring the system returns to the original guidance route Wh...

Page 78: ...system may not be able to calculate a detour route depend ing on the selected distance and surrounding road conditions A number of choices are provided on the conditions which the system uses to de t...

Page 79: ...ot be displayed Points of Interest such as gas stations and restaurants can be displayed on the map screen You can also set their location as a destination and use them for route guidance 1 Touch Map...

Page 80: ...the complete POI listing screen Local POI List When searching for the nearest Point of Interest touch this touch screen button The system will list the points within 20 miles 32 km See page 80 Touch O...

Page 81: ...touch More To display the local POI list Points of Interest that are within 20 miles 32 km of the current position will be listed from among the selected catego ries 1 Touch Local POI List on the Disp...

Page 82: ...on the screen The distance shown is measured as a straight line from the current vehicle position to the POI 2 When the desired Point of Interest overlaps with the cursor touch Enter The screen change...

Page 83: ...runs through two or more cit ies the name change will not appear on the list The street names will be dis played in order from the starting point along with the distance to the next turn These marks...

Page 84: ...vious destination or starting point To review the route to the pre vious destination or starting point in fast forward mode To indicate the previous desti nation or starting point It is possible to s...

Page 85: ...route trace Stop To stop recording the route trace If you touch Stop the following screen will be displayed Touching Yes stops recording and the route trace remains displayed on the screen Touching N...

Page 86: ...uming guidance 86 Volume 87 User selection 88 XM NavTraffic 90 My Places 96 Registering memory points 97 Editing memory points 98 Deleting memory points 102 Registering home 103 Deleting home 104 Regi...

Page 87: ...ithout route guidance the Sus pend Guidance cannot be used The screen will return to the current posi tion map without route guidance To resume guidance 1 Push the NAVI button 2 Touch Resume Guidance...

Page 88: ...e When selected the number or OFF will be highlighted 3 Touch OK to confirm your se lection INFORMATION During route guidance the voice guidance continues even if the navigation screen is changed to o...

Page 89: ...f dual map Route preference Maintenance notification XM NavTraffic 1 Push the NAVI button 2 Touch Select User To register 1 Touch Memorize The confirmation screen will be dis played 2 To register touc...

Page 90: ...e user Touch User number The above message appears then the map screen will be displayed To delete user 1 Touch Delete The confirmation screen will be dis played 2 To delete touch Yes To re turn to th...

Page 91: ...te the service To activate the service an extra fee is required in addition to subscription fees for the XM Satel lite Radio For details about service and activation call XM Listener Care Center at 1...

Page 92: ...een Freely flowing traffic Orange Controlled traffic Black Closed road XM NavTraffic indicator When any XM NavTraffic information has been received the XM NavTraffic indicator will appear on the scree...

Page 93: ...he NAVI button to display the Menu screen and touch XM Traffic 2 Touch Auto Avoid Traffic INFORMATION Due to the dynamic nature of traf fic events traffic information from the XM NavTraffic may not ma...

Page 94: ...INFORMATION When the Traffic Information indi cator is dimmed Auto Avoid Traf fic and Voice Guidance will not operate d XM NavTraffic text information When you touch the XM NavTraffic icon on the map...

Page 95: ...raffic information is dis played on the screen To show the map or detailed information touch Map or Detail This Detail function is not available while driving MAP The map around the traffic event is d...

Page 96: ...raffic Events to dis play the All Traffic Events screen This All Traffic Events function is not available while driving 3 Touch the desired road name from the list 4 All XM NavTraffic information is d...

Page 97: ...rformed Registers memory points See Registering memory points on page 97 Edits memory points See Editing memory points on page 98 Deletes memory points See Deleting memory points on page 102 Registers...

Page 98: ...the same way as for a destination search See Destination search on page 42 After memory point registration is com pleted the Memory Point screen will be displayed 5 Touch OK To edit registered inform...

Page 99: ...e touch screen button to be edited Icon To select icons to be displayed on the map See page 99 Quick Access To set an attribute Memory points with a set attribute can be used as a Quick Access or Home...

Page 100: ...NS When the vehicle approaches the mem ory point the selected sound will be heard 1 Touch with Sound on the Change Icon screen 2 Touch the desired sound icon The next screen appears when Bell with Dir...

Page 101: ...page 44 and Destination search by Quick access on page 45 1 Touch Quick Access on the Memory Point screen 2 Touch the desired attribute It is possible to replace a registered at tribute 3 To replace t...

Page 102: ...ayed DISPLAYING MEMORY POINT NAMES The name of a memory point that may be displayed on the map can be set To show the name touch ON on the Memory Point screen To not show it touch OFF To change Locati...

Page 103: ...ral keys 3 Touch OK The previous screen will be displayed 1 Push the NAVI button 2 Touch My Places on the Menu screen 3 Touch Delete 4 Touch the touch screen button to be deleted Delete All To delete...

Page 104: ...by Home on page 44 1 Push the NAVI button 2 Touch My Places on the Menu screen 3 Touch Register 4 Enter the location in the same way as for a destination search See Destination search on page 42 When...

Page 105: ...nt to avoid because of traf fic jams construction work or other rea sons can be registered as areas to avoid 1 Push the NAVI button 2 Touch My Places on the Menu screen 3 Touch Register 4 Enter the lo...

Page 106: ...ng through the area to avoid a route passing through the area to be avoided may be shown Up to 10 locations can be regis tered as points areas to avoid If there are 10 locations already registered the...

Page 107: ...feature touch ON on the Edit Area to Avoid screen To turn off the feature touch OFF on the Edit Area to Avoid screen 6 Touch OK To change Name 1 Touch Name on the Edit Area to Avoid screen 2 Enter the...

Page 108: ...ctional touch screen button to move the cursor to the desired point on the map 3 Touch Enter The previous screen will be displayed To change Area Size 1 Touch Area Size on the Edit Area to Avoid scree...

Page 109: ...5 To delete the area touch Yes To cancel the deletion touch No The previous destination can be deleted 1 Push the NAVI button 2 Touch My Places on the Menu screen 3 Touch Delete Previous Points 4 Tou...

Page 110: ...be displayed INFORMATION To reset all setup items touch De fault Distance unit Distance unit can be changed 1 Push the NAVI button 2 Touch Setup on the Menu screen 3 Touch km or miles of Dis tance to...

Page 111: ...Main street and Freeway To set the default speeds touch De fault 5 After setting of the desired speeds is completed touch OK INFORMATION The displayed time to the destina tion is the approximate drivi...

Page 112: ...ayout Keyboard layout can be changed 1 Push the NAVI button 2 Touch Setup on the Menu screen 3 Touch ABC or QWE of Key board Layout to choose the key board layout LAYOUT TYPE ABC type QWE type The sel...

Page 113: ...aylight Saving Time Daylight sav ing time can be set or cancelled To set daylight saving time touch ON and to cancel it touch OFF 5 Touch OK Screen layout function Function Each touch screen button an...

Page 114: ...etting of the icons to be displayed on the map screen can be done easily 1 Push the NAVI button 2 Touch Setup on the Menu screen Then touch to display page 2 of the Setup screen 3 Touch Change of Disp...

Page 115: ...n 3 Touch ON of 3D landmark The selected button is highlighted 4 Touch OK Notifying traffic restriction When the Traffic Restrict Notification feature is turned on the system notifies you of traffic o...

Page 116: ...h to display page 2 of the Setup screen 3 Touch ON of Voice Guidance in All Modes The selected button is highlighted 4 Touch OK Auto voice guidance When the Auto Voice Guidance feature is turned on th...

Page 117: ...n Then touch twice to display page 3 of the Setup screen 3 Touch ON of Pop up Mes sage The selected button is highlighted 4 Touch OK When the Pop up Message is turned off the following messages will n...

Page 118: ...Touch the desired touch screen button INFORMATION For additional information on the accuracy of a current vehicle posi tion see Limitations of the naviga tion system on page 270 POSITION DIRECTION CA...

Page 119: ...s function will adjust the miscalculation caused by the circumference difference between the old and new tires If this procedure is not performed when the tires are replaced the current vehicle positi...

Page 120: ...126 Editing a memo 127 Memo list 127 Hands free system for cellular phone 129 Register a Bluetooth phone 133 Call on the Bluetooth phone 137 Receive on the Bluetooth phone 141 Talk on the Bluetooth p...

Page 121: ...All To cancel all conditions which have been inputted Reset All To reset the item which has satisfied a condition Set Dealer To register or edit dealer information See Dealer setting on page 122 If O...

Page 122: ...an be created separately from provided ones 4 Input the conditions Notice of Date The next maintenance date can be input Notice of Distance The driving dis tance until the next maintenance check can b...

Page 123: ...for a destination search See Destination search on page 42 When Set Dealer registration is finished the Edit Dealer screen will be dis played 5 Touch the touch screen button to be edited Dealer To en...

Page 124: ...g the alpha numeric keys Up to 24 letters can be entered 3 Touch OK The previous screen will be displayed To edit Location 1 Touch Location on the Edit Dealer screen 2 Touch the eight directional touc...

Page 125: ...screen will be displayed It is possible to enter memos for particu lar dates on the calendar The system informs you of the memo entry when the system is turned on See page 22 Memos can also be used f...

Page 126: ...mo screen Memos can be edited by touching the list button See Editing a memo on page 127 Add Memo To add a memo See Adding a memo on page 126 Mark To change the color of the mark displayed next to the...

Page 127: ...dd a memo on the Calendar screen 4 Touch Add Memo Up to 100 memos can be added 5 Touch Memo 6 Enter text using the keys Up to 24 letters can be entered After entering the text touch OK at the bottom r...

Page 128: ...See Starting route guidance on page 61 Delete To delete the memo It is possible to display a memo list by setting a condition 1 Push the INFO button 2 Touch Calendar on the Infor mation screen 3 Touch...

Page 129: ...played 6 To delete touch Yes To cancel the deletion touch No To display memos for a specified period of time 1 Touch Period on the Memo Search screen 2 Enter the period using the nu meral keys The per...

Page 130: ...ar phone in the car The temperature indoor may be high and damage the phone INFORMATION In the following conditions the system may not function The cellular phone is turned off The current position is...

Page 131: ...ther party Driving on unpaved road Mak ing a traffic noise Driving at the high speed The window is open Turning the air conditioning vents towards the microphone The sound of the air conditioning fan...

Page 132: ...he display behind the seat or in the glove box or console box Your cellular phone touches or is covered with metal materials Your cellular phone is in the trunk Leave the Bluetooth phone in a place wh...

Page 133: ...d to provide reasonable protection against harmful interference in a residential installation This equipment generates uses and can radiate radio frequency energy and if not installed and used in acco...

Page 134: ...at least 20 cm and more between the radiator and person s body ex cluding extremities hands wrists feet and legs Co location This transmitter must not be co located or operated in conjunc tion with a...

Page 135: ...into the phone For the operation of the phone see the manual that comes with your cellular phone If you want to cancel it touch Cancel 7 When the connection is com pleted this screen is displayed You...

Page 136: ...n the ACCESSORY or IGNITION ON mode the selected Bluetooth phone will be automati cally connected and the connection result is displayed This screen appears when the Blue tooth phone is first connecte...

Page 137: ...tooth phone In this case the connection result is not displayed If the Bluetooth is disconnected on pur pose such as you turned your cellular phone off this does not happen Re connect it by the follow...

Page 138: ...ch time you touch an inputted digit is deleted When you touch the number you called last is inputted Touch the off hook button on the screen By phone book You can call by phone book data which is tran...

Page 139: ...ldest number is deleted This cannot be operated while driving 1 Touch Call Log to display the Outgoing Calls screen When you call by phone book the name if registered is displayed When you call the sa...

Page 140: ...d in the phone book is received the name and the number are dis played Received calls which you did not answer are also memorized in the system and Abs is displayed on the left side of the number Rece...

Page 141: ...dial 1 Touch Speed Dial to display the Speed Dial screen 2 Touch the desired number to call You can change the page by touching Speed Dial 2 or Speed Dial 3 When you push the telephone button while d...

Page 142: ...below on the screen To adjust the volume of the other party s voice Touch or or use the vol ume switch of the steering wheel To hang up the phone Touch the on hook button on the screen To mute your v...

Page 143: ...on the screen and touch Send The num ber before marked sign will be sent When you touch Exit this function will be finished and normal tone screen ap pears To hang up the phone Touch the on hook butto...

Page 144: ...tone For registering the speed tone see b Registering the speed tone on page 146 1 Touch Speed Tone 2 Touch the desired touch screen button to send a tone Touch Settings to display the Set tings scree...

Page 145: ...redial ing 1 Touch Speed Dial to display the Speed Dial Settings screen 2 Touch Register of Speed Dial 3 Select the data you want to regis ter 4 Touch the desired telephone number 5 Touch the touch s...

Page 146: ...ete 01 17 of the speed dial individually If you delete them all at once all of 17 numbers are deleted 1 Touch Delete of Speed Dial 2 Touch the touch screen button you want to delete 3 Touch Yes Deleti...

Page 147: ...in put the name 3 Input the number and touch OK 4 Touch the desired touch screen button you want to register in If you select a touch screen button you registered before this screen is displayed 5 Tou...

Page 148: ...NS 147 Editing the speed tone You can edit the speed tone 1 Touch Edit of Speed Tone 2 Touch the touch screen button you want to edit 3 Use the software keyboard to in put the name 4 Input the number...

Page 149: ...can delete 1 to 6 of the speed tone If you delete them all at once all of 6 numbers are deleted 1 Touch Delete of Speed Tone 2 Touch the touch screen button you want to delete 3 Touch Yes Deleting al...

Page 150: ...Ring Volume Voice Volume Adjusting the other party s voice Ring Volume Adjusting the ring volume Automatic volume settings for high speed You can set the volume one step up when the speed is over 50 m...

Page 151: ...S 150 Initializing the settings You can initialize the settings Touch Default Touch Yes d Setting the screen 1 Touch Screen to display the Screen Settings screen 2 Do the detail settings of the screen...

Page 152: ...is displayed and you can operate it on the screen Icon mode The message is dis played on the screen Auto answer When a call is received the display automatically changes to the talking screen and you...

Page 153: ...nnected the connection check is displayed Vehicles without smart entry and start system When the engine switch is in ACC or ON position and the Bluetooth is automatically connected the connec tion che...

Page 154: ...tings of phone book Transferring a telephone number You can transfer the telephone num bers in your Bluetooth phone to the system Up to 1000 person s data up to 2 numbers a person can be registered in...

Page 155: ...can be memorized in the system 5 When this screen is displayed the transfer is completed When this screen is displayed try the transfer operation again If the number of people to be registered exceeds...

Page 156: ...displayed 1 Touch Name 2 Use the software keyboard to in put the name Editing the phone number You can register the phone number in TEL1 and TEL2 separately Up to 2 numbers a person can be regis tere...

Page 157: ...when needed by using the group display You can select No group or Group 01 to Group 19 No group is displayed if you don t set the group 1 Touch Group 2 Select the desired group Adding the data to the...

Page 158: ...ting the data You can edit the registered data 1 Touch Edit 2 Select the data you want to edit 3 Touch the desired touch screen button When you edit the data touch OK When you also touch Edit on this...

Page 159: ...he data When you release your car delete all your data on the system 1 Touch Delete of Phone Book 2 Touch the desired touch screen button 3 Touch Yes You can also delete it in the following way 1 Touc...

Page 160: ...all the phone data 1 Touch Delete All of Phone Book 2 Select the deleting method Group Data Deleting all the phone data in group All Contact Data Deleting all the phone data 3 When you select Group Da...

Page 161: ...OTHER FUNCTIONS 160 4 Select the desired group 5 Touch Yes You can also delete it in the following way 1 Touch Phone Book 2 Touch Delete All 3 Touch Yes...

Page 162: ...roup Group 01 Group 19 is registered by default You can change Group 01 Group 19 into desired names 1 Touch Register of Group Name 2 Select the group you want to reg ister 3 When you complete all the...

Page 163: ...o in put the name Deleting a group name You can delete the group names indi vidually or all at once If you delete a group name that group will return to the default setting excluding No group 1 Touch...

Page 164: ...1 Touch Delete All of Group Name 2 Touch Yes Deleting the log data You can delete the log data individu ally or all at once When you release your car delete all the data on the system INDIVIDUALLY 1...

Page 165: ...the security you can prevent people from using some functions of the hands free system It is useful when you leave your car with the hotel or you don t want others to see the data you registered When...

Page 166: ...cannot unlock the security when you forget it If you forget the security code initialize your personal data When you initialize it not only the phone book data but also the memory points in the navig...

Page 167: ...screen regis tering deleting the speed dial and speed dialing Display of the other party s name for calls being received or made Display of dialed numbers screen and received calls screen deleting dia...

Page 168: ...2 Input the security code and touch OK 3 Touch Yes Selecting a Bluetooth phone In case you register more than one Bluetooth phone you need to choose a favorite one 1 Touch Settings to display the Sett...

Page 169: ...ne yet Bluetooth mark is displayed when you choose the phone Although you can register up to 6 Blue tooth phones in the system only one Bluetooth phone can function at a time 3 Touch OK When the resul...

Page 170: ...Name The name of Bluetooth phone which is displayed on the screen You can change it into a desired name Bluetooth Device Address The address peculiar to the system You cannot change it 1 Select the d...

Page 171: ...settings of Bluetooth information on the system The information displays the following items Device Name The name in the Bluetooth network You can change it Passcode The password when you regis ter yo...

Page 172: ...1 Touch Bluetooth 2 Touch Change of Device Name or Passcode Bluetooth is a registered trademark of Bluetooth SIG Inc 3 Use the software keyboard to in put the device name You can input up to 20 charac...

Page 173: ...ngs You can initialize the settings 1 Touch Default 2 Touch Yes Deleting a Bluetooth phone 1 Touch Delete of Bluetooth Telephone 2 Select the telephone you want to delete and touch OK 3 Touch Yes Blue...

Page 174: ...want to display the information about 2 When you complete confirming it touch The brightness and the contrast of the screen can be adjusted depending on the brightness of your surroundings You can al...

Page 175: ...a function that enables automatic return to the navigation screen from the audio screen Select Navi or Audio and then touch OK Navi The navigation screen auto matically returns from the audio screen 2...

Page 176: ...en touch OK You can select the desired beep sound type by touching the appropriate number If no beep sound is needed touch OFF to disable the feature When selected the number or OFF will be highlighte...

Page 177: ...n returns to the map display A commercially available rear view camera can be used by connecting it to the RCA Relay Cable s RCA termi nals For further information and operation procedures refer to th...

Page 178: ...tem 179 Some basics 179 Screen adjustment 191 Radio operation 193 CD player operation 202 DVD player operation 210 USB player operation 224 Bluetooth audio operation 231 AUX operation 245 iPod operati...

Page 179: ...gle of the display and eject discs For details see page 180 VOL button Push S or T button of VOL to adjust the volume For details see page 180 AV button Push this button to display the AV Menu screen...

Page 180: ...es or modifications in con struction not expressly approved by AISIN AW Co Ltd for compli ance could void the user s au thority to operate the equipment Radio frequency exposure This device is approve...

Page 181: ...OFF to turn off the power Adjusting the volume Push S or T button of VOL to adjust the volume Inserting or ejecting disc Vehicles with smart entry and start sys tem The ENGINE START STOP switch must...

Page 182: ...tween functions 1 Push the AV button 2 Touch the desired mode touch screen button Touch these touch screen buttons if you want to switch from one mode to an other Changing modes to Satellite Radio Blu...

Page 183: ...AUDIO to display the respective audio mode operation screen You can turn off the CD DVD player by ejecting the disc If the audio video system was previously off then the en tire audio video system wil...

Page 184: ...AUDIO VIDEO SYSTEM 183 DVD mode Bluetooth audio mode AUX mode iPod mode USB mode Video mode...

Page 185: ...system does not respond to a touch of a touch screen button move your finger away from the screen and then touch it again You cannot operate dimmed touch screen buttons Wipe off fingerprints on the s...

Page 186: ...er s ear from each speaker to be adjusted See page 188 FAD BAL Allows the front rear left and right volume balance to be adjusted See page 189 Sub Woofer Allows the subwoofer output level and phase co...

Page 187: ...vel of the band 4 Touch the Q curve switch to ad just the Q curve bandwidth The Q curve can be adjusted to three phases Widens the Q curve bandwidth Narrows the Q curve bandwidth 5 Repeat steps 1 to 4...

Page 188: ...powerful energetic live sound Feel Player s sound reproduces the sound on the stage that musicians hear For more details please visit the SCION Web site at http www scion com 1 Touch SSP to display th...

Page 189: ...Vol 1 to Auto Vol 5 Touch Off to clear the settings Touch when settings are complete Sound travel time adjustment Focus It is possible to offset the variations in sound travel time that occur due to d...

Page 190: ...oint Touch or to make fine adjustments Touch Reset to clear the setting Subwoofer settings The preferred output level for the audio when a subwoofer is connected can be set 1 Touch Sub Woofer to displ...

Page 191: ...LCD Monitor can be used by con necting it to the RCA Relay cable s RCA terminals For further information and operation procedures refer to the device s manual This product incorporates copyright prot...

Page 192: ...Y 3 Select the desired button to ad just brightness and contrast Brightness brightens Brightens the screen Brightness darkens Darkens the screen Contrast strengthens Strengthens the contrast of the sc...

Page 193: ...OK The screen goes off when Screen Off is touched To turn the display screen back on push any button such as AV etc The selected screen appears INFORMATION When you do not touch any touch screen butt...

Page 194: ...broadcasts which means reception is still possible in regions with no digital coverage HD Radio Technology Manufactured Under License From iBiquity Digital Corporation U S and Foreign Patents HD Radi...

Page 195: ...dio will find the next station and stay there for a few seconds and then scan again To select a station touch SCAN again To scan the preset stations Touch P SCAN on the screen The radio will tune in t...

Page 196: ...one The Tag data will then automatically be erased from the vehicle s audio system When the recorded Tag data on the iPod or iPhone is synced with a computer the tagged songs will appear in a Tagged p...

Page 197: ...ailability and content of the satellite radio services provided which are subject to the terms and conditions of the XM Satellite Radio customer service agreement Customers should have their radio ID...

Page 198: ...o 1 Push the AV button 2 Touch SAT Push the AV button and touch AUDIO to display the satellite radio operation screen Changing the band The band changes each time SAT2 SAT3 and SAT1 is touched The ban...

Page 199: ...ons and hold it until a beep is heard This sets the channel to the touch screen button and the name and number of the channel appears on the touch screen button Each touch screen button can store thre...

Page 200: ...TRACK TUNE the radio will begin seeking up or down for the next receiv able channel and will stop when the but ton is released Touch either CAT SEEK or CAT SEEK The radio will step up or down the cha...

Page 201: ...ot authorized Wait for about 2 seconds until the radio returns to the previous channel or CH001 If it does not change automatically select another channel If you want to listen to the premium channel...

Page 202: ...vision reception which can be determined by turning the equipment off and on the user is encouraged to try to cor rect the interference by one or more of the following measures Reorient or relocate th...

Page 203: ...CD CD text 203 MP3 WMA disc 205 For appropriate discs for this player see Audio video system operating hints on page 259 a Playing a disc Push the AV button and touch Disc if an audio CD or MP3 WMA di...

Page 204: ...desired track Push the S or T button of TRACK TUNE until the desired track number appears on the screen As you release the button the player will start playing the selected track from the be ginning F...

Page 205: ...it for automatic repeat of the track you are currently listening to While the track is playing touch REPEAT briefly When the track is finished the player will automatically go back to the beginning o...

Page 206: ...ch LIST The folder list is dis played Touch the desired folder number The player will start playing the first file of the selected folder By touching this touch screen button the list moves up by 5 fo...

Page 207: ...the player will start playing the selected file from the beginning Fast forward Push the S button of TRACK TUNE and hold it to fast for ward the disc When you release the button the player will resume...

Page 208: ...ist moves down by 5 file groups If this touch screen button is touched when the last page of the list is displayed the top page is displayed Folder The folder list is displayed Searching for a desired...

Page 209: ...is displayed REPEAT Use it for automatic repeat of the file or folder you are currently lis tening to Repeating a file While the file is playing touch REPEAT briefly RPT appears on the screen When the...

Page 210: ...r malfunctions your audio system will display following messages If Check Disc appears on the dis play There is no disc in the player the disc is dirty damaged or inserted upside down or the disc is n...

Page 211: ...o disc information on page 222 Precautions on DVD video disc When recording with a DVD video audio tracks may not record in some cases while the menu is displayed As audio will not play in this case v...

Page 212: ...m from the menu recorded on the disc is selected Description of DVD controls See page 212 Displaying DVD controls If you touch a part of the screen while watching video DVD controls will ap pear Page...

Page 213: ...o appears For the operation see the manual that come with the DVD video disc provided separately Subtitle The subtitle changing screen appears See page 215 Audio The audio changing screen appears See...

Page 214: ...g on the disc Furthermore discs are played based on the disc content and therefore there may be times when the selected operation does not function as expected 2 Touch Page 2 3 Touch 4 Touch or to sel...

Page 215: ...ton of TRACK TUNE you can select a chap ter SEARCHING BY TITLE NUMBER 1 Touch Search 2 Touch 10 or 10 and input the title number When you touch the previous screen returns 3 Touch Enter Playback is co...

Page 216: ...itle language Each time you touch Subtitle the language is selected from the ones stored in the discs and changed Changing the audio language Each time you touch Audio the lan guage is selected from t...

Page 217: ...mode optional screen 3 Touch Normal Wide or Zoom Normal Displays the 3 H 4 W screen with the remaining area at both edges in black Wide Displays the 3 H 4 W screen with the screen widened left and rig...

Page 218: ...ted by copyright laws and therefore care should be exercised Default setting 1 Touch Setup 2 Touch Default Setting to display the Default setting screen The initial setting can be changed After you ch...

Page 219: ...nguage on the DVD video menu 1 Touch Menu Lang 2 Touch the language you want to read on the Select menu language screen If you cannot find the language you want to read on this screen touch Other and...

Page 220: ...NOTICE There are no issues regarding the viewing of visual material in wide screen format provided that it is for personal use However compress ing or enlarging the screen for commercial purposes or...

Page 221: ...520 Estonian 0521 Basque 0601 Persian 0609 Finnish 0610 Fiji 0615 Faroese 0625 Frisian 0701 Irish 0704 Scots Gaelic 0712 Galician 0714 Guarani 0721 Gujarati 0801 Hausa 0809 Hindi 0818 Croatian 0821 Hu...

Page 222: ...i 1815 Romanian 1823 Kinyarwanda 1901 Sanskrit 1904 Sindhi 1907 Sangho 1908 Serbo Croatian 1909 Sinhalese 1911 Slovak 1912 Slovenian 1913 Samoan 1914 Shona 1915 Somali 1917 Albanian 1918 Serbian 1919...

Page 223: ...here is a problem inside the system Eject the disc It indicates that the inside of the player unit may be too hot due to a high ambient temperature Re move the disc from the player and allow the playe...

Page 224: ...by digital which enables higher qual ity of sound Furthermore multi angle and multi language features will also help you enjoy the more advanced technology of DVD video Viewer restrictions This featur...

Page 225: ...blished works 1992 1997 Dolby Laboratories All rights reserved This product incorporates copyright protection technology that is pro tected by U S patents and other in tellectual property rights Use o...

Page 226: ...high temperatures inside the ve hicle may damage the USB mem ory device Do not push down on or apply unnecessary pressure to the USB memory device while it is con nected as this may damage the USB mem...

Page 227: ...Push the AV button and touch USB if a USB memory device is al ready loaded in the USB player The USB memory device will start play back c Operating a USB memory device Playing a USB memory device Push...

Page 228: ...list moves down by 5 folder groups If this touch screen button is touched when the last page of the list is displayed the top page is displayed File The file list is displayed Selecting a desired fil...

Page 229: ...nning By touching this touch screen button the list moves up by 5 file groups If this touch screen button is touched when the top page of the list is displayed the last page is displayed By touching t...

Page 230: ...reaches the end of the folder it will continue scan ning from file 1 After all the files are scanned in one pass normal play resumes Searching for a desired folder While the USB memory device is playi...

Page 231: ...d the USB player will automatically go back to the beginning of the folder and play the folder again To cancel it touch REPEAT once again RANDOM Use it for automatic and random selection of the folder...

Page 232: ...that the USB memory device has no playable data If the malfunction is not rectified Take your vehicle to your dealer The Bluetooth audio system enables users to enjoy music played on a portable playe...

Page 233: ...ayer is turned off The portable player is not con nected The portable player has a low battery Depending on the portable player that is connected to the system certain functions may not be available I...

Page 234: ...ve a charging function The Bluetooth connection utilizes the Bluetooth antenna The indica tion of the Bluetooth connection may turn yellow and the system may not function when you use the Bluetooth po...

Page 235: ...e refer to the manual that comes with your portable player for operation of the portable player 1 Push the INFO button 2 Touch BT Audio Settings to display the BT Audio Settings screen 3 Touch Registe...

Page 236: ...register the portable player in the vehi cle s audio system You can cre ate a password of your choice See Change the Bluetooth au dio settings on page 240 For portable players lacking passcode entry c...

Page 237: ...connected and the connection result is displayed This screen appears when the Blue tooth portable player is first connected after the ENGINE START STOP switch is turned to the ACCESSORY or IGNITION ON...

Page 238: ...the Bluetooth audio system is dis connected with a poor reception from the Bluetooth network when the ENGINE START STOP switch is in the ACCESSORY or IGNITION ON mode the system automatically re conn...

Page 239: ...is a registered trademark of Bluetooth SIG Inc c Operating a Bluetooth audio player Playing a Bluetooth audio Push the AV button and touch AUDIO to display this screen Depending on the portable player...

Page 240: ...g the selected track from the beginning Fast forward Push and hold the S button of TRACK TUNE to fast forward the player When you release the button the player will resume playing from that posi tion...

Page 241: ...h RANDOM once again INFORMATION Depending on the portable player that is connected to the system certain functions may not be avail able d Change the Bluetooth audio set tings Selecting a portable pla...

Page 242: ...nnot change it Connection Method The connection method can be switched between From Portable Player and From Display De vice Bluetooth is a registered trademark of Bluetooth SIG Inc 1 Select desired p...

Page 243: ...t see page 236 cannot be selected Bluetooth is a registered trademark of Bluetooth SIG Inc Displaying the Bluetooth audio settings You can see the Bluetooth audio information settings on the system De...

Page 244: ...e or passcode 1 Touch BT Audio Settings 2 Touch Edit at Device Name or Passcode 3 Use the software keyboard to in put the device name You can input up to 20 characters 4 Input a Passcode with 4 8 digi...

Page 245: ...ou can initialize the settings 1 Touch Default 2 Touch Yes Deleting a portable player 1 Touch BT Audio Settings 2 Touch Remove at Bluetooth Settings 3 Select the portable player you want to delete and...

Page 246: ...o device in a location that will not interfere with SRS airbag deployment Failure to do so may result in death or serious injury due to the inability of the airbag to function properly or if the porta...

Page 247: ...ys tem power or switch to another mode prior to disconnecting or connecting Changing the portable audio de vice power supply while in AUX mode may lead to distortion and speaker damage Always ensure t...

Page 248: ...evice is output from the speakers iPod music files can be played by con necting your iPod to the audio system Furthermore it is also possible to per form such operations as selecting tracks from the p...

Page 249: ...nector to USB Cable Disconnect all accessories currently connected to the iPod As soon as the iPod is connected its power is automatically turned on Disconnecting your iPod Disconnect the Dock Connec...

Page 250: ...ically switch to iPod mode when the au dio system and iPod are connected SCION displays at the iPod when connected to the audio system Please note that operation cannot be performed using your iPod wh...

Page 251: ...fter the ENGINE START STOP switch is turned off Vehicles without smart entry and start system The connected iPod will be turned off about two minutes after the en gine switch is turned to the LOCK pos...

Page 252: ...entry and start system If the system does not function properly disconnect your iPod from the Dock Connector to USB Cable and then turn the ENGINE START STOP switch off Turn the iPod off then back on...

Page 253: ...inning Fast forward Push and hold the S button of TRACK TUNE or continue touching I to fast forward the player When you release the button the player will resume playing from that position Reverse Pus...

Page 254: ...c menu screen The screen shown at step 4 displays when SONGS is selected 3 Touch the desired touch screen button on the mode list screen Touch the list to playback the first music file in the selected...

Page 255: ...ongs mode Touch to select the previous list music files in Songs mode Other functions INFORMATION If your iPod is disconnected while TRACK REPEAT TRACK SHUFFLE or ALBUM SHUFFLE is set the iPod will sw...

Page 256: ...Phone 3G 3 1 3 c iPhone 3GS 3 1 3 c c Compatible Incompatible INFORMATION iPod is a trademark of Apple Inc registered in the U S and other countries iPhone is a trademark of Apple Inc The use of iPods...

Page 257: ...letely stopped with the parking brake set If the Video mode is activated while the vehicle is in motion only the audio will be played If the commercially available Rear Seat LCD Monitor is connected t...

Page 258: ...in the same ratio to fill the display Change to this mode to display a 9 H 16 W screen When you touch the previous screen returns Showing the short menu Touch the display to show the short menu Hiding...

Page 259: ...hapter in either direction To select a desired track file or chapter Quickly push and release the or switch until the track file or chapter you want to play is set If you want to return to the beginni...

Page 260: ...ener ally the effective range of FM is about 25 miles 40 km Once outside this range you may notice fading and drifting which increase with the distance from the radio transmitter They are often accomp...

Page 261: ...asis function is not available for files recorded at these frequencies The sound quality of MP3 WMA files generally improves with higher bit rates In order to achieve a rea sonable level of sound qual...

Page 262: ...the lens of the unit It may not be possible to play discs recorded on a personal computer depending on the application set tings and the environment Record with the correct format For details contact...

Page 263: ...be working Remove the discs from the CD DVD player and wait until it dries CAUTION CD DVD player uses an invisible laser beam which could cause hazardous radiation exposure if directed outside the uni...

Page 264: ...not use special shaped transparent translucent low qual ity or labeled discs such as those shown in the illustrations The use of such discs may damage the player or it may be impossi ble to eject the...

Page 265: ...use the player to skip or to repeat a sec tion of a track To see a pin hole hold the disc up to the light Remove discs from the player when you are not using them Store them in their plastic cases awa...

Page 266: ...ernal power sources such as USB audio de vices may not be recognized correctly even if the ENGINE START STOP switch is turned to ACCESSORY or IGNITION ON mode In this case turn the ENGINE START STOP s...

Page 267: ...ES 8E80 0009 2GB POCKETBIT MINI 1GB SONY 07718BBCB 1GB POCKETBIT MINI 512MB SONY 08214BCCV 512MB USB FLASH MEMORY 1GB TOSHIBA 7441H910168NM8N 1GB Swivel Flash Drive 8GB Imation 8E80 0014 8GB Swivel Fl...

Page 268: ...mat This is the international standard for the formatting of CD ROM folders and files For the ISO 9660 format there are two levels of regulations Level 1 The file name is in 8 3 format 8 character fil...

Page 269: ...AUDIO VIDEO SYSTEM 268...

Page 270: ...N 7 APPENDIX Limitations of the navigation system 270 Map database information and updates 272 Confirming the database version and SD memory card coverage area 273 Changing the map SD memory card 273...

Page 271: ...e corrected within a few seconds When your vehicle is receiving signals from the satellites the GPS mark ap pears at the top left of the screen The GPS signal may be physically ob structed leading to...

Page 272: ...ation see page 117 b Inappropriate route guidance may occur in the following cases When turning at an intersection off the designated route guidance If you set more than one destination but skip any o...

Page 273: ...are correct In order to provide you with as accurate map information as possible we are always gathering information such as on road repairs and carrying out on site investigations However the names o...

Page 274: ...e is a more recent update available 1 Push the OPEN button 2 Touch Open The display can also be opened by pushing the OPEN button for ap proximately 1 second until a beep sound is emitted The display...

Page 275: ...lace anything on the opened display as such items may be thrown about and possi bly injure people in the vehicle during sudden braking or in an accident To reduce the chance of injury in the case of a...

Page 276: ...3 RGB Active pixel rate More than 99 99 Display format Transmissive color filter format Drive system TFT thin membrane transistor active matrix format Usage temperature range 20 to 65 C Storage temper...

Page 277: ...umption 1 W x 4 output time about 4 1 A About 15 A max Exterior dimensions 205 5 mm width 104 mm height 161 5 mm depth Weight About 2 7 kg Please note that due to changes in specifications and externa...

Page 278: ...INDEX 277 INDEX For navigation system function please also refer to the Navigation system function index on page 10...

Page 279: ...Phone 102 Change Quick Access 100 Change button 14 42 Change the route 62 76 Change the settings of the Bluetooth phone 143 Changing a device name 170 241 Changing map orientation and configuration 3...

Page 280: ...isc 222 DVD video disc glossary 223 E Edit Dealer or Contact 123 Edit Location 123 Edit Phone 124 Editing a group name 162 Editing a memo 127 Editing area to avoid 105 Editing memory points 98 Editing...

Page 281: ...button 16 N Names of areas to be avoided 106 NAVI button 12 16 17 Nearest 5 Cities 48 51 North up 12 35 North up symbol 12 35 Numbers and symbols 24 O OFF function 12 17 112 On route button 54 80 One...

Page 282: ...he map screen 53 Searching for a desired file 207 229 Searching for a desired folder 208 229 Searching for a desired track 204 Searching for desired footage 214 Searching for the desired music file fr...

Page 283: ...ical voice guidance prompts 69 U USB player operation 224 USB port 225 248 User selection 88 Using iTunes Tagging 195 V Video operation 256 Viewer restrictions 218 223 Voice guidance in all modes 17 1...

Page 284: ...99400 00405...
Reviews: