Page
16
of
21
Start in Conversation Screen
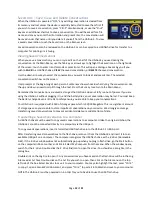
By default, the UbiDuo 3 displays the Conversation
screen when both halves are turned “ON” and
connected
by wire or wirelessly. Use this option if you wish to have the Main Menu displayed in lieu of the Conversation
screen.
Software Update
This option is used to update the UbiOS software that controls the UbiDuo 3. From time-to-time sComm will
release bug-fixes, performance enhancements, and new features to improve the performance and
functionality of the UbiDuo 3. Please refer to
Updating the UbiOS Software
section of this manual for a full
description of the update procedure.
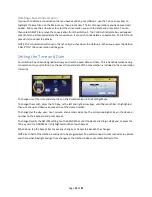
USB Port
For additional security, this option allows the USB port to be disabled to prevent it from being used to save
the Chat Log or install software updates. This option is only available on the high security UbiDuo. Please call
us for more information on the high security UbiDuo.
Updating the UbiOS Software
From time-to-time sComm will release bug-fixes, performance enhancements, and new features to improve
the functionality of the UbiDuo 3. As updates are made available, you will be notified at the email address
that was provided when your UbiDuo 3 was purchased. Each UbiDuo 3 device includes one (1) year of free
software updates from the date of purchase. After that period expires, a Service Agreement may be
purchased to obtain further software updates.
NOTE:
You will need a formatted USB flash drive (not provided) to download software to your UbiDuo 3.
SPECIAL NOTE BEFORE YOU START A SOFTWARE UPGRADE:
Any conversations you have saved on the
UbiDuo 3 will be deleted when you download updated software to the UbiDuo 3. Before updating your
software, transfer any saved conversation that you wish to preserve to a USB flash drive. If they become
deleted there is no way for them to be recovered.
To update the UbiDuo 3’s software, first visit the website link included in the e
mail to download the new
firmware.bin package. Save this file on your computer. Next, prepare a formatted USB flash drive and plug it
into your computer. Transfer or copy the firmware.bin file to your flash drive. Once the copy finishes,
perform the
“safely remove” procedure to protect the data on your flash drive; remove flash drive from the
computer.
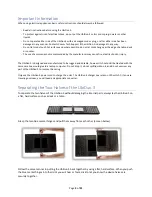
Make sure both halves of the UbiDuo 3 are powered “OFF.” Insert the USB flash drive into the USB port of
one of the halves, then press the power button to t
urn it “ON” and boot it from the USB flash drive. You will
see a white screen with a thin green progress bar moving from left to right. When this bar reaches the end on
the right side, the UbiDuo 3 will start its normal boot process.
The upgrade file will
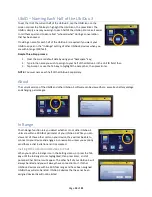
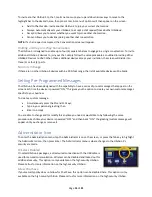
now need to be installed into the UbiDuo 3’s memory. To complete this process, at the
Main Menu, tap the Settings icon or press the Tab key to highlight the Settings icon; then press Enter. When
the Settings menu is displayed, tap the Administrator icon or press the Tab key to highlight that icon; then
press Enter.
You may now press the power button to turn “OFF” the UbiDuo 3. Once it is off, remove the USB flash drive.
Press the power button to turn the UbiDuo 3 “ON” and tap the Settings icon or press th
e Tab key to highlight
it; then press Enter. Next, tap the About icon or press the Tab key to highlight it; then press Enter. In the
About icon you will be able to verify that the UbiDuo 3 is loaded with the latest updated version of UbiOS.


