background image

Designed in 

Great Britain

®

Nouvotech House, Harbour Road, Oulton Broad, Suffolk, NR33 0RU, UK

tel

 0330 124 1733 

email

 info@scooterpac.com 

web

 www.scooterpac.com

SPCA/M/EN/2020

Summary of Contents for Canopy

Page 1: ...UserManual scooterpac canopy EN ...

Page 2: ...warm and dry Yourtickettostaying allyearround ...

Page 3: ...fetyNotices BoxContents IntroductiontotheCanopy QuickStartGuide KymcoStrengtheningKit InstallationGuide FoldingtheCanopyaway CaringforyourScooterpacCanopy FAQ Notes Contents Brighten your day 4 5 6 7 9 12 14 28 36 37 38 ...

Page 4: ...lesecuringpoints Scooterpaccannotacceptliabilityforanyinjurywhichiscausedbythemisuseorfailuretofollowthis manual Scooterpaccannotacceptliabilityforanyloss damageorpersonalinjurytoyourselforotherswhich occursduetousingunsuitablesecuringpointsonthescooterorduetotheCanopynotbeingsecurely andsafelysecuredtothescooter Itisstronglyrecommendedthatyoureadthissectioncarefullybeforeusingthe ScooterpacCanopy...

Page 5: ...haveallthenecessaryfixingpoints Whenmakinguseofthesidedoorspleaseensurethatthezipsarecompletelyclosed TheCanopyshouldonlybeusedinthefullyunfoldedorfullyclosedpositionwiththeprotective bagcoveringit DonottrytofoldorunfoldtheCanopywhilesittingonthescooter ItisadvisablenottousetheCanopyinwindsabove40mph TheCanopyisdesignedforpavementandroaduseonly Checkallfixingsaresecureanddonotusewithdamagedorfault...

Page 6: ...BoxContents Frame Cover Doors Bag Spigotx1 M8handwheelx2 M6rachethandlex1 Boltedarmbracketsx2 Locatedontheframe ToollessarmBracketsx2 M8x45mmboltsx3 M10x45mmboltx1 M8nylocnutx1 Velcrosquarepadsx2 6 ...

Page 7: ...theningplatesx2 Allenkey s 4mm Socketspanner 13mm Spanner 13mm Scissors Includedandtobeuseddependingonthescootermanufacturer ManufacturerToolKits Toolsrequired KymcoStrengtheningKit PrideMountingKit Spigotsecuringbracket 7 ...

Page 8: ...IntroductiontotheCanopy Luxurywindscreen Easyaccesswindow Basketfixingaccess ColourcodedVelcro Largeaccesszips 8 ...

Page 9: ...Lockingmechanism Universalarmbrackets Mountingspigot Installation 20 minutes Unfolding 30 seconds 9 ...

Page 10: ...QuickStartGuide Removethe protectivecover Unfoldthe frame Onceunfolded intothisposition ensurethe safetyclipclicks andissecure Continue unfoldingthe Canopy 1 2 3 4 Click 10 ...

Page 11: ...Zipthedoor fromtheback towardsthe front Repeaton theotherside Unfoldthesidedoorsandmoveintoposition 5 6 7 8 8 simple steps to mobility freedom 11 ...

Page 12: ...eningKitincludedwith theCanopymustbeusedotherwiseproceedtopage14 KymcoStrengtheningKit 3 Locatetheboltswhichsecurethe armrestmountingtheseatbase 2 Taketheseatoffthescooter 1 Removethescooterarmrestsby looseningthetwohandknobs underneaththeseat 12 ...

Page 13: ...nandremoveoneofthese bolts 5 Insertthestrengtheningplateand Replacetheboltsandretighten Repeattheprocessontheother sideoftheseat 6 Replacetheseatandarmrests TheKymcoscooterisnowreadyforyourScooterpacCanopy 13 ...

Page 14: ...spigot 2 Slidethespigotsecuringbracket locatedin thePrideMountingKit overtheaccessoryport ensuringthethreadednutlinesupwiththefixing hole Ifthereisnotanutlocated ontheaccessoryport please proceedtostep2 Ifthereisanutlocatedonthe accessoryport pleaseproceedtostep 3 14 ...

Page 15: ...matchingsocket spanner Youmayhavetoadjustthealignmentofthe spigottoensuretheM8 M10boltpasses throughthenearestholelocatednearestthe faceofthespigot 3 Insertthespigotintotheaccessoryport underneaththebackofthescooter asfaras itwillgoin Beforeinsertingthespigot ensurethe holesonthespigotmatchuptothehole ontheaccessoryport 15 ...

Page 16: ... scooter sseat 1 Onthefaceofthespigot equallyloosenoffthetwo M8handwheelswithsix fullturns 2 Ensurethatbothwashes arespacedawayfromthe faceofthespigotandare positionedagainsttheM8 handwheels 3 OntheCanopyframeturn thearmsupportssothat theyarepointingawayto thesidesinrelationtothe frame 4 SlidethemainCanopy frameontothespigotin betweenthewashersand thefaceofthespigot s plate 16 ...

Page 17: ...ecuringthearmrestonthe seat 3 Removethenutsandboltsonthescooter armrests Toinstalltheboltedarmbracketsproceedtostep2 Toinstallthetoollessarmbracketsproceedstep6 TOP TIP Iftheboltedarmbracketsdonotfitsecurelyaroundthe scooter sarmrestse g thereareplasticshroudssurrounding seatarmsortherearenotthenecessaryfixingpointsto securetheboltedbracket pleaseusethetoollessarm brackets TOP TIP Ifthearmrestsare...

Page 18: ...armbracket 5 SecurethenutsontheM8boltswithasocketwrenchandspanner TOP TIP Pleasedonotovertightenthenutstoensurethearmrestscanstillberaisedandlowered Toollessarmbrackets 6 Removetheboltedarm bracketfromarmsupports locatedonthesideofthe Canopy 7 Onthetoollessarm bracket unwindthe adjustablestrapsothatit caneasilypassoverthearm 18 ...

Page 19: ...ketover thearmsothatitalignswiththearm supportontheCanopy 9 Slidethetoollessarmbracketinto thearmsupportonCanopy 10 Tightentheadjustablestrapsothat itissecureonthearmrest Thisshouldbemountedasnear tothetopofthearmaspossible 19 ...

Page 20: ...TOP TIP Pleasepositionsothatthearmrestscanstillberaisedandlowered Repeatsteps6 10ontheotherarmrest More than halfway there to mobility freedom 20 ...

Page 21: ...bleandresponsible Alwaysaccountableforouractions Excellence Doourbestandexceedexpectations Surpassordinarystandards Innovation Creatingvalueanddrivingefficiency Pioneersinthemarketplace Integrity Everythingwedoisfair honestandtrustworthy WestandbyourproductsandservicesbecausewefollowTheScooterpacPromise The Scooterpac Promise 21 ...

Page 22: ...thefrontofthearmrest Then lockthequickreleaseclampsonthearm supportintoposition Repeattheprocesson theotherarmsupport 2 Usinga4mmallenkey onbothsidesofthe Canopyframe tightenthebracketsthatholdthe armsupportsinplace TOP TIP BeforecontinuingpleaseensuretheCanopyisvertical whenviewedfrombehind Ifnecessary adjustthearmsby looseningtheallenboltsandslidingupordown 22 ...

Page 23: ...ewhenunfolding 4 InserttheM6rachethandleintothespigot Usetheleverasaspannertohelpyousecurethe boltastightlyaspossible Pushtheleverroundto tightenandthenpullitout rotateit allowingitto resettowardsthespigotandthentightenmore Repeatuntiltheboltisfullysecure Click 23 ...

Page 24: ...Pleasedonotremovethefoamsupportlocatedontheframehinge thisprovidessupporttotheCanopytomaintainsafeoperation ThemainCanopycoverandsidedoorsarelocatedinthefabricbag 2 RemovethemainCanopycoverandsidedoorsfromthebag 3 Workingfromthebackofthescootertowardsthefront laythemainCanopycoverovertheframeensuringthe Scooterpaclogoisattherearofthescooter behindtheseatandfitssquarely 24 ...

Page 25: ...hecover 5 Tosecuretheroofofthecovertotheframe fixthe Velcrolooparoundthefronthinges Repeatthe processfortherearhinges 6 Movingtotheback securetheVelcroloopsaround theCanopy srearsupportframe 7 Securetherearwindscreenpartofthecovertothe framebyusingtheVelcrostrapsontheCanopy Attach thesetotheframe ssupportbars Repeatontheother side IMPORTANT Onbothsidesitisessentialtosecureonesetofstrapstothe topof...

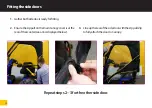
Page 26: ...rbothsidedoorsreadyforfitting Repeatsteps2 3fortheothersidedoor 2 EnsurethezippullonthemainCanopycoverisatthe rearofthescooter seearrowdisplayedbelow 3 Lineuptherearofthesidedoorwiththezippull Zip tofullyattachthedoortoCanopy 26 ...

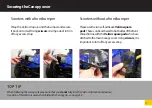
Page 27: ... pads Thesecanbeadheredtobothsidesofthefront shroudinlinewiththeVelcrosquarepadswhichare stitchedtothemainCanopycover Usingscissors itis importanttotrimoffanyexcessstrap TOP TIP WhenfollowingthesestepspleaseensurethatyoudonotfullytrimtheVelcrostripmentionedabove AsectionofthisVelcroisusedwhenfoldingtheCanopyup seepage32 Scooterswithafrontbumper Scooterswithoutafrontbumper 27 ...

Page 28: ...FoldingtheCanopyaway 1 AtthefrontoftheCanopyunzipfromthebottom Pleaseensureyouonlyunziphalfwaydownthe backofthedoor 28 ...

Page 29: ...2 HoldingtheCanopyatthemiddlepoint foldthesidepaneldownbymatchingtheyellowVelcro striplocatedatthetopandbottomofthedoor 29 ...

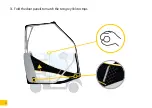
Page 30: ...3 FoldthedoorpanelstomatchthetwogreyVelcrostrips 30 ...

Page 31: ...4 FoldeachdoorpanelbehindthescootersothatthetworedVelcrostripscanbeattached Repeatsteps1 4fortheotherside 31 ...

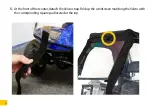
Page 32: ...5 Atthefrontofthescooter detachtheVelcrostrap FoldupthewindscreenmatchingtheVelcrowith thecorrespondingsquarepadlocatedatthetop 32 ...

Page 33: ...6 Foldthewindscreenupontotheroofsection Pleasetakecarenottotrapyoufingers 33 ...

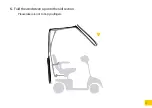
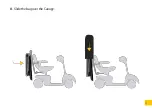
Page 34: ...7 Pullthesafetyplungerandcarefullyfoldtheframedowntotherearofthescooter 34 ...

Page 35: ...8 SlidethebagovertheCanopy 35 ...

Page 36: ...chiswaterprooftoo Unfortunately this willnotstoptheusualdepositsfindingtheirwayontoit WerecommendcleaningtheCanopywithasmallamountofwashingupliquid mixedwithwateranda sponge PLEASEDONOTUSEBLEACH BeforefoldingupyourCanopyagainpleaseleaveitfullyunfoldedandinawell ventilatedplacetodry 36 ...

Page 37: ...spushingontheinsideofthe coverremovethebasketfixingaccessstrip see page8 Youcannowfixthebaskettothefrontof yourscooterontheoutsideoftheCanopy WhatshouldIdoifmymirrorsarecatchingthe insideoftheCanopy Switchtheleftandrightmirrorswitheachother Youcanthentwistyourmirrorstoavertical positioninsteadofhorizontal Thiswillensureyour mirrorsarenowclearoftheCanopy WhatisthefullheightoftheCanopyoncefully unfo...

Page 38: ...Notes 38 ...

Page 39: ...39 ...

Page 40: ...Designed in Great Britain NouvotechHouse HarbourRoad OultonBroad Suffolk NR330RU UK tel03301241733emailinfo scooterpac comwebwww scooterpac com SPCA M EN 2020 ...

Reviews: