background image


Note: Connect the (HAR-1) harness to the MCM only after installation is completed. 

          
          If the battery is to be removed, disconnect this connector first. Reconnect only after battery  
          terminals are reconnected. 


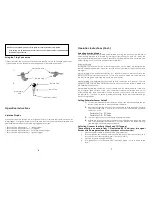
Using the T-tap Connectors 

 
1) Place female T-tap connector over wire to be tapped, close and squeeze until it snaps. 
 2) Now slip male T-tap connector over hinged end of the female connector. 


                              Motorcycle Wire 

                   1) 


                                                                     Female T-tap  


                 2) 


                       Female T-tap 


                                                                                                       Male T-tap 
                     Motorcycle 
                             Wire 


                                                                                          Wire from (GEN-1)                                  


Operation Instructions 


Violation Display 


When the system is disarmed the turn signals will flash to indicate that there has been an 
alarm trigger.  The lights will flash once to indicate that the system has been disarmed and 
additional flashes indicate the following trigger has occurred: 


1 flash then 1 additional flash     =    Shock Trigger 
1 flash then 2 additional flashes =    Tilt Trigger  
1 flash then 3 additional flashes =    Perimeter Sensor Trigger  
1 flash then 5 additional flashes =    Ignition Trigger  


Operation Instructions (Cont.) 

 
Selecting Arming Modes 

The SR-i800 can be manually armed and disarmed by using the button on the remote or 
automatically  armed  and  disarmed  by  turning  your  ignition  key  on  and  off.    When  the 
alarm is first installed the alarm will arm 5 seconds after the HAR-1 harness is installed.  The 
default setting is to arm with the perimeter sensor (SN-5) on.   


Automatic Arming 
By  keeping  the  remote  with  you  and  turning  your  key  on  the  alarm  will  recognize  the 
remote and disarm the alarm.  Once you turn the key off the alarm will wait 5 seconds and 
arm again. 


Manual  Arming- Press  and  hold  the  button  for  1  second.  When  you manually  disarm  the 
alarm, you are turning the auto arm off.  To turn auto back on simply arm the alarm with 
the remote and go back to using the key to arm and disarm. 
 
Manual  Arming with  Perimeter  Sensor-  Press  and  hold  the  button  for  5  seconds.  The  turn 
signals will flash normally then will flash left-right twice to confirm the system is armed with 
the Perimeter Sensor active. 


While  armed  double  tap  the  button  on your  remote  and  the alarm will  chirp  1  time  and 
the  turn  signal  lights  will  flash  1  time.    Now  the  alarm  is  manually  disarmed  and  will  not 
automatically arm.  Now the alarm will only arm when you push and hold the button on 
the  remote  for  1  second.    To  return  to  automatic  arming,  simply  arm  the  alarm  and  go 
back to using the key. 


Setting Perimeter Sensor Default 

1.


To select between perimeter sensor on and off you must first double tap the 
button on the remote to manually disarm the alarm. 

2.


Next turn your ignition key on-off-on then double tap the button quickly and 
the  siren  should  chirp  2  or  3  times  to  let  you  know  whether  the  perimeter 
sensor is on or off. 

   Perimeter On:  2 Chirps 
   Perimeter Off:  3 Chirps 

3.


Turn your ignition key off to save and exit program mode. 

4.


Manually arming the Perimeter Sensor will not change the default. The next 
time  the  system  arms  automatically,  it  will  go  back  to  the  default  setting. 
(see Arming with Perimeter Sensor above) 

Adjusting G sensor Sensitivity (Shock and Tilt Triggers) 
The sensitivity is on a scale from 1-5 indicated by 1-5 chirps or turn signal 
flashes with 5 being most sensitive.

 (If equipped with optional siren)


1.


Manually disarm the alarm by double tapping the button. 

2.


Turn your ignition key on-off-on and then hold the button, the siren should chirp to 
let you know its current sensitivity level.   (Default is level 3) 

3.


Press the button to change sensitivity. 

4.


Turn  ignition  key  off  to  save  and  exit.    The  siren  will  give  1  chirp  to  indicate  the 
save. 


Summary of Contents for SR-i800

Page 1: ... a Transceiver 1 Unplug HAR 1 from the MCM 9 and plug it back in the siren will chirp 2 times and the lights will flash 2 times 2 Within 6 seconds of plugging in the HAR 1 turn ignition switch ON and OFF 3 times 3 If step 2 is done correctly and within the time allowed the siren will chirp 2 times and the lights will flash an additional 2 times to confirm that the system is in Learn Mode 4 Press a...

Page 2: ...els 2 Components List MCM Main Control Module Remote Transceiver Generic Installation Kit GEN 1 Accessory Harness ACC 1 Main Harness HAR 1 RFID Module This remote transceiver uses a CR2032 battery To replace the battery pry the cases apart using a flathead screwdriver at the small end of the remote Then slide the screwdriver towards the button until the case halves come apart Now pull the circuit ...

Page 3: ...for the optional accessories Accessory Harness Plug in the accessory harness to the matching connector on the MCM Each one of the connectors on the accessory harness is unique and can only be connected to the correct accessory If no options are being used plug in the supplied dust cover 4 Main Harness If the optional factory connector kit is being used please disregard this section of the instruct...

Page 4: ...arm off To turn auto back on simply arm the alarm with the remote and go back to using the key to arm and disarm Manual Arming with Perimeter Sensor Press and hold the button for 5 seconds The turn signals will flash normally then will flash left right twice to confirm the system is armed with the Perimeter Sensor active While armed double tap the button on your remote and the alarm will chirp 1 t...

Page 5: ...ou do not need to wait for a full cycle 2 Enter code as originally entered 3 When correct code is entered the alarm will deactivate 8 Perimeter Sensor SN 5 Mounting the SN 5 The Perimeter Sensor uses high frequency microwave technology to detect mass density movement around the motorcycle The signal can transmit through the seat fiberglass leather and plastic but not metal It is recommended to pla...

Page 6: ...ganization to make any warranties or assume any liability in connection with the sale installation or use of this product This completes Aritronix warranty and no other warranty exists What should you do if you experience a problem with a Scorpio product First contact Aritronix Ltd Proof of purchase installer and motorcycle information will be requested If after assistance from our trained staff i...

Reviews: