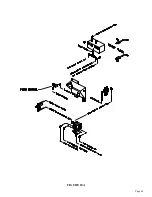
7.2 POWER DOWN FEED
The power down feed option, used in conjunction with the power vise option, changes a manual saw into
a semi-automatic saw. These options will increase productivity and reduce operator fatigue. The power
down feed option cannot be retrofit to machines with serial number 11940491 and prior in the field. This
option can be used on machines with or without the power vise option.
7.2A POWER DOWN FEED SET-UP AND MAINTENANCE
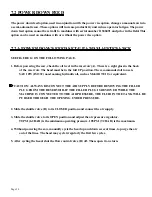
SEE FIGURE 14 ON THE FOLLOWING PAGE.
1. Before powering the saw, check the oil level in the reservoir (A). There is a sight glass in the back
of the reservoir. The head must be in the full UP position. The recommended oil to use is
SAE 10W (ISO 32) non-foaming hydraulic oil, such as Mobil DTE 10 or equivalent.
CAUTION: ALWAYS DISCONNECT THE AIR SUPPLY BEFORE REMOVING THE FILLER
PLUG FROM THE RESERVOIR. IF THE FILLER PLUG IS REMOVED WHILE THE
MACHINE IS CONNECTED TO THE AIR PRESSURE, THE FLUID IN THE TANK WILL BE
PURGED THROUGH THE OPENING UNDER PRESSURE.
2. Slide the shuttle valve (D) to its CLOSED position and connect the air supply.
3. Slide the shuttle valve to its OPEN position and adjust the air pressure regulator.
90 PSI (6.2 BAR) is the minimum operating pressure. 105 PSI (7.2 BAR) is the maximum.
4. Without powering the saw, manually cycle the head up and down several times, to purge the air
out of the lines. The head may cycle irregularly the first few cycles.
5. After cycling the head, shut the flow control valve (B) off. Then, open it one turn.
Page 34
Summary of Contents for CPO-275
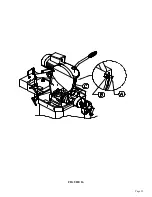
Page 8: ...Page 7 FIGURE 1...
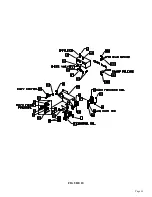
Page 10: ...Page 9 FIGURE 2...
Page 13: ...Page 12 MANUAL OR PK W TRIGGER SWITCH FIGURE 3 1...
Page 14: ...Page 13 PKPD W EMERGENCY STOP FIGURE 3 2...
Page 15: ...Page 14 1 PHASE MOTOR W TRIGGER SWITCH FIGURE 3 3...
Page 16: ...Page 15 1 PHASE MOTOR W E STOP SERIAL S B3431 UP FIGURE 3 4...
Page 22: ...Page 21 FIGURE 5A...
Page 28: ...Page 27 FIGURE 8 FIGURE 9...
Page 30: ...Page 29 FIGURE 10...
Page 36: ...FIGURE 14 Page 35 C A B D...
Page 38: ...Page 37 FIGURE 15...
Page 40: ...Page 39 FIGURE 16...
Page 42: ...Page 41 FIGURE 17...
Page 44: ...Page 43 FIGURE 18...
Page 46: ...Page 45 FIGURE 19...
Page 48: ...Page 47 FIGURE 20...
Page 50: ...Page 49 FIGURE 20A...
Page 58: ...Page 57 FIGURE 23...
Page 60: ...FIGURE 24 Page 59...
Page 62: ...Page 61 G 078000 60 RPM 230 Volt 1 Phase T S 078001 60 RPM 230 Volt 1 Phase E S FIGURE 25...
Page 66: ...Page 65 FIGURE 27...
Page 68: ...Page 67 FIGURE 28...
Page 70: ...Page 69 FIGURE 29...
Page 74: ...Page 73 FIGURE 31...
Page 76: ...Page 75 FIGURE 32...
Page 78: ...Page 77 FIGURE 33...
Page 80: ...FIGURE 34 Page 79...
Page 82: ...Page 81 FIGURE 35...
Page 84: ...Page 83 FIGURE 36...
Page 86: ...Page 85 FIGURE 37...
Page 88: ...Page 87 FIGURE 38...
Page 90: ...Page 89 FIGURE 39...

