7.5 SPECIAL VISE JAWS
Special vise jaws for holding square tubing, rectangular tubing and angle iron are stock items. Jaws for
holding thin wall round tubes, profiles and bundles are available on a made-to-order basis. For prices
and delivery on special jaws, contact your local dealer or the factory.
7.6 LOCK-OUT DISCONNECT SWITCH
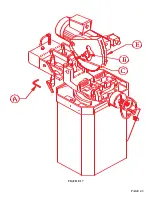
A lock-out disconnect switch is available for this machine if your plant is not equipped with lock-out
capabilities. The switch mounts on the base of the saw and is shipped complete, with all of the necessary
Parts and installation instructions.
7.7 LASER LIGHT
There is an optional laser light available that follows the blade for miter cutting at any degree. Refer to
Section 10.7 for a parts diagram.
8.0 TROUBLE SHOOTING GUIDE
8.1 ELECTRICAL TROUBLE SHOOTING
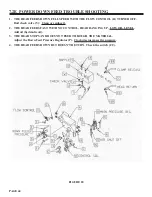
1. THE MOTOR WILL NOT RUN:
A. On machines equipped with the power down feed option, the motor switch must be in the ON position.
B. Also, check the supply voltage to the saw to make sure that it is the same as the motor voltage. If the
supply voltage is correct, the switch energizes and the motor still will not run, contact your local
dealer or the factory.
2. THE SAW MOTOR RUNS BUT DOES NOT HAVE ADEQUATE POWER:
A. Make sure that the supply voltage and phase correspond to the saw motor’s voltage and phase.
B. Disconnect the machine from the power source and check for any loose or disconnected wires.
C. The supply lines to the machine must be of adequate size to handle the load. For recommended sizes
and lengths, SEE SECTION 4.4.
D. The worm gears in the head may be damaged. With the power to the machine disconnected, check the
blade spindle for any free travel. If free play is present, drain the oil from the head and remove the
motor. Check both worm gears for wear and replace, if necessary. We recommend replacing the
worm gears as a set, if either shows wear. For instructions, REFER TO SECTION 8.4.
8.2 BREAKAGE OR EXCESSIVE DULLING OF BLADES
1. Select the proper blade and spindle speed for the material being cut. For recommendations, REFER
TO SECTION 6.3.
PAGE 52
Summary of Contents for CPO 350
Page 1: ...CPO 350 VARIABLE SPEED COLD SAW PRINTED SEPTEMBER 2014...
Page 7: ...PAGE 7 FIGURE 1...
Page 8: ...4 2 MACHINE MOVING PROCEDURES SEE FIGURE 2 BELOW PAGE 8 FIGURE 2...
Page 11: ...PAGE 11 350 VS POWER DOWN 230 VOLT SEE PAGE 47 FOR POWER DOWN WIRING FIGURE 3 1...
Page 12: ...PAGE 12 350 VS MANUAL PK 230 VOLT FIGURE 3 2...
Page 13: ...PAGE 13 350 VS POWER DOWN 460 VOLT SEE PAGE 47 FOR POWER DOWN WIRING FIGURE 3 3...
Page 14: ...PAGE 14 350 VS MANUAL PK 460 VOLT FIGURE 3 4...
Page 17: ...PAGE 17 FIGURE 4...
Page 19: ...PAGE 19 FIGURE 5...
Page 27: ...PAGE 27 FIGURE 8 FIGURE 9...
Page 29: ...PAGE 29 FIGURE 10...
Page 33: ...PAGE 33 FIGURE 12...
Page 35: ...PAGE 35 FIGURE 13...
Page 37: ...PAGE 37 FIGURE 14...
Page 39: ...PAGE 39 FIGURE 15...
Page 41: ...PAGE 41 FIGURE 16...
Page 43: ...PAGE 43 FIGURE 17...
Page 45: ...7 2F POWER DOWN FEED WIRING DIAGRAM Ser s 6425 Up PAGE 45 FIGURE 19...
Page 46: ...7 2G PNEUMATIC SCHEMATIC POWER DOWN MACHINES PAGE 46 FIGURE 20...
Page 47: ...THIS PAGE LEFT BLANK INTENTIONALLY PAGE 47...
Page 49: ...PAGE 49 FIGURE 21...
Page 51: ...PAGE 51 FIGURE 22...
Page 55: ...PAGE 55 FIGURE 23...
Page 59: ...PAGE 59 FIGURE 25...
Page 61: ...PAGE 61 FIGURE 26...
Page 63: ...PAGE 63 FIGURE 27...
Page 65: ...PAGE 65 FIGURE 28...
Page 67: ...PAGE 67 FIGURE 29...
Page 69: ...PAGE 69 FIGURE 30...
Page 71: ...PAGE 71 FIGURE 31...
Page 73: ...PAGE 73 FIGURE 32...
Page 75: ...PAGE 75 FIGURE 33...
Page 77: ...PAGE 77 FIGURE 33...
Page 79: ...PAGE 79 FIGURE 34...
Page 81: ...PAGE 81 FIGURE 35...
Page 83: ...PAGE 83 FIGURE 36...
Page 85: ...PAGE 85 FIGURE 37...
Page 87: ...PAGE 87 FIGURE 38...
Page 89: ...PAGE 89 FIGURE 39...
Page 91: ...PAGE 91 FIGURE 40...
Page 93: ...PAGE 93 FIGURE 41...

