26500
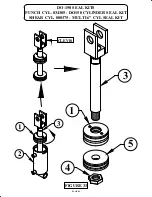
FIGURE 30
221212
M10 x 30
26501
26502
26502
26502
221212
M10 x 30
221212
M10 x 30
221212
M10 x 30
221212
M10 x 30
221212
M10 x 30
26500 Assy.
2
3
4
1
5
6
2" Shank
Punch
221212
221212
26500
18507
PAGE 70
7.10D #45 PUNCH RETAINING NUT
The #45 punch retaining nut is of the same design as the #40 and is used in oversize punching
applications. FOR REQUIREMENTS, SEE THE #40 TOOLING PARTS MANUAL.
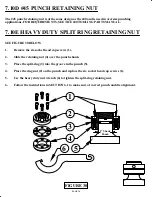
7.10E HEAVY DUTY SPLIT RING RETAINING NUT
SEE FIGURE 30 BELOW
1.
Remove the six socket head cap screws (1).
2.
Slide the retaining nut (4) over the punch shank.
3.
Place the split-ring (3) into the groove in the punch (5).
4.
Place the ring nut (2) on the punch and replace the six socket head cap screws (1).
5.
Use the heavy duty nut wrench (6) to tighten the split-ring retaining nut.
6. Follow the instructions in SECTION 6.1 to make sure of correct punch and die alignment.

