Page 14
5.4 MACHINE OPERATION
TO SET THE MACHINE UP FOR AN OPERATION:
1.
Open the hood and place your material in the machine, with 3/8" to 1/2" extending beyond the cut
slot for the blade. Set the vise so it is within 1/4 of an inch of the material and clamp the shuttle vise.
If the shuttle vise is not properly clamped, the red Material Out light on the vise will be on.
2.
Adjust the horizontal and vertical clamping cylinders to the size of the material you are going to cut.
The two horizontal clamping cylinders can be turned off if they interfere with the vertical clamps.
The clamping cylinders are adjusted with a 17mm wrench. The clamping cylinders must contact the
material when activated.
3.
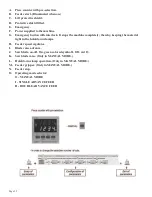
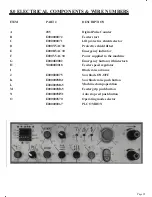
Set the Parts Counter to the value that you want to cut. To set the Parts Counter, press the PRESET
button and then, press and hold the SET button. You can then use the scroll buttons to set the
values. After you have set the values, press the PRESET button again. The counter is now set.
Pressing the RESET button on the counter will zero out the number of parts cut, the top red
numbers on the counter. The preset quantity to cut are the gold numbers on the bottom row of the
counter.
NOTE: The counter will count every stroke of the machine, including the trim cut.
4.
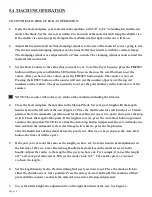
Close the hood and place the machine in the Manual Mode. Set your part length with the length
hand wheel on the left side of the saw (Figure 2). Place the shuttle selector switch in the 1 or 2 hitch
position. Start the automatic operation and let the machine cut one or two parts; then, press the stop
switch. Check the length of the parts. If the length is correct, press the Auto Start button again and
continue the operation. NOTE: Every time the Auto Stop button is depressed, the saw will make one
trim cut when the automatic cycle is started again. It is best to press the Stop button
after the shuttle has advanced and before the part is cut. This way, when you press the Auto Start
button, the trim cut will be a part.
5.
If the part you cut is not the same as the length you have set: Go to the hand wheel adjustment on
the left side of the saw. Leave the locking handle locked and loosen the small set screw in the
handle. Adjust the reader to the length of the part you have cut. For example, if you set the length
at 1” and your part came out at .985, set the reader back to 1". Cut another piece or two and
re-check the length.
6.
Set the length hand wheel to the desired length of part you want to cut. Place the mode switch in
either the shuttle once or twice position. Press the auto cycle start button B. The machine will cut
parts until the counter reaches 0, the material runs out or the stop is depressed.
7.
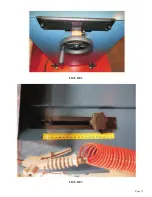
To set the blade height, the adjustment is on the right hand side of the saw. See Figure 3.
Summary of Contents for GAA-500-90 NF
Page 1: ...PRINTED OCTOBER 2020 Page 1 MODEL GAA 500 90 NF AUTO UPCUT COLD SAW WWW SCOTCHMAN COM...
Page 9: ...Page 9...
Page 11: ...Page 11 FIGURE 1...
Page 13: ...Page 13 THIS PAGE LEFT BLANK INTENTIONALLY...
Page 15: ...Page 15 FIGURE 2 FIGURE 3...
Page 16: ...Page 16 FIGURE 5...
Page 17: ...Page 17 FIGURE 6...
Page 22: ...Page 22 POWER CIRCUIT FIGURE 8...
Page 23: ...Page 23 FIGURE 9...
Page 27: ...Page 27...
Page 29: ...Page 29 THIS PAGE LEFT BLANK INTENTIONALLY...
Page 31: ......
Page 32: ...Page 32 12 0 SHUTTLE FEED SYSTEM...
Page 33: ...Page 33...


