background image


GENERAL SAFETY


IMPORTANT SAFETY WARNINGS


TO REDUCE RISK OF INJURY: 
Before any use, be sure everyone using this tool reads and         
understands all safety instructions and other information contained   
in this manual.   

CAUTION: 

Wear appropriate personal hearing protection during use. 

Under some conditions and duration of use, noise from this product 
may contribute to hearing loss.  

Save these instructions and review frequently prior to use and in     
instructing others.  

WARNING: 

When using electric gardening appliances, basic safety 

precautions should always be followed to reduce risk of fire, electric 
shock, and personal injury, including the following: 
 

READ ALL INSTRUCTIONS


DON’T ABUSE CORD – Never carry the string trimmer by the cord 
or yank the cord in order to disconnect from the receptacle. Keep 
cord from heat, oil, and sharp edges.


KEEP CHILDREN AWAY - All visitors, children and pets should stay 
at a safe distance from the work area.


DRESS PROPERLY – Don’t wear loose clothing or jewelry.  Wear 
protective hair covering to  contain long hair. They can be caught    
in moving parts. Use of rubber gloves and substantial  footwear is 
recommended when working outdoors.


USE SAFETY GLASSES –Wear safety glasses with side shields or 
goggles that are marked to comply with ANSI Z87.1 standard when 
operating this product. Use face or  dust mask if environment is dusty. 


GROUND FAULT CIRCUIT INTERRUPTER (GFCI) protection 
should be provided on the circuit(s) or outlet(s) to be used for the 
string trimmer. Receptacles are available having built-in GFCI    
protection and may be used.


USE RIGHT APPLIANCE – Do not use an appliance for any job 
except that for which it is intended.


EXTENSION CORD. Make sure your extension cord is in good   
condition.  When using an extension cord be sure it is heavy enough 
to carry the current your product will draw. An  undersized extension 
cord will cause a drop in line voltage resulting in loss of power and 
overheating. The following table shows the  correct size to use   
depending on cord length  and nameplate ampere rating. If in doubt, 
use the next heavier gage. The smaller the gage number, the    
heavier the cord.


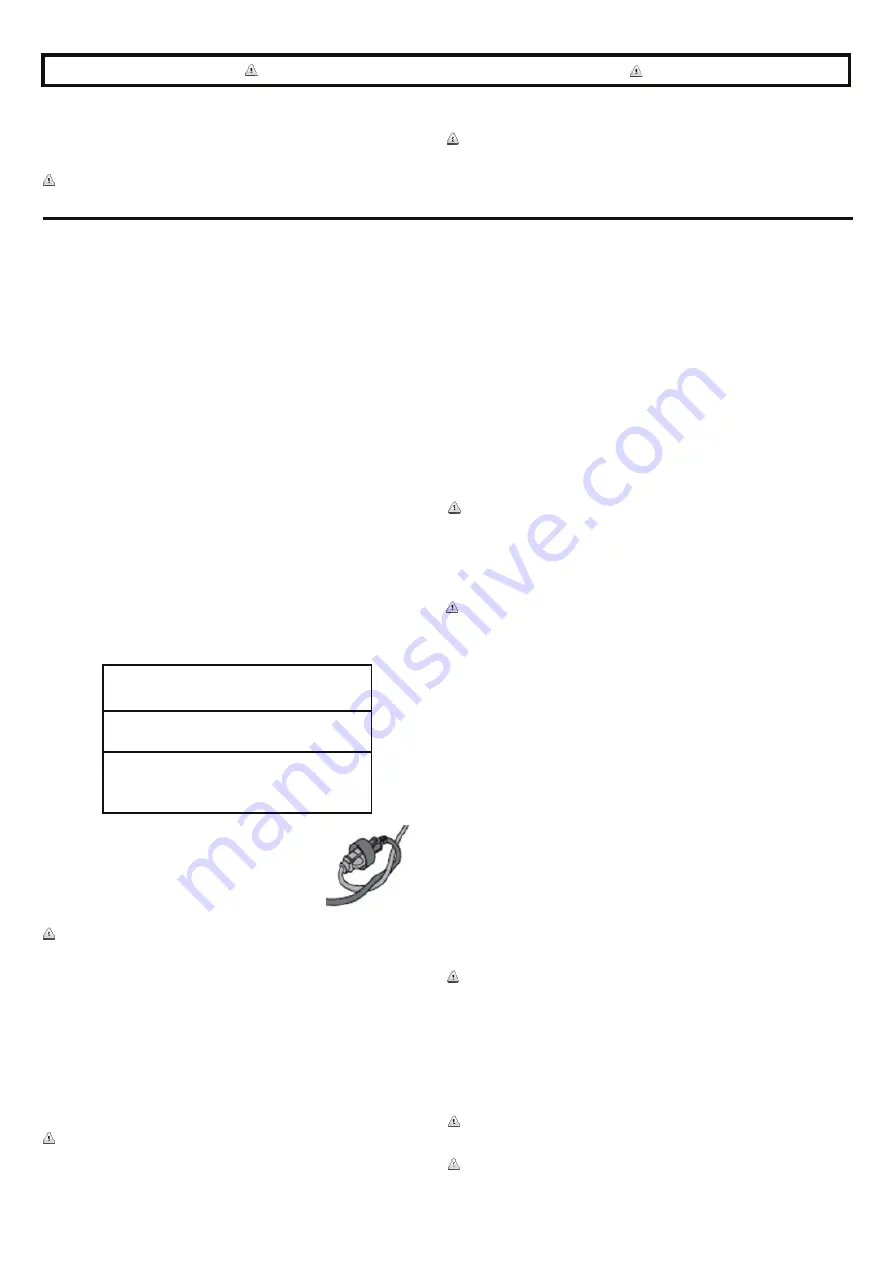
It is possible to tie the extension cord and power 
cord in a knot to prevent them from becoming 
disconnected during use. Make the knot as 
shown, then connect the plug end of the power 
cord into the receptacle end of the extension 
cord. This method can also be used to tie two 
extension cords together.


WARNING

:  Use outdoor extension cords marked SW-A, SOW-A, 

STW-A, STOW-A, SJW-A, SJTW-A, or SJTOWA. These cords are 
rated for outdoor use and reduce the risk of electric shock.


POLARIZED PLUGS – To reduce the risk of electric shock, this      
equipment has a polarized plug (one blade is wider than the other). 
This equipment must be used with a  suitable polarized 2 wire or 3 
wire   extension cord. Polarized connections will fit together only one 
way. Make sure that the receptacle end of the extension cord has 
large and small blade slot widths. If the plug does not fit fully into the 
extension cord, reverse the plug. If it still does not fit, obtain a      
suitable extension cord. If the extension cord does not fit fully into  
the outlet, contact a qualified electrician to install the proper outlet. 
Do not change the tool plug or extension cord in any way.


WARNING: 

Do Not use the string trimmer with any type of          

accessory or attachment. Such usage might be hazardous.


Minimum Gage for Cord Sets


    Volts                      Total Length of cord in Feet


    120V                 0-7        8-15    16-30     31-45 

   Ampere Rating  
    More


Not More               American wire Gage 

    Than       Than 
      0      -      6      18           16             16            14 
      6      -    10      18           16             14            12 
     10     -    12      16           16             14            12 
     12     -    16      14           12        Not Recommended


DOUBLE INSULATION – Double Insulation is a concept in safety in 
electric power tools, which eliminates the need for the usual three-wire 
grounded power cord. All exposed metal parts are  isolated from the 
internal metal motor components with protecting insulation. Double 
insulated tools do not need to be grounded. 

NOTE: The double insulated system is intended to protect the user from 
shock resulting from a break in the tool’s internal insulation. Observe all 
normal safety precautions to avoid electrical shock.


DISCONNECT STRING TRIMMER from the power supply when not in 
use or when servicing or cleaning. Do not leave unattended.


AVOID DANGEROUS ENVIRONMENTS – Don’t use trimmer in rain, 
damp or wet locations. Do not operate trimmer in gaseous or explosive 
atmospheres. Motors in these tools normally spark, and the sparks 
might ignite fumes.


AVOID UNINTENTIONAL STARTING – Don’t carry plugged in string 
trimmer with finger on switch. Be sure switch is off when plugging in.


DANGER: 

Risk of cut. Keep hands away from the line. Keep both 

hands on handles when power is on.


DO NOT ATTEMPT to remove cut material or hold material to be cut 
when lines are moving. Make sure trimmer switch is off when clearing 
jammed material from guard. Do not grasp the guard or lines when 
picking up or holding the trimmer.


CAUTION: 

Lines coast after turn off.


DON’T FORCE TRIMMER – It will do the job better and with less     
likelihood of a risk of injury at the rate for which it was designed.


STAY ALERT – Watch what you are doing. Use common sense.        
Do not operate string trimmer when you are tired or under the          
influence of drugs, alcohol or medications.


STORE IDLE STRING TRIMMER INDOORS – When not in use,        
the string trimmer should be stored indoors in a dry and high or      
locked-up place, out of reach of children.


MAINTAIN TRIMMER WITH CARE – Keep clean for best performance 
and to reduce the risk of injury. Inspect extension cord periodically and 
replace if damaged. Keep handles dry, clean and free from oil and 
grease.


CHECK DAMAGED PARTS – Before further use of the trimmer, a 
guard or other part that is damaged should be carefully checked to 
determine that it will operate properly and perform its intended function. 
Check for alignment of moving parts, binding of moving parts, breakage 
of parts, mounting and any other condition that may affect its operation. 
A guard or other part that is damaged should be properly repaired or 
replaced.  Call our customer service help line at 1-800-618-7474 for 
assistance. 
LIGHTING - Only operate trimmer in daylight or good artificial light.


DON’T OVERREACH – Keep proper footing and balance at all times.


WARNING: 

Some dust created by this product contains chemicals  

known to the State of California to cause cancer, birth defects or other 
reproductive harm. Some examples of these chemicals are: 
 

-compounds in fertilizers 


-compounds in insecticides, herbicides and pesticides 


-arsenic and chromium from chemically treated lumber 

Your risk from exposure to these chemicals varies depending on how 
often you do this type of work. To reduce your exposure to these      
chemicals, wear approved safety equipment such as dust masks that 
are specially designed to filter out microscopic particles.


WARNING: 

California Proposition 65: 

This product contains chemicals known to the State of California to 
cause cancer, birth defects or other reproductive harm.   

WARNING: 

Cancer and Reproductive Harm - 

www.P65Warnings.ca.gov. 


Model ST00213S 

Summary of Contents for ST00213S

Page 1: ...ed for it will give you years of rugged trouble free performance WARNING To reduce the risk of injury the user must read and understand the owner s manual before using this product Thank you for your purchase DO NOT RETURN THIS PRODUCT TO THE STORE OPERATING ASSEMBLY PARTS SERVICE QUESTIONS GO TO SCOTTS AMERICANLAWNMOWER COM OR CALL 1 800 618 7474 BETWEEN 8 00 AM 5 00 PM EST FOR ASSISTANCE SAVE TH...

Page 2: ...Length of cord in Feet 120V 0 7 8 15 16 30 31 45 Ampere Rating More Not More American wire Gage Than Than 0 6 18 16 16 14 6 10 18 16 14 12 10 12 16 16 14 12 12 16 14 12 Not Recommended DOUBLE INSULATION Double Insulation is a concept in safety in electric power tools which eliminates the need for the usual three wire grounded power cord All exposed metal parts are isolated from the internal metal ...

Page 3: ... 60 Hz 4 Amps Speed 9000 RPM Cutting Width 13 in Weight 5 51 Ib 2 5 kg FEATURES 3 Model ST00213S No Description No Description A Switch trigger F Trimmer head B Cord retainer G Air vents C Rear handle H Edger guide D Auxiliary handle I Safety Guard E Locking collar J Telescoping shaft A B C D E G F H I J ...

Page 4: ...Fit the safety guard onto the trimmer head by aligning the tab on the trimmer head with the notch in the safety guard The screw holes in the safety guard should be aligned with the screw holes in the trimmer head Install the screws and tighten securely A Screw s B Screw hole C Line cutting blade D Safety guard E Notch F Tab Fig 2 Fig 1 A B C D OPERATING TO TURN THE TOOL ON To start the string trim...

Page 5: ...e has been rotated 180 and locks into place Fig 7 Rotate the wire edge guide forward and down into place before edging To operate as a maintenance edger position trimmer above sidewalk as shown Fig 8 Return to trimming position by turning the tool off push in direction of arrow and rotate the trimmer head counter clockwise until it stops When using the tool in the trimmer mode you may choose to fo...

Page 6: ...or your trimmer edger is available at extra cost from your local dealer or service center To install bulk line follow these steps Unplug the string trimmer Remove the spool from the string head NOTE Remove any old line remaining on the spool Cut two pieces of line each being approximately 9 ft long Use only 065 in diameter monofilament line Insert the first line into the anchor hole in the upper p...

Page 7: ...for damage If the guard is bent or cracked handles broken or if you see any other condition that may affect the trimmer s operation it must be repaired before putting it back into use Call our customer service help line at 1 800 618 7474 for assistance TROUBLESHOOTING Problem Unit does not run Line won t feed Line fails to cut off Possible Cause Extension cord not connected to the plug Cord not co...

Page 8: ...iption QTY 1 ST13 AHK 1 Auxiliary handle Kit 1 2 ST13 PGK 1 Protective Guard Kit 1 3 RS90113 Spool Kit 1 For parts or service please call 1 800 618 7474 or visit us online at scotts americanlawnmower com Be sure to provide all relevant information when you call or visit REPAIR PARTS KITS ITEMS The model serial number of this tool is found on a plate or label attached to the housing Please record t...

Page 9: ..._____________________________________________________________ __________________________________________________________________ __________________________________________________________________ __________________________________________________________________ __________________________________________________________________ __________________________________________________________________ ___...

Page 10: ...r environmental extremes This warranty does not cover normal deterioration of the exterior finish or normal wear and tear on the products including but not limited to scratches cracks dents or damage caused by outside chemicals This warranty is not transferable and only applies to new products sold directly from an authorized retailer This warranty does not apply to any product new or used purchas...

Page 11: ...trata con cuidado esta herramienta le otorgará años de óptimo rendimiento y resistencia ADVERTENCIA Para reducir el riesgo de sufrir alguna lesión el usuario debe leer y comprender el manual del operario antes de usar este producto Muchas gracias por su compra NO DEVUELVA ESTE PRODUCTO A LA TIENDA TIENE PREGUNTAS SOBRE FUNCIONAMIENTO MONTAJE PIEZAS O SERVICIO TÉCNICO IR A SCOTTS AMERICANLAWNMOWER ...

Page 12: ...eñada PONGA ATENCIÓN Observe lo que está haciendo Use el sentido común y no opere la desbrozadora si está cansado o bajo la influencia de medicamentos drogas o alcohol GUARDE LA DESBROZADORA BAJO TECHO Cuando no esté en uso la desbrozadora se deberá guardar en un lugar cerrado seco y elevado o fuera del alcance de los niños TENGA CUIDADO AL DAR MANTENIMIENTO A LA HERRAMIENTA La desbrozadora debe e...

Page 13: ... V 60 Hz 4 amp Velocidad 9000 RPM Ancho de corte 33 cm 13 in Peso 2 5 kg 5 51 Iibras No Descripción No Descripción A Interruptor de gatillo F Cabeza recortadora B Retenedor de cable G Salidas de aire C Asa trasera H Guia de bordeadoras D Mango auxiliar I Guardia de seguridad E Collar de bloqueo J Eje telescópico 3 Modelo ST00213S A B C D E G F H I J ...

Page 14: ... etiqueta en el eje Si es necesario suba o baje el mango para ajustarlo a la posición de manejo deseada Reinstale el perno y la tuerca de mariposa Ajuste la tuerca de mariposa por seguridad HERRAMIENTAS NECESARIAS La siguiente herramienta no incluida es necesaria para el montaje destornillador Phillips A Asa delantera B Eje del mango trasero C Tuerca de mariposa D Perno Fig 1 A B C D Fig 2 FUNCION...

Page 15: ...ra de mantenimiento primero debe apagarla Desenchufe el cortador de hilo Tire del collarín de bloqueo del eje y gire el extremo de la manija en sentido antihorario Suelte el anillo de bloqueo del eje del borde cuando la manija se haya girado 180 y se trabe en su lugar Fig 7 Rote la guía de borde de alambre hacia adelante y hacia abajo hasta que quede bien instalada antes de comenzar a bordear Para...

Page 16: ...desbrozadora bordeadora con un costo adicional Para instalar el hilo a granel siga estos pasos Desenchufe la recortadora de hilo Quite el carrete del cabezal del hilo NOTA Retire todo el hilo sobrante en el carrete Corte dos tramos de hilo de 2 7 m 9 ft aproximadamente Use solamente hilo monofilar de 1 65 mm 0 065 in de diámetro Introduzca el primer hilo en el orificio de sujeción de la parte supe...

Page 17: ...está doblado o tiene grietas o los mangos están rotos o si detecta alguna otra condición que pudiera afectar el funcionamiento de la desbrozadora llame al 1 800 618 7474 para obtener asistencia DETECCIÓN Y SOLUCIÓN DE PROBLEMAS Problema La unidad no funciona El hilo no avanza El hilo no se corta Posible causa El cable de extensión no está conectado al enchufe El cable no está conectado a la fuente...

Page 18: ...úmero de serie en el espacio provisto a continuación MODELO N º ST00213S_ _ NÚMERO DE SERIE_______________ Mencione siempre el serial del modelo cuando ordene kits para el mismo N Número de kit Número de artículo Descripción Cantidad 1 ST13 AHK 1 Kit de mango auxiliar 1 2 ST13 PGK 1 Kit de protección protectora 1 3 RS90113 Kit de carrete 1 LLÁMENOS PRIMERO Si tiene preguntas sobre el funcionamient...

Page 19: ..._____________________________________________________________ __________________________________________________________________ __________________________________________________________________ __________________________________________________________________ __________________________________________________________________ __________________________________________________________________ ___...

Page 20: ...in cargar por demasiadotiempo y mal uso o abuso de la batería Estagarantía no cubre los dañoscausados por el frío el calor la lluvia el exceso de humedad u otrascondicionesambientalesextremas Estagarantía no cubre el deterioro normal del acabado exterior ni el desgaste normal de los productos incluidos entre otros los arañazos grietas abolladuras o dañoscausados por productosquímicosexternos Estag...

Page 21: ... intensif et sans soucis AVERTISSEMENT afin de réduire le risque de blessure l utilisateur doit lire et comprendre le manuel de l utilisateur avant d utiliser ce produit Merci pour votre achat CONSERVEZ CE MANUEL POUR RÉFÉRENCE ULTÉRIEURE NE RENVOYEZ PAS CE PRODUIT AU MAGASIN AVEZ VOUS DES QUESTIONS CONCERNANT LE FONCTIONNEMENT L ASSEMBLAGE LES PIÈCES OU LA RÉPARATION DU PRODUIT ALLEZ À SCOTTS AME...

Page 22: ... les fils quand vous prenez ou tenez la tondeuse à fil ATTENTION les fils tournent encore après la mise hors tension NE PAS FORCER LA TONDEUSE À FIL Elle sera plus efficace et avec un moindre risque de blessure à l intensité pour laquelle elle a été conçue RESTER VIGILENT Regardez ce que vous faites Faites preuve de bon sens N utilisez pas la tondeuse à fil si vous êtes fatigué ou sous l influence...

Page 23: ...itesse 9000 tr mn Largeur de coupe 33 cm 13 po Poids 2 5 kg 5 51 Ib 3 Modèle ST00213S No La description No La description A Commutateur de déclenchement F Tête de coupe B Cordon de retenue G Bouches d aération C Poignée arrière H Guide de coupe D Poignée auxiliaire I Agent de sécurité E Collier de verrouillage J Manche télescopique A B C D E G F H I J ...

Page 24: ... le poteau de la poignée arrière dans la zone indiquée par l illustration Ajustez la poignée vers le haut ou le bas si nécessaire à la position de travail souhaitée Réinstallez le boulon et l écrou à oreilles Serrer l écrou à oreilles pour le fixer A poignée avant B manche arrière C Ecrou à oreilles D Boulon 4 Modèle ST00213S Fig 1 A B C D Fig 2 MISE EN MARCHE DE L OUTIL Pour démarrer le trimmer a...

Page 25: ...e guide du fil en place vers l avant et vers le bas avant de couper les bordures Pour l utiliser comme coupe bordures positionnez la tondeuse à fil au dessus du passage comme indiqué Fig 8 Pour remettre l outil en position de coupe arrêtez le poussez dans le sens de la flèche et faites tourner la tête de la tondeuse à fil dans le sens contraire des aiguilles d une montre jusqu à ce qu elle s arrêt...

Page 26: ...TTE À PARTIR DE FIL EN VRAC N UTILISEZ QUE DU FIL DE 1 65 MM 0 065 PO DE DIAMÈTRE Le fil en vrac pour votre tondeuse à fil coupe bordures est disponible à l achat auprès de votre vendeur ou centre de réparation local Effectuez les étapes suivantes pour installer le fil en vrac Débrancher la taille bordures à ligne Retirer la bobine de la tête de coupe NOTE Retirer le fil restant éventuellement sur...

Page 27: ...tordu ou fendu ou les poignées cassées ou si vous voyez un autre état pouvant affecter le fonctionnement de la tondeuse à fil veuillez appeler le 1 800 618 7474 pour assistance Problème L appareil ne fonctionne pas Le fil n avance pas Le fil n est pas coupé Cause possible La rallonge n est pas branchée à la prise Le câble n est pas branché à la source d alimentation Le bouton de verrouillage n est...

Page 28: ...llez fournir toute l information pertinente lorsque vous nous appelez ou nous rendez visite PIÈCES DE RECHANGE KITS ARTICLES Le numéro de modèle de série de cet outil se trouve sur une plaque ou une étiquette fixée au bâti Notez votre numéro de série dans l espace prévu ci dessous NUMÉRO DE MODÈLE _ST00213S NUMÉRO DE SÉRIE______________ Toujours mentionner le numéro de modèle lors de la commande d...

Page 29: ..._____________________________________________________________ __________________________________________________________________ __________________________________________________________________ __________________________________________________________________ __________________________________________________________________ __________________________________________________________________ ___...

Page 30: ...ie laissée trop longtemps non chargée et une mauvaise utilisation ou un mauvais traitement de la batterie Cette garantie ne couvre pas les dommages causés par le froid la chaleur la pluie l humidité excessive et les autres conditions environnementales extrêmes Cette garantie ne couvre pas la détérioration normale de la finition extérieure ou l usure normale sur les produits y compris notamment les...

Reviews: