7
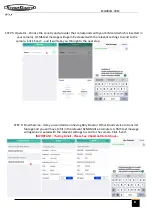
STEP 3:
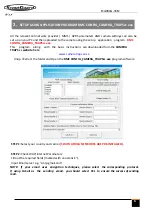
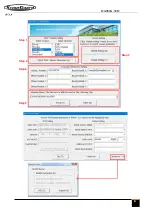
Choose between default or manual settings. For first time use, we suggest using the default
settings.
STEP 4:
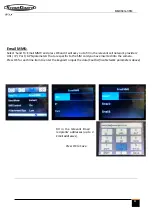
Input the phone number of the phone to receive images in the
“administrator
number”
field
and
address
in “Receive Email 1” field (This is
NOT the phone number of the inserted SIM card that resides in the camera). The administrator number
is also the one that can send the remote SMS commands - see later for more information on
Remote
Communication
-
PLEASE NOTE - No country prefixes (+27 etc.) Simply insert your cell numbers as is e.g.
'0823456789'
STEP 5:
Select the location to save the relevant settings then
click 'Save' and a 'GSM' folder will
be created in the selected location.
If your country or SIM card provider is not listed, select “Others”. You will need
to ask the SIM card provider for their specific MMS URL, MMS APN, Port, MMS IP, Account,
Password, GPRS APN, GPRS account, GPRS password
(or contact CAMERA TRAPS cc for relevant
parameters -
info@cameratraps.co.za
).
For email sending, your email service provider will be
able to provide the send email server and port settings.
STEP 6
:
Copy this 'GSM' folder to the SD card and after it is inserted into the camera
and the camera is turned on, these settings will automatically be updated to the camera.
MG984G
-3
6
M
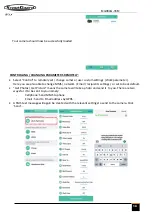
You can make the cameras send and receive to the same e-mail address so now suddenly you are not limited to only 4 x recipient e-mail addresses.
For example...
Create a free Gmail address and have the camera send and receive to this new address...
The relevant trusted personnel that you want to receive the footage from the camera/s just have to have this new E-mail address and Password and all they need
to do is set this new address up in one of the above listed free Apps on their phones / tablets. They will then automatically also receive the camera/s activations...
Now your recipient list is unlimited...
Another option is to set up an 'Auto-Forward' on your G-mail address and your new g-mail address will forward whatever arrives in the inbox to the relevant e-mail
address/s that you choose... This method does require an extra verification step by having the relevant forward address being verified by clicking on a link sent via
Google..
For Proactive Security Applications and immediate responses
- it’s best to
NOT
use the standard e-mail Apps that come with smart phones because these
standard smart phone e-mail Apps have server fetch / check limitations and the quickest you can automatically set them to fetch / check the relevant server is +/- 5
minutes. For Proactive Security applications - you want to be notified as the footage (e-mail) arrives at the relevant server…
Hence for immediate e-mail footage notification of activations on your phones / tablets, please download one of the below FREE Apps from either the Google Play
Store (for Android phones) or Apple i-Store (for i-Phone’s).
With these mentioned Free mail Apps there are no server fetch / check limitations that smart devices are forced to adhere to so when an e-mail message arrives in
the inbox (image or clip sent from the camera) you will be alerted immediately via the App on your phone / tablet - just like an MMS - but it will also be far cheaper
than sending via MMS...
THINGS T
O CONS
I
DER...
Gmail
MyMail
Microsoft Outlook


