background image

Heatime® HR Frequently Asked Questions 

HeatimeHR User Manual RC1 2.13.X.X .docx 


P a g e  135 

8  Heatime

®

 HR Frequently Asked Questions 

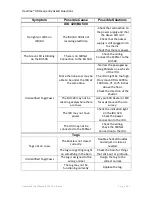
Use the information in these tables as a guide for identifying and solving issues that you 
may encounter. 


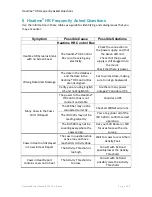
Symptom 

Possible Cause 

Possible Solutions 

Heatime HR Control Box  

Heatime HR Screen is blank 

with no Screen Saver 

The Heatime® HR Control 

Box is not receiving any 

electricity. 

-Check the connection to 

the power supply, and that 

the Green LED is lit. 

-Check that the power 

supply is still plugged in to 

the mains. 

Check that there is power. 

Wrong Date Alert Message 

The date in the database 

and the date in the 

Heatime® HR Control Box 

are not aligned. 

Set to correct date, making 

sure to not go backwards. 

Verify you are using English 

US and not English UK. 

Are there many power 

outages? Consider a UPS. 

Many Cows in the Cows 

W/O ID Report 

The power to the Heatime® 

HR Control box is not 

constant and stable. 

Consider a UPS 

The SCRNet may not be 

connected correctly. 

Check all SCRNet wire runs. 

The IDU 420s may not be 

reading correctly 

Pass a tag under all of the 

IDU 420s to confirm correct 

operation. 

The BU 500 may not be 

covering everywhere the 

cows can go. 

Ask your SCR Dealer or SCR 

for assistance with a site 

survey. 

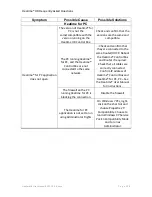
Cows in Heat not displayed 

in Cows in Heat Report 

The cow in question while 

active may not have 

reached its Activity Peak. 

Wait for cows to reach their 

Activity Peak. 

The Activity Threshold is 

too high. 

Consult with SCR and 

possibly lower the Activity 

Threshold. 

Cows in Heat Report 

contains cows not in heat 

The Activity Threshold is 

too low. 

Consult with SCR and 

possibly raise the Activity 

Threshold. 

Summary of Contents for Heatime HR

Page 1: ......

Page 2: ...onsent Disclaimer The information in this manual was accurate and reliable at the time of its release However we reserve the right to change the specifications of the product described in this manual without notice at any time Registered Trademarks All other proprietary names mentioned in this manual are the trademarks of their respective owners SCR Product Number DOCXXXX Revision 2 13 X X July 20...

Page 3: ...Tag Data 30 2 6 Pairing Cows with Tags 34 2 7 Customizing the Message Screen 36 3 Working with Heatime HR 39 3 1 Daily Tasks 39 3 1 1 Using the Cows in Heat Report 40 3 1 2 Using the Health Report 49 3 1 3 Using the Distress Report 52 3 1 4 Understanding Tech Alerts 53 3 2 Batch Events 56 3 3 Weekly Tasks 59 3 3 1 Reading the Anestrus Cows Report 60 3 3 2 Reading the Cows with Irregular Heat Repor...

Page 4: ...9 6 1 4 How to Read the Sorting Report 120 6 1 5 How to Read the Cows to be Sorted Report 120 6 1 6 The Cows in the Sorted Cows area are Different 121 6 2 DataWand 122 6 2 1 Creating Sets for the SCR DataWand 124 6 2 2 Loading Sets to the SCR DataWand 127 7 Registering to HC24 and Connecting Heatime HR 129 7 1 HC24 Registration 130 7 2 Registering Heatime HR and Herd Management Systems 132 7 3 Is ...

Page 5: ...fication while the Black HR Tag provides Rumination and Activity Monitoring as well as Identification Tag Type LD Identification Identification Activity Monitoring Rumination Monitoring HR LD Tag HR Tag H LD Tag H Tag Green H Tag Black HR Tag The Black Heatime HR Tag detects individual animals in heat as well as checks their welfare and behavior continuously 24 hours a day 7 days a week 365 days a...

Page 6: ...ieve and view the information Individual cow data is stored in the database for up to a year Each time new data is received at the control unit that data is compared to the cow s historical data to detect any changes in activity or rumination If changes in activity or rumination levels are detected the system alerts the user When a sorting gate is installed cows can be diverted automatically to a ...

Page 7: ...signed to provide reasonable protection against harmful interference when the equipment is operated in a commercial environment This equipment generates uses and can radiate radio frequency energy and if not installed and used in accordance with the instructions may cause harmful interference to radio communications Operation of this equipment in a residential area is likely to cause harmful inter...

Page 8: ...ve tasks that must be done in any new Heatime HR installation before adding any cows 2 1 1 Set the Language The first step is to set the Language 1 Tap the SCR Logo in the bottom left of the screen a dialog box appears 2 Tap the Down Arrow on the list box and the list of available languages appears 3 Choose the Language required from the list 4 Tap the Green Check Mark to save the choice and set t...

Page 9: ...X docx P a g e 5 2 1 2 Setting the Correct Date and Time The next step is to set the correct Date and Time 1 From the Main Menu tap Options the Options Menu appears 2 Tap User Options the Keypad appears 3 Enter the User Password 6285 the User Options Menu appears ...

Page 10: ...nual RC1 2 13 X X docx P a g e 6 4 Tap Parameters the System Parameters menu appears 5 Tap Date and Time the System Date and Time menu appears 6 Tap into the Change Date Field a calendar appears Choose the correct date from the Calendar and tap OK ...

Page 11: ...d Use the Arrows to change the time Remember to set AM or PM as required 8 Tap OK to save the correct Time and Date NOTE When using Heatime HR no adjustments are needed for Daylight Savings Time CAUTION The time on the Heatime HR device cannot ever be adjusted backwards once there are cows in the system ...

Page 12: ... Farm Name The next step in configuring a new Heatime HR System is to enter the name of the farm 1 From the Main Menu tap Options the Options menu appears 2 Tap User Options the Keypad appears 3 Enter the User Password 6285 the User Options menu appears 4 Tap Parameters the Parameters menu appears ...

Page 13: ... g e 9 5 Tap Miscellaneous the Miscellaneous Options menu appears 6 Tap into the Farm Name Field the keyboard appears Use Back Space to clear the field and enter the name of the Farm 7 Tap on the green background to clear the keyboard and tap OK to save the Name of the Farm ...

Page 14: ... 1 4 Creating Groups After entering the Name of the Farm Groups are created 1 From the Main Menu tap Options the Options menu appears 2 Tap User Options the Keypad appears 3 Enter the User Password 6285 the User Options menu appears 4 Tap Herd Handling the Herd Handling menu appears ...

Page 15: ...nt Screen appears Field Name Description Group Name The name of the group Heat Threshold The threshold for elevated activity that defines what is a cow in heat W O ID Is this group exposed to ID Units When a group is not exposed to ID Units either in the Pens or in the Milking Parlor tick this box so the cows are not included in the Cows W O ID Report ...

Page 16: ...field the Keyboard appears Use the Keyboard to enter the names of the required groups 7 Tap the Green Background to clear the Keyboard and tap OK to save the Names of all the Groups NOTE The group General must remain This is the default group that contains all cows not yet assigned to a different group ...

Page 17: ...guring Heatime for your Herd The next step is to configure Heatime for operation in your herd 1 From the Main Menu tap Options the Options 2 Tap User Options the Keypad appears 3 Enter the User Password 6285 and tap OK the User Options Menu appears 4 Tap Parameters the Parameters Menu appears ...

Page 18: ... Alert Hours Cows not identified for the default of 14 hours are included in the Cows W O ID Report Set Graph Days The default width of graphs in days Low Daily Rumination Threshold Cows that ruminate for less than this have 10 points deducted from their Health Index Health Index Threshold Cows with a Health Index of less than this appear in the Health Report Calving Alert Sensitivity Default sens...

Page 19: ...reeding this is the number of days that cows will be left off of the Heat Report even if they appear to have elevated activity NOTE When installing Heatime for the first time SCR Strongly recommends leaving these settings as default Always consult with your SCR Dealer or SCR Engineering before making any changes to these settings WARNING If at any point during the installation and initial training...

Page 20: ...ystem is configured to provide a very high detection rate of problematic calvings However it is possible that the Prolonged Labor Alert will be generated for normal calvings as well The Prolonged Labor Alert is available in one of three modes On the Main Menu of Heatime HR As an Email Message if Heatime HR is connected to the Internet As an SMS Message if Heatime HR is connected to the SCR SMS Mod...

Page 21: ...re they are used Paring is done using the TC 500 device 1 Insert the USB Plug in the USB Socket on the Heatime Control Box The 4 LEDS will blink The TC 500 is ready to use when only the Power Led is flashing 2 From the Heatime Main Menu Tap Options and then User Options 3 Enter the User Password 6285 the User Options Menu appears 4 Tap Utilities then LD Tags the TC 500 Menu appears ...

Page 22: ...Valid values for Farm ID are any number in between 1 8388607 NOTE Adjacent farms should use different Farm ID numbers to prevent identification and download of the wrong data 5 A number appears in the Farm ID Box This number corresponds to the serial number of the TC500 Tap Set Farm ID 6 Tap Save to save the information in the Database Reboot now all BU 500 s attached to the SCRNet RS 485 Network ...

Page 23: ...and hold it directly under all the ID Units to demonstrate their correct operation Use 2 3 different tags so the information displayed on the Control Box changes between identifications In the Window on the bottom of the Main Menu the Tag s Number Date and Time are displayed If this tag has been paired with a cow this information is also displayed ...

Page 24: ... use with your Heatime is completed by your SCR Distributor or SCR Engineering CAUTION Failure to pair tags with the farm at once may cause loss of data when tags are attached to the cows 1 Insert the USB Plug in the USB Socket on the Heatime Control Box The 4 LEDS will blink The TC 500 is ready to use when the Power LED is steady and the Scanning LED is flashing 2 From the Main Menu tap Options a...

Page 25: ...e and the TC 500 is ready for tag pairing NOTE When The TC 500 is activated and ready for tags the Power LED is steady and the Scanning led blinks 7 Pass tags slowly over the TC 500 with the Rounded Black end down toward the TC 500 and the Engraved SCR Logo facing you The Receiving LED will begin to flash when communication with the tag is established and the parameters on the tag are changed 8 Re...

Page 26: ...n information The information collected depends on the type of tags in use This baseline of information is used to judge behavior in the future NOTE Two people are needed to fit the tags on the cows WARNING Extreme care and caution must be exercised when attaching tags collars to cows 2 4 1 Attaching Collars Tags to Cows Read these instructions from start to finish before attempting this procedure...

Page 27: ... P a g e 23 2 Record the Tag Number and Cow Number When assembling the tags record the tag number cow number group and status in a list Keep this list handy since the information will be used later This table may be printed as required Cow Number Tag Number Group Status ...

Page 28: ...Heatime HR System Activation HeatimeHR User Manual RC1 2 13 X X docx P a g e 24 3 Open the Buckle NOTE There is a spare clip included in the box 4 Pull the buckle apart ...

Page 29: ... Activation HeatimeHR User Manual RC1 2 13 X X docx P a g e 25 5 Remove the collar from the buckle The length of the collar can be adjusted to best fit the cow 6 Helper now backs the cow s head up against the stanchion ...

Page 30: ...t side of the animal directly behind the left ear The tag should be on the upper portion on the neck as pictured below Tighten the collar so you are able to fit in two fingers snuggly between the collar and the top of the cow s neck just above where the sensor is placed 8 Fold the collar inward toward the cow at the desired length and attach to the buckle ...

Page 31: ...g is correctly placed directly behind the cow s left ear and there are only two fingers of slack in the collar CAUTION Correct attachment of the neck tags is vital to their performance Tags that are not placed in the correct location or that are not fitted on snug collars will not be able to collect or transmit data correctly ...

Page 32: ...t will be necessary to remove tags from cows Read these steps from start to finish before attempting to remove tags NOTE Two people are needed to remove tags from cows WARNING Extreme care and caution must be exercised when removing tags collars from cows 1 Slide ring off of the end of the collar 2 Turn over the buckle and remove the pin ...

Page 33: ...Heatime HR System Activation HeatimeHR User Manual RC1 2 13 X X docx P a g e 29 3 Open the buckle and slide off the collar 4 Remove collar from the cow ...

Page 34: ...s data Cow Number Burn Number SCR Tag Number Group Number from Creating Groups on page 10 and the Birth date or Calving date of the cow a If the cow has not yet calved use her birth date b If the cow has calved use her last calving date 2 Enter this data using Excel NOTE The date must be in the DD MM YYYY format 3 Save the file as CSV Comma Delimited Move the saved file to a USB Stick 4 Insert the...

Page 35: ... HR System Activation HeatimeHR User Manual RC1 2 13 X X docx P a g e 31 5 From the Main Menu Tap Options User Options 6285 Utilities System Utilities 6 Tap Database Operations the Manage Database Menu appears ...

Page 36: ...ual RC1 2 13 X X docx P a g e 32 7 Next to the Import Data from CSV File Option tap Browse and highlight Hard Disk for the USB Stick and tap OK 8 Browse the USB Stick until you find the saved CSV file and Tap OK 9 Tap GO to begin the CSV File Upload ...

Page 37: ...cx P a g e 33 10 A message appears click the green check mark to continue 11 A message is displayed when the process completes 12 Return to the Main Menu and tap Total Cows and verify that the cows you have imported exist NOTE CSV Files currently support SCR Tags only ...

Page 38: ...ill walk around the pens be identified by ID Units or when the BU 500 queries the tags These cows must then be entered into the system and paired with their Tag ID This is a second way to enter cows into the Heatime HR system Unassigned tags appear in the Tech Alerts reports section 1 Tap Tech Alerts and then tap Tag Problems 2 Tap Unassigned Tags the Unassigned Tags report appears ...

Page 39: ...ap into the Red Area and a Cow Card appears 4 Tap Open the keypad appears 5 Using the worksheet that was filled in when attaching the tags to the cows record the cow number and tap OK The rest of the information about this cow can be entered by editing the Cow Card add cross reference ...

Page 40: ...ep in integrating the system with farm and milking operations is customizing the messaging screen 1 From the Main Menu tap Options the Options menu appears 2 Tap User Options the Keypad appears 3 Enter the User Password 6285 and tap OK the User Options Menu appears 4 Tap Message Screen The Message Screen Settings Menu appears ...

Page 41: ...t Color Odd Row The color to use for the font of the odd lines of data cows in the table Background Color Even Row The color to use for the background of the even lines of data cows in the table Font Color Even Row The color to use for the font of the even lines of data cows in the table Number of Rows The number of rows to use for each view Font Size The size of the font to use on the display Ref...

Page 42: ...Heatime HR System Activation HeatimeHR User Manual RC1 2 13 X X docx P a g e 38 5 Tap OK to save the desired configuration 6 Tap Home to return to the Main Menu ...

Page 43: ...e a great deal of time These reports should be examined each and every day Report Name Description Using the Cows in Heat Report This report shows all cows that are currently in heat Using the Health Report This report shows all cows that have a Health Index below 86 Using the Distress Report This report shows cows that may be in distress Understanding Tech Alerts Leads to two different types of r...

Page 44: ...this report should not be bred NOTE When breeding once a day if cows appear in this report on consecutive days they should only be bred on the second day if the value for Hours to AI is greater than 6 NOTE When breeding twice a day AM PM breed cows as follows A When the Hours to AI value is 18 or less breed cows at the next or closest breeding session B When the Hours to AI value is 19 or more bre...

Page 45: ... for each of these cows tells us they should be bred if they are in cycle at the closest breeding session d Cow 800 has her Rumination Value also in red because her Rumination Value has dropped more than 30 points in the last 24 hours e Cow 832 is 62 Days in Milk DIM 7 days from the last recorded heat and has yet to be bred during this lactation f Cow 800 is 117 DIM 21 days since the last recorded...

Page 46: ...n Breed Now and breeding is entered for this cow on this day h Tap in the Group Name Field to see all of the cows in that group i Tap into Cow ID DIM Age Days since Last Heat or Days from AI to see the Cow Card for this cow j Tap into Activity Peak Rumination Low or Hours to AI to see the Rumination and Activity Change Graph for this cow ...

Page 47: ...e Cow Card The Cow Card holds and centralizes all of the information for individual cows Everything needed to identify and manage each cow can be found here Navigation Icon Description Go back to the originating Report or List Go up to the Main Menu Refresh this report Record breeding for this cow on this date ...

Page 48: ...tion Open Cow Search Go to the Previous Cow in the Report or List Go to the Next Cow in the Report or List Open the Cow Card for editing Close the Cow Card abandon changes Save the Changes to the Cow Card Delete this record Go to the Cow Card Graph Parameters Available from Graphs and explained here ...

Page 49: ...ast calved or her birthday Last AI Date When the cow was last Bred If blank then the cow has not yet been bred Pregnancy Check The date and results of the cow s last pregnancy check Do Not Breed Is this cow a candidate for culling DIM Age How many Days in Milk or Age in Days Three Graphs are available from each Cow Card Property on Cow Card Available Graph Change Graph Shows the daily changes in A...

Page 50: ...orking with Heatime HR HeatimeHR User Manual RC1 2 13 X X docx P a g e 46 These symbols are used on all graphs in Heatime HR Symbol Description Insemination Positive Pregnancy Check Calving Health Event ...

Page 51: ...ulated Activity Rumination Change Displays the daily changes in calculated Rumination Raw Activity Displays the daily changes in Raw Activity Rumination Minutes Displays the daily changes in Actual Rumination Minutes Average Activity Displays the daily average Activity Daily Rumination Displays the actual daily rumination minutes The subject of the graph can also be chosen Graph Subject Descriptio...

Page 52: ...rmation displayed here will only be as complete as the last time the cow ID d 7 Days Displays information from the last 7 days 30 Days Displays information from the last 30 days Useful when confirming suspected cystic cows 60 Days Displays information from the last 60 days The default view for most reports 90 Days Displays information from the last 90 days 365 Days Displays information from the la...

Page 53: ... information Column Description Cow ID The ID for the cow Group Name The group where the cow is assigned DIM Age The Days in Milk or Age of the cow Activity Low The difference between the cow s activity in the last 24 hour window and the average for that same window over the previous week Rumination Low The difference between the cow s rumination minutes in the last 24 hour window and the average ...

Page 54: ... has eaten and how well she is able to rest Rumination monitoring is shown to be a very good indicator of future calving diseases and also an early indicator of diseases in general Rumination monitoring may also help identify difficult calvings When Rumination drops this is a clear sign that the cow is uncomfortable and probably not well A drop in Rumination is often seen before any drop in produc...

Page 55: ...g Red behind Cow ID This background signifies that the cow has been set to Do Not Breed Yellow behind Cow ID This background means cows that have had positive pregnancy checks Pink behind entire line in report This background means cows that have a drop of 50 rumination minutes over each of 3 consecutive days Red Numbers in any field This means a value that is irregular and or exceptional that bea...

Page 56: ...rages all of the technical advantages of HR LD Tags HR LD Tags enable Heatime HR LD to in almost real time advise of possible cows in labor or distress Tap Distress the Distress Report appears Two types of cows can appear in this report Cows that may be experiencing a difficult or prolonged calving Cows that may require assistance ...

Page 57: ...activity and or rumination data is outside the normal operating range Unassigned Tags This report displays all of the tags that have been scanned by an ID Unit but the Tag ID Number is not yet paired with a cow Net Problems Holds reports about the network Problem Node The number of network devices or nodes that have stopped working in the last 24 hours No Net Time The length of time the network is...

Page 58: ...ing Collars Tags to Cows cows will walk around the pens be identified by ID Units or when the BU 500 queries the tags These cows must then be entered into the system and paired with their Tag ID Unassigned tags appear in the Tech Alerts reports section 1 Tap Tech Alerts and then tap Tag Problems 2 Tap Unassigned Tags the Unassigned Tags report appears ...

Page 59: ...en the cow card for editing 5 Using the worksheet that was filled in when attaching the tags to the cows record all of the information about the cow in the system Cow ID Calving or Birth Date Last AI Date and Group ID are all entered here 6 Tap Save to save the information about this cow 7 Tap on Next to advance to the next cow in the list ...

Page 60: ...e 56 3 2 Batch Events Certain events like pregnancy checks or moving cows from one group to another are more easily entered in a large cluster or batch 1 From the Main Menu tap Options the System Options Menu appears 2 Tap Batch Events to enter the Batch Events Entry Menu ...

Page 61: ...ws giving birth Set Do Not Breed Changing the status of cow to Do Not Breed Report Insemination Reporting the insemination of cows 3 Choose the correct event from the drop down list For Group Transfer choose the destination group For Pregnancy Check choose the date and if the checks are Positive or Negative For Calving choose the date For Set Do Not Breed change from No to Yes For Report Inseminat...

Page 62: ...C1 2 13 X X docx P a g e 58 4 Choose the cows for this Batch of events from the Cow List Use the Keypad if you prefer 5 When finished tap Save to save the events A confirmation dialogue box appears 6 Tap to confirm and save the events in the system ...

Page 63: ...s report displays cows that have not displayed a heat in the last 30 days unless they are pregnant Reading the Cows with Irregular Heat Report This report displays cows that have at least three 3 heats in the last 30 days Reading the Health History Report This report displays the cows that were included in the health report over the last week Reading the Total Cows Report This report displays all ...

Page 64: ...Reading the Anestrus Cows Report The Anestrus Cows Report displays any cow that has not been detected in heat for the last 30 days the cow must also have the tag for at least 30 days 1 Tap Reports on the Main Menu the All Reports menu appears 2 Tap Cows the Cows Reports menu appears ...

Page 65: ...HR User Manual RC1 2 13 X X docx P a g e 61 3 Tap Anestrus Cows the Anestrus Cows report appears Some cows are colored pink because they have recorded system heats at least 42 days ago These cows are ready to be checked for pregnancy ...

Page 66: ...Anestrus Cows Report 2 Cow s Pregnancy Status in Heatime HR In Heatime HR a cow is NOT pregnant if any one of these conditions is fulfilled a The cow has a negative pregnancy check status This is the default state in Heatime HR All new cows are in this state b The cow has a positive pregnancy check more than 270 days in the past It is most probable that this cow has already calved but that event w...

Page 67: ...0 days and is at least 30 days from calving and has no recorded system heats then the cow appears in the Anestrus Cows Report OR 4 with 2 and 5 If the cow is not pregnant and has a tag for more than 30 days and has not had a system heat for at least 42 days but no more than 90 days Then the cow appears in the Anestrus Cows Report This phrase seeks to label cows as Anestrus that might actually be r...

Page 68: ... Cows Reports menu choose Anestrus Cows the Anestrus Cows Report appears 4 Tap on Days from Last AI column to sort cows by days from last breeding Locate cows that require a pregnancy test based on the number of days after AI Cows appearing in pink lines are recommended for Pregnancy Checks The line turns pink when a cow has not showed signs of heat for 42 90 days after its last recorded heat You ...

Page 69: ...rd with the result by tapping on the cell in the P C Result column to get to the Cow Card 6 Tap on the Edit icon the colors of the fields will change from gray to white 7 Tap on the Pregnacy Check date drop down menu a window will appear Select the date of pregnancy check and the result from the list immediately to the right ...

Page 70: ...a g e 66 8 Tap on Save The record is updated 9 Tap on the back button to return to the Anestrus Cows report 10 Repeat these steps for each cow that has a Pregnancy Check result NOTE Lactation Status Events like Pregnancy Checks are important and must be updated daily ...

Page 71: ...P a g e 67 3 3 2 Reading the Cows with Irregular Heat Report The Cows with Irregular Heat Report displays any cows that have three or more heats in the past 30 days 1 Tap Reports on the Main Menu the All Reports menu appears 2 Tap Cows the Cows Reports menu appears ...

Page 72: ...er Group Name The Cow s Group DIM Age How many days since the cow has calved or how old the cow is if she is a heifer of System Heats in 30 Days The number of time this cow has been in heat during the last 30 days according to the system Days since Last Heat The number of days since the last system recorded heat NOTE These cows should be checked by the veterinarian ...

Page 73: ... the Health History Report The Health History Report displays all cows that appeared in the Health Report over the last seven 7 days except for the cows that appear in today s Health Report 1 Tap Reports on the Main Menu the All Reports menu appears 2 Tap Cows the Cows Reports menu appears ...

Page 74: ...roup Name The Cow s Group DIM Age How many days since the cow has calved or how old the cow is if she is a heifer Events in Last Week Number of time this cow appeared in the health report over the last 7 days Days from Last Event Number of days since the last time this cow appeared in the Health Report Last Health Index The cow s Health Index when she last appeared in the Health Report ...

Page 75: ... Report displays all of the Cows with SCR Tags in the system From the Main Menu Tap Total Cows the SCR Cows Report appears The first line in this list is a tag that is not yet been paired with a cow Cows 724 and 730 are pregnant For more information on the use of color in Heatime see Understanding Color in Heatime on page 51 ...

Page 76: ...e may be required to be performed monthly and others may be required less often Report Description Reviewing Do Not Breed Cows This report contains all of the cows with a Do Not Breed Status of yes Reviewing the Group Status Report This report displays a summary of each group Reviewing the Last ID Report This report displays the last three times each cow was identified ...

Page 77: ...P a g e 73 3 4 1 Reviewing Do Not Breed Cows Deciding to not breed certain cows is an important factor in the genetic as well as economic success of every dairy herd 1 Tap Reports on the Main Menu the All Reports menu appears 2 Tap Cows the Cows Reports menu appears ...

Page 78: ...4 3 Tap Do Not Breed Cows the Do Not Breed Cows report appears This report shows all of the cows that have been set to Do Not Breed and their respective groups If there is a specific cow that needs to be added to the Do Not Breed Report 4 Tap Search the Search Keypad appears ...

Page 79: ...he requested Cow Card appears 6 Tap Open to enable the record for editing 7 Tap the arrow next to Do Not Breed and choose Yes 8 Tap Save to save the updated status 9 Tap Back to return to the Do Not Breed Report the report appears The report is already updated to include the newly entered cow 10 Repeat as required ...

Page 80: ...ap Reports on the Main Menu the All Reports Menu appears 2 Tap Groups the Groups Reports menu appears 3 Tap Group Status the Groups Status report appears Values for Activity and Rumination are not calculated for groups that have less than 10 members NOTE When there are large changes in Activity for an entire group this may indicate that the group escaped their pen or possibly had unauthorized visi...

Page 81: ...Reviewing the Last ID Report The last ID Report displays the last time each cow was identified by the system 1 Tap Reports on the Main Menu the All Reports Menu appears 2 Tap Identification the Identification Reports list appears 3 Tap Last ID Report the Last ID Report List appears ...

Page 82: ...p Name The Cow s Group Hours from Last ID The hours since the cow was most recently identified Last ID Station The RS 485 Address of the ID Unit that identified the cow Hours from ID 1 The hours since the cow was previously identified Hours from ID 2 The hours since the cow was identified before the previous identification ...

Page 83: ...ime to time Backups or Updates may be required 3 5 1 Heatime HR Backups Heatime HR automatically backs up the internal database every day Should a manual backup be required follow this procedure 1 From the Main Menu choose Options from the Options menu choose User Options 2 Enter 6285 on the Keypad and choose Utilities 3 Choose Database Operations and the Manage Database menu appears ...

Page 84: ...appears 5 Select the location where the backup file will be saved The system automatically assigns a file name NOTE When a USB Memory stick is used it is recognized by the system as a Hard Drive 6 Tap on OK and exit the screen 7 Tap Go the backup begins 8 The dialogue appears with the name of the backup file when the backup completes ...

Page 85: ...the Main Menu tap Options the Options menu appears 2 Tap Technician Options the keypad appears 3 Enter the Technicians Password 1239 tap OK the Technician Options Menu appears 4 Tap Technical Utilities and then Tap Miscellaneous the Miscellaneous Options Menu appears 5 Insert the USB stick that contains the Backup that you wish to Restore 6 Tap Update Restore the System Update Screen appears ...

Page 86: ...rking with Heatime HR HeatimeHR User Manual RC1 2 13 X X docx P a g e 82 7 With the USB stick inserted into the USB Drive on the Heatime HR Control Box Tap Browse Locate the file to be used for restoring ...

Page 87: ...onfirm that this is the file and tap Start Restore As the restore process progresses so does the progress bar 9 When the Restore has completed this dialogue appears Tap OK to close the Dialogue reboot the Heatime HR control box and load the restored data 10 Remove the USB stick WARNING Only perform a restore when directed by your SCR Distributor or SCR Engineering ...

Page 88: ...g steps from beginning to end before attempting any upgrade 1 Backup the Heatime HR Control Box as instructed in Heatime HR Backups on page 79 2 From the Main Screen choose Options the Options Menu appears 3 From the Options Menu choose Technician Options a keypad appears 4 Enter 1239 and press OK the Technician Options Menu appears 5 From the Technician Options menu choose Technical Utilities the...

Page 89: ...he version that you wish to use for the update b When ready click the Green Check Mark A clock appears 8 The update begins now and goes thru Steps One Eight automatically a Step 8 is the reboot of the Control Box and the completion of the update 9 Remove the USB Drive WARNING This process should only be performed when instructed by SCR Engineers or your SCR Reseller ...

Page 90: ...PC as the interface NOTE When installing for the first time the Version running on the Heatime HR Control Box and the Version of Heatime Viewer must be the same After that if connected to the HC 24 the Heatime Viewer version will update automatically NOTE When connecting the Heatime HR Control Box to the Router DHCP Server for the first time the Heatime HR Control Box must be rebooted ...

Page 91: ...g e 87 4 1 Installing Heatime Viewer Follow these instructions to correctly install Heatime Viewer 1 Browse to the location of the Heatime Viewer install set 2 Click on the HTHR Viewer MSI file the installation begins 3 Click on Next the installation continues ...

Page 92: ...atimeHR User Manual RC1 2 13 X X docx P a g e 88 4 Click on Next the destination folder window appears Heatime HR for the PC works best when installed in the default location and with the default user rights of Everyone ...

Page 93: ...eHR User Manual RC1 2 13 X X docx P a g e 89 5 Click on Next the installation begins and progresses until finished 6 The Installation of Heatime HR for the PC is complete Click on Close to terminate the installation program ...

Page 94: ...se Properties 8 Choose the Compatibility Tab and click Run the program as an administrator 9 Click on the Heatime Viewer Icon the program launches If a message appears asking if the program should be allowed to have access to the network or should be allowed to go through the firewall always give the program access ...

Page 95: ...rectly from the Heatime HR Control Box are available from the Heatime for PC Interface NOTE It is not necessary to know the IP address of the Heatime HR Control Box The Control Box and the PC where Heatime for PC is installed must be located in the same logical IP Subnet They must both receive their IP Addresses automatically from a single DHCP Server ...

Page 96: ...tical Tap the SCR logo in the bottom corner of the Heatime HR Main Menu When installing the Heatime HR for PC application the version number is part of the file name of the install set NOTE The two versions in the above examples are compatible When connecting the Heatime HR Control Box to the Router DHCP for the first time the Control Box must be rebooted If when the Main Menu appears the Heatime ...

Page 97: ...rmation is displayed o On the Heatime HR Control Box from the Main Menu o Tap Options Technician Options Enter the Technician Password Technical Utilities Miscellaneous Options The IP address of the Control Box appears here o Returning to the PC in the Command Line Session type Ping IP Address of the Control Box or in our case Ping 172 17 1 81 and hit Enter ...

Page 98: ...ll o If the local Windows Firewall is Not Connected then check for a locally installed Anti virus application and follow the instructions provided by that application NOTE The PC running Heatime HR Viewer and the Heatime HR Control Box must be connected to the same Router DHCP Server and they must also be members of the same logical network or subnet ...

Page 99: ...eports You should consult with your Heatime HR Dealer or with SCR Engineering LTD directly to confirm that your Third Party Herd Management system is compatible with File format Exported by Heatime HR 1 Complete the installation of Heatime Viewer 2 On the Home Screen click on Options the Options menu appears 3 Click on Technician Options the Keypad appears ...

Page 100: ...Heatime Viewer HeatimeHR User Manual RC1 2 13 X X docx P a g e 96 4 Enter 1239 and then click on OK the Technician Options menu appears 5 Click on Parameters the System Parameters menu appears ...

Page 101: ...s the file location where the external herd management system will look for and locate the exported file 7 Click on OK to save the settings 8 Click on the Home Arrow to return to the main menu NOTE The external herd management system must be configured to read the exported Heatime file from the specified location NOTE Heat Export is only available from the Heatime Viewer application ...

Page 102: ...6380 11 30 10 20 00 00 76 11 30 10 23 28 07 6140 11 30 10 22 00 00 63 11 30 10 23 32 11 6634 11 30 10 16 00 00 80 Date of ID Time of ID Cow ID Date of Current Activity Peak Time of Current Activity Peak Height of Current Activity Peak 11 30 10 23 32 11 6634 11 30 10 16 00 00 80 The Interpretation On November 30 2010 at 11 32 PM Cow 6634 was identified by Heatime HR This cow s peak of activity was ...

Page 103: ...n using Heatime Viewer it is possible to print reports using the printer connected to the PC 1 From the Main Menu click on a report In this example we will use the Health Report The Health Report appears 2 Click the Printer icon the Print Dialogue box appears 3 Choose the desired Printer and Click Print ...

Page 104: ...available with Heatime Email and SMS Email and SMS can be used together or separately 5 1 Email Messaging with Heatime HR Heatime HR can send Emails to up to 3 different Email Addresses 1 Tap Options on the Main Menu the Options Menu appears 2 Tap User Options the Keyboard appears 3 Enter the User Password 6285 the User Options Menu appears ...

Page 105: ... RC1 2 13 X X docx P a g e 101 4 Tap Messaging the Messaging Setup menu appears There are three steps to setup Email Messaging Add Recipients to receive the Emails Configure the time s the Emails will be sent Configure what will be sent in the Email ...

Page 106: ...3 X X docx P a g e 102 5 1 1 Adding Recipients Create the list of Email Recipients 1 From the Messaging Setup Menu Tap Recipients List Setup the Recipients List Setup page appears 2 Add up to 3 different Email addresses tap Save the Email addresses are saved ...

Page 107: ...can send Emails up to 4 times per day 1 From the Messaging Setup Menu tap Alert Times Setup the Alert Times Setup menu appears 2 Tap into the Square making the line Active the Alert Hour field is enabled 3 Enter the name of the event and the hour as desired Repeat as needed 4 Tap Save the schedule is saved ...

Page 108: ...etup from the Messaging Setup Menu the Alerts Setup Summary menu appears 2 Tap Add to create an Alert The Alerts Setup screen appears 3 Enter the name of the Set Highlight the name of the Recipient the Time and the particular Report or Reports desired When real time notifications are desired tap All Day and then whenever a cow is added to the particular report a message is sent ...

Page 109: ... RC1 2 13 X X docx P a g e 105 NOTE When All Day is used whenever a cow enters a particular report for the first time during a 24 hour period an Email is sent 4 Tap Save to save this set The Alerts Setup summary page appears with the configured Alert ...

Page 110: ...06 To Delete this Alert Tap into the Alert the Alerts Setup Page appears Tap Delete the Delete Warning appears Tap Yes the Set is deleted NOTE Email messaging is only available if the Farm has an internet connection and the Heatime Control Box is able to connect to the internet ...

Page 111: ...S Messaging with Heatime Heatime can send SMS s to up to 3 different Telephone Numbers 1 Tap Options on the Main Menu the Options Menu appears 2 Tap User Options the Keyboard appears 3 Enter the User Password 6285 the User Options Menu appears 4 Tap Messaging the Messaging Setup menu appears ...

Page 112: ...HeatimeHR User Manual RC1 2 13 X X docx P a g e 108 There are three steps to setup SMS Messaging Add the Telephone Numbers to receive the SMS s Configure the time s the SMS s will be sent Configure what will be sent in the SMS s ...

Page 113: ...3 X X docx P a g e 109 5 2 1 Adding Recipients Create the list of SMS Recipients 1 From the Messaging Setup Menu Tap Recipients List Setup the Recipients List Setup page appears 2 Add up to 3 different Telephone Numbers tap Save the Email addresses are saved ...

Page 114: ... can send SMS s up to 4 times per day 1 From the Messaging Setup Menu tap Alert Times Setup the Alert Times Setup menu appears 2 Tap into the Square making the line Active the Alert Hour field is enabled 3 Enter the name of the event and the hour as desired Repeat as needed 4 Tap Save the schedule is saved ...

Page 115: ...ears 2 Tap Add to create an Alert The Alerts Setup screen appears 3 Enter the name of the Set Highlight the name of the Recipient the Time and the particular Report or Reports desired If you would rather get a real time notification when a cow is added to a particular report then do not tap in the Time Cell tap All Day NOTE When All Day is used whenever a cow enters a particular report for the fir...

Page 116: ...set The Alerts Setup summary page appears with the configured Alert To Delete this Alert Tap into the Alert the Alerts Setup Page appears Tap Delete the Delete Warning appears Tap Yes the Set is deleted NOTE SMS Messaging is only available if the Heatime Control Box is connected to the SCR Cellular Modem ...

Page 117: ... and complete management tool in the herd 6 1 SCR Sorting Gate and Heatime HR Use of Heatime HR with the SCR Sorting Gate automates a number of common daily and weekly tasks NOTE Before enabling the SCR Sorting Gate on the Heatime HR Control Box it must be assembled installed and connected to the SCRNet RS 485 Network 1 Tap Sorting Gate from the Main Menu the Sorting Gate Menu appears ...

Page 118: ...e Cells Management the keypad appears 3 Enter 6285 and tap OK the Time Cells Management Menu appears Enter the period of time that the Sorting Gate is required to be active 24 hour time is used The times entered should be slightly before and after the usual start of each milking session ...

Page 119: ...d of the checkmark next to each line changes color to indicate the sorting gate is now active during each time period 5 Tap to return to the Sorting Gate Menu The Sorting Gate is now ready to use during the configured time periods WARNING The holding areas must provide water and protection from the elements for the sorted cows ...

Page 120: ...Miscellaneous the same place where the Setting the Farm Name is set there is an additional check box that cancels the sorting of Do Not Breed cows NOTE If this setting is enabled cows that are set to Do Not Breed and that appear in the Health Report will not be sorted when the Health Report is used as a sorting condition for the sorting gate ...

Page 121: ... e 117 6 1 2 How to Add Reports to the Sorting Gate The reports that are included with Heatime HR can be used directly with the Sorting Gate 1 Tap Sorting Management the Sorting Management Summary is displayed 2 Tap the Sorting Management Configuration Menu is displayed ...

Page 122: ... Day means that this sort will occur whenever the Sorting Gate is active 5 Choose the Report or Reports to use 6 Choose the day or days that this sort occurs It is possible to choose Everyday instead of marking each day separately Use the Specific Day setting for running special reports on specific days 7 Choose the Exit that will receive the sorted cows ...

Page 123: ... X docx P a g e 119 8 Tap to save this Sort the Sorting Management Summary is displayed 6 1 3 How to View the Sorting Schedule The Sorting Schedule displays an overview of the configured and active sorts Tap Sorting Schedule the Sorting Schedule is displayed ...

Page 124: ...the sorting occurred Sorted Cows The number of cows that were sorted 6 1 5 How to Read the Cows to be Sorted Report The Cows to be Sorted Report displays the Cows that have been entered manually for sorting Tap Cows to be Sorted the Cows to be Sorted Report appears Column Description Date The date the sorting will occur Time Cell The Time the sorting will occur Cows to be Sorted The number of cows...

Page 125: ...ows in the Sorted Cows Area that should not be there cows were sorted unnecessarily a If after checking all of the reports used to sort cows during this shift there is still no reason for these extra cows check the photocells and make sure they are clean 2 After milking there are cows missing from the Sorted Cows Area cows required were not sorted a If after checking all of the reports used to sor...

Page 126: ...eatime HR the DataWand helps identify individual cows that require different types of treatments from a larger group of cows The DataWand can also be used to help detect and isolate malfunctioning tags The DataWand is the perfect solution for any dairy farm that does not have a sorting gate 1 Tap Options the System Options Menu appears 2 Tap User Options the Keypad Appears ...

Page 127: ...Heatime HR Enhancements HeatimeHR User Manual RC1 2 13 X X docx P a g e 123 3 Enter 6285 and tap OK the User Options Menu appears 4 Tap DataWand The DataWand Sets Menu appears ...

Page 128: ...ded into the DataWand 1 From the DataWand Sets Menu tap the Set Builder Menu appears 2 Enter the Name of the Set 3 Choose the Report or Reports to include in the Set 4 Set the number of Beeps that the DataWand will sound when a cow is found The output from different reports can be loaded onto the DataWand In order to differentiate between each cow that is found and the report that this cow is a pa...

Page 129: ...ual RC1 2 13 X X docx P a g e 125 NOTE Cows that are found in more than one group will be identified in the higher priority group 5 Set the priority of the groups in the set 6 Add individual cows if desired 7 When finished tap the Set is saved ...

Page 130: ... a g e 126 The set is saved and can be used now or in the future Reports in Sets do not contain specific cows until the set is loaded onto the DataWand 8 To Delete the set tap the set the Set Builder Menu appears 9 Tap a confirmation message appears Tap OK to delete ...

Page 131: ...x 1 Connect the SCR recommended USB to Com device Catalogue Number EXS00202 to the USB Slot on the Heatime HR Control Box NOTE Other USB to Com devices may not function correctly because their drivers are not available on the Heatime HR Control Box 2 Connect the RS232 9 pin connector from the DataWand to the 9 pin connector on the USB to Com Device currently mounted in the Heatime HR Control Box 3...

Page 132: ...Heatime HR tap to upload the Set to the DataWand 5 If the upload to the DataWand is successful Heatime returns to the DataWand Set Menu If the upload fails a dialogue box will appear saying that the upload failed NOTE If the upload fails check that the DataWand is fully charged and in fact connected to the Heatime HR Control box ...

Page 133: ... and Integration process is to make sure that the Heatime HR Control Box is running the correct version Heatime HR supports the HC 24 Portal from Version 2 13 X X and above Confirm this by taping the SCR Logo in the bottom left hand corner of the Heatime HR Screen If the Heatime HR Control Box you wish to connect to the HC 24 Portal is not at 2 13 X X stop at this point and upgrade the Heatime HR ...

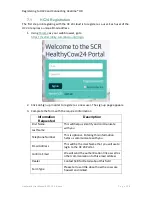
Page 134: ...The sign up page appears 3 Complete the form with the required information Information Requested Description First Name This will help us identify and communicate with you Last Name Telephone Number This is optional Entering this information helps us communicate with you Email Address This will be the User Name that you will use to login to the HC 24 Portal Confirm Email We will send the authentic...

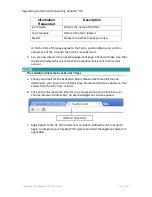
Page 135: ...make sure that the Email displayed here is correct the activation link is sent to this email account NOTE The activation link remains active for 7 days 5 Check your email for the Activation Email Please note this email may be delivered to your Spam or Junk Email Area Please whitelist the address so that emails from the HC 24 are not lost 6 Click on the link inside the Email or copy and paste the e...

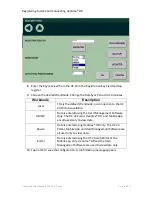
Page 136: ...ave an additional device on the farm to generate a key for that system as well 4 Choose the correct Third Party Herd Management System Click on Generate key NOTE Check with the relevant Herd Management Software Vendor as to the correct version for use with the HC 24 Portal Clicking on Send the Key to my Email is recommended 5 On the Heatime HR Control Box from the Main Menu go to Main Menu Options...

Page 137: ...ection to the HC 24 Portal is available HMSW Data is entered using the Herd Management Software Only The HC 24 Portal Heatime HR and Mobile App are all used only to view data Device Data is entered using Heatime HR only The HC 24 Portal Mobile App and Herd Management Software are all used only to view data Portal Data is entered using the HC 24 web Portal or the Mobile app only Heatime HR and the ...

Page 138: ... e 134 7 3 Is Heatime HR Connected to the HC 24 Portal When Heatime HR is connected to the HC 24 a green cloud with a check mark is displayed in the update area NOTE For information on Herd Management System connectivity to the HC 24 Portal consult with the Specific System Vendor for details ...

Page 139: ... backwards Verify you are using English US and not English UK Are there many power outages Consider a UPS Many Cows in the Cows W O ID Report The power to the Heatime HR Control box is not constant and stable Consider a UPS The SCRNet may not be connected correctly Check all SCRNet wire runs The IDU 420s may not be reading correctly Pass a tag under all of the IDU 420s to confirm correct operation...

Page 140: ... Symptom Possible Cause Possible Solutions Cows are shown to be in heat 2 3 days after tag fixing tags to cows Tags were assigned without deleting the tag history Only assign tags from the Unassigned Tags report and always make sure to remove old pairings before assigned a tag to a new cow ...

Page 141: ...ach side of the IDU T he IDU might be too high Only mount IDUs 1800 to 1900 mm 71 to 75 inches above the floor Check the direction of the shutter The BU 500 may not be covering everywhere there are cows Ask your SCR Dealer or SCR for assistance with a site survey The IDU may not have power Check the indication light on the IDU 420 Check the power connection to the IDU The IDU may not be connected ...

Page 142: ...ed to the same network Check and confirm that they are connected to the same Router DHCP Reboot the Heatime Control Box and Router if required Check that all cables are correctly connected Confirm IP address of Heatime Control Box and Heatime for PC PC See the Heatime User Manual for instructions The firewall on the PC running Heatime for PC is blocking the connection Disable the firewall The Heat...

Page 143: ...apters HeatimeHR User Manual RC1 2 13 X X docx P a g e 139 Appendix A Adapters Use this adapter when migrating from Heatime to Heatime HR or Heatime HR LD Place this adaptor between the ID units and the Control Box ...

Page 144: ...Appendix B 3rd Party RFID Antenna Connections Pin Outs HeatimeHR User Manual RC1 2 13 X X docx P a g e 140 Appendix B 3rd Party RFID Antenna Connections Pin Outs S600 S1200 to DF221 Serial Connections ...

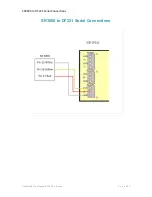
Page 145: ...SR3000 to DF221 Serial Connections HeatimeHR User Manual RC1 2 13 X X docx P a g e 141 SR3000 to DF221 Serial Connections ...

Page 146: ... Heatime HR Installations Property Description Impedance 120 Ω Coupling Attenuation Type II Maximum DC Resistance 92 0 Ω km 20 C Attenuation 2 6 1MHz 5 4MHz 7 9 10MHZ dB 100m Capacitance 45 pFm Velocity of Propagation 75 nom Dielectric Strength 700V Minute Dielectric Strength to Shield 700V Minute Voltage Rating 30V Maximum Operating Temperature 70 C Minimum Operating Temperature 40 C ...

Page 147: ...Installations Property Description Construction 2 18 AWG PVC Insulated conductors 2 24 AWG PVC Insulated conductors Standards RoHS 2002 95 EC Flammability Rating IEC 60332 1 UL 1581 VW 1 Coupling Attenuation Type II DC Resistance 18 AWG 22 0 Ohm Km 20 C max DC Resistance 24 AWG 86 0 Ohm Km 20 C max Dielectric Strength 1500V Minute Voltage Rating 600V Maximum Operating Temperature 70 C Minimum Oper...

Page 148: ... no guarantee that interference will not occur in a particular installation If this equipment does cause harmful interference to radio or television reception which can be determined by turning the equipment off and on the user is encouraged to try to correct the interference by one or more of the following measures Reorient or relocate the receiving antenna Increase the separation between the equ...

Page 149: ...eHR User Manual RC1 2 13 X X docx P a g e 145 Appendix F Heatime HR LD Installation Examples These diagrams are examples of the types of installations and coverage possible with Heatime HR LD Systems NOTE Actual coverage will vary according to conditions ...

Page 150: ...Appendix G Certifications HeatimeHR User Manual RC1 2 13 X X docx P a g e 146 Appendix G Certifications ...

Page 151: ...Appendix G Certifications HeatimeHR User Manual RC1 2 13 X X docx P a g e 147 ...

Page 152: ...Appendix G Certifications HeatimeHR User Manual RC1 2 13 X X docx P a g e 148 ...

Page 153: ...Appendix G Certifications HeatimeHR User Manual RC1 2 13 X X docx P a g e 149 ...

Page 154: ...Appendix G Certifications HeatimeHR User Manual RC1 2 13 X X docx P a g e 150 ...

Page 155: ...Appendix G Certifications HeatimeHR User Manual RC1 2 13 X X docx P a g e 151 ...

Page 156: ...Appendix G Certifications HeatimeHR User Manual RC1 2 13 X X docx P a g e 152 ...

Page 157: ...Appendix G Certifications HeatimeHR User Manual RC1 2 13 X X docx P a g e 153 ...

Page 158: ...Appendix G Certifications HeatimeHR User Manual RC1 2 13 X X docx P a g e 154 ...

Page 159: ...Appendix G Certifications HeatimeHR User Manual RC1 2 13 X X docx P a g e 155 ...

Reviews: