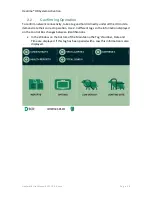
Heatime® HR System Activation
HeatimeHR User Manual RC1 2.13.X.X .docx
P a g e 4
2 Heatime
®
HR System Activation
After the physical assembly of the components is complete and they are all wired
together, Heatime® HR can be connected to the power supply and activated for the first
time.
2.1
Heatime
®
HR First Steps,
There are five tasks that must be done in any new Heatime® HR installation before
adding any cows.
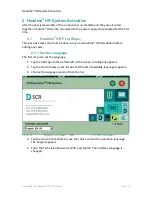
2.1.1 Set the Language
The first step is to set the Language.
1.
Tap the SCR Logo in the bottom left of the screen, a dialog box appears.
2.
Tap the Down Arrow on the list box and the list of available languages appears.
3.
Choose the Language required from the list.
4.
Tap the Green Check Mark to save the choice and set the operation language.
The Keypad appears.
5.
Enter the Technician Password, 1239, and tap OK. The Interface language is
changed.
Summary of Contents for Heatime HR
Page 1: ......
Page 151: ...Appendix G Certifications HeatimeHR User Manual RC1 2 13 X X docx P a g e 147 ...
Page 152: ...Appendix G Certifications HeatimeHR User Manual RC1 2 13 X X docx P a g e 148 ...
Page 153: ...Appendix G Certifications HeatimeHR User Manual RC1 2 13 X X docx P a g e 149 ...
Page 154: ...Appendix G Certifications HeatimeHR User Manual RC1 2 13 X X docx P a g e 150 ...
Page 155: ...Appendix G Certifications HeatimeHR User Manual RC1 2 13 X X docx P a g e 151 ...
Page 156: ...Appendix G Certifications HeatimeHR User Manual RC1 2 13 X X docx P a g e 152 ...
Page 157: ...Appendix G Certifications HeatimeHR User Manual RC1 2 13 X X docx P a g e 153 ...
Page 158: ...Appendix G Certifications HeatimeHR User Manual RC1 2 13 X X docx P a g e 154 ...
Page 159: ...Appendix G Certifications HeatimeHR User Manual RC1 2 13 X X docx P a g e 155 ...


