SECTION 2:
PRE-INSTALL CHECKLIST
BUSINESS HOURS
Technical Support is available Monday – Friday between the hours
of 9am and 6pm EST and can be contacted via phone at
(407)
774-2447
or through live chat at :
www.sctflash.com
. If you need to
contact Tech Support, please be sure to have your device with you
before initiating contact.
INTERNET ACCESS
In the unlikely event that technical support is needed, Internet access
may be required to troubleshoot. Our Technical Support team may
also need to remotely connect to your computer to fix any issues you
may be having.
ALLOW TIME FOR INITIAL SETUP
Make sure you have at least an hour to complete the initial setup,
update, and installation process.
READ LIVEWIRE TS+ USER MANUAL
SCT highly recommends taking a moment to read through your
Livewire TS+ user guide found on our website at:
www.sctflash.com/
support
before your initial installation. There is a lot of in depth and
useful information inside the manual that won’t be covered in this Quick
Start Guide.
This device is not legal for sale or use in California on pollution controlled vehicles.
SECTION 3:
IMPORTANT ON-DEVICE INFO.
From the
Main Menu
, select
Device Info
.
Within
Device Info
, you will find :
SERIAL NUMBER:
Needed for dealers to create custom tunes for your vehicle
and device.
FIRMWARE VERSION:
This is essentially your device’s operating system.
TUNE REVISION
The version number of your preloaded tunes.
UNLOCKS LEFT:
Number of unlocks remaining. An unlock is used when the tuned
vehicle is returned to stock and a different vehicle is programmed.
MARRIED STATUS:
Unmarried = Unlocked and ready for vehicle pairing.
Married = Locked to a vehicle.
VBATT:
The amount of voltage being run through the device from your ve-
hicle’s battery. As a general rule, 12.75+ volts is needed to flash a tune
to a vehicle.
SECTION 4:
UPDATING YOUR LIVEWIRE TS+ DEVICE
INSTALLING THE UPDATER SOFTWARE
1.
Go to
www.sctflash.com
2. Click
“Support”
tab at the top of the page.
3. Click the
Livewire TS+
button (Part Number 5015P/5416P).
4. Click the
“Downloads”
button and then click the
“Download Now”
button under the
“Updater”
menu item.
5. Wait for that program to download, then double click and “Run” the
SCTDeviceUpdater.exe
file if it does not open automatically.
6. Follow the on-screen directions of the
SCT Device Update Soft-
ware Installer
until it allows you to click
“Finish”
.
7. Follow the on-screen directions of the
SCT Drivers
Installer
until it
allows you to click
“Finish”
.
8. Your SCT Device Updater Software and Drivers are now fully
installed and ready for use.
UPDATING YOUR LIVEWIRE TS+
1.
Prior to updating your Livewire TS+ you will need to return the
vehicle back to stock, if not at stock already.
2. Connect your Livewire TS+ Device to your Windows™ based PC
using the
provided Micro USB™ cable
. Unfortunately, we do not
offer support for Apple computers at this time.
3. Double click and open the
SCT Device Updater Software
.
4. Click
“Automatically Check for Updates”
.
5. Confirm the update by pressing the
“Update”
button. The update
will now begin.
6. Let the updater run until it says
“Your device is now up to date”
.
7. You may now unplug your device from your computer and load a
tune to your vehicle.
(407) 774-2447 / WWW.
SCTFLASH
.COM
QUICK START GUIDE
SECTION 1:
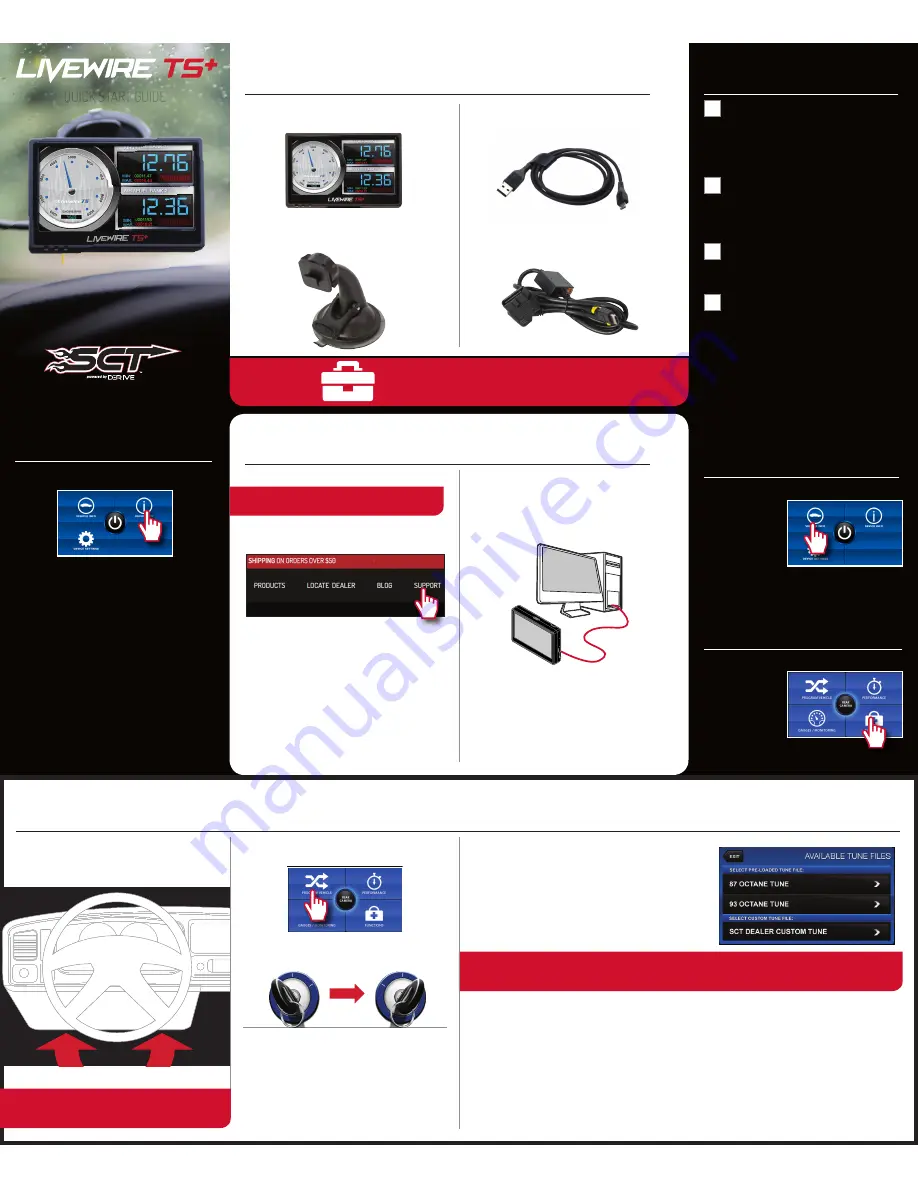
PARTS CHECKLIST
LIVEWIRE TS+ DEVICE
LIVEWIRE TS
+
WINDOW MOUNT
MICRO USB
™
CABLE
LIVEWIRE TS+ OBDII CABLE
NOTE: Make sure the Livewire TS
+
is unplugged from your
computer before starting this process.
SECTION 5:
READING VEHICLE VIN & STRATEGY/
OS PART#’S
From the
Main Menu
, select
Vehicle Info
.
Once on the Vehicle Info
screen, you’ll be asked to
turn the
key on
. The VIN#
will display as well as the
Strategy for Ford vehicle/
device. GM vehicle/device,
will display the OS
Part Numbers.
SECTION 6:
CHECKING/CLEARING VEHICLE
TROUBLE CODES
From the
Main Menu
, select
Vehicle
Functions.
Within this menu, you will
be given the option to read
or clear DTCs (Diagnostic
Trouble Codes). Make your
selection and follow the
on-screen prompts.
SECTION 7:
PROGRAMMING THE VEHICLE
POWERING ON THE LIVEWIRE TS+
To power up your device using the provided
HDMI to OBDII cable
, connect
to the vehicle’s OBDII port. The OBDII port is most commonly found within
24” of the steering column under the driver’s side dash.
BEGIN PROGRAMMING
1.
From the
Main Menu
, select
Program Vehicle
.
2. At this point, the key should be in the ignition, but in the
OFF
position until prompted to turn key
ON/RUN
position.
Within
Program Vehicle
, there are 2-3 selections depending on the
state of the vehicle.
• Pre-Loaded Tune Files
= Preloaded SCT tunes for use on stock
vehicles only.
• Custom Tune
= Custom Tuning Dealer files, if there are any on
the device.
• Return to Stock
= Restore original factory file to vehicle.
USING PRE-LOADED TUNE FILES
Once you follow the first
“Key On”
prompt, the device will show you a selection
of vehicles and engine sizes. Select yours here. This will take you to Adjustable
Options where you will be able to adjust to different performance levels, vehicle
characteristics, and options including, but not limited to, speed limiters, axle ratio
and tire size. (Adjustable Options are vehicle specific). For more information on
Adjustable Options, please see the
Adjustable Options Explained
section of this guide
USING CUSTOM TUNES
To install Custom Tunes, select Program Vehicle, and scroll down to the Custom Tunes section. If your device contains any custom tunes for your
vehicle, this is where they will be listed. Once you’ve found your desired tune, select it by pressing on it and follow the on-screen instructions to load the
tune to your vehicle.
RETURNING TO STOCK
With SCT devices, your stock file is stored during the initial programming. The stock file stays on the programmer until the vehicle is returned to stock.
From Program Vehicle, select Return to Stock and follow the on-screen instructions to advance through the programming process.
NOTE: Custom Tunes are built by SCT’s network of Custom Tuning Dealers and any questions related to them need to be directed
toward the tuning dealer.
Two clicks
Fuse Puller | Voltage Tester | Battery Charger | Pliers
TOOLS NEEDED:
NOTE: Please make sure that all stock electronics are turned off
and disconnect any aftermarket electronics as well.


