background image

Galaxy 2000RS-2W  -  Page 5

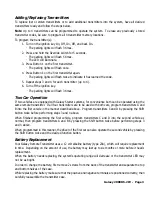
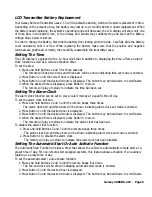
LCD Transmitter Battery Replacement

Your Galaxy Remote Transmitter uses a 1.5 volt AAA alkaline battery, which will require replacement in time.

Depending on the amount of use, the battery may last up to six months before it needs replacement. When

the battery needs replacing, the system’s operating range will decrease, the LCD display will show only one

of three bars in the battery icon, or the display and sounds may suddenly stop and start as the battery

voltage drops below minimum.
In order to change the battery, first slide the battery door locking pin to the side.  Carefully slide the battery

cover downward until it is free. While replacing the battery make sure that the positive and negative

terminals are positioned correctly, then carefully reassemble the transmitter case.

Setting The Time

The LCD display is equipped with a 12-hour clock that in addition to displaying the time, offers an alarm

clock function as well as a remote activation timer.

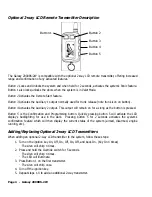
To set the time:

1. Press and hold Buttons 2 and 3 for three seconds.

· The remote will beep two times and three bars will be shown indicating time set mode is entered.

2. Press Button 2 until the correct hour is displayed.

3. Press Button 3 until the desired minute is displayed. The button may be held down to scroll faster.

4. When the desired time is displayed, press Button 5 to store.

· The remote will play a melody to indicate the time has been set.

Setting The Alarm Clock

The alarm clock function can be set to play an alert melody at a specific time of day.

To set the alarm clock function:

1. Press and hold Buttons 2 and 3 until the remote beeps three times.

· The alarm clock bell and three bars will be shown indicating alarm clock set mode is entered.

2. Press Button 2 until the desired hour is displayed.

3. Press Button 3 until the desired minute is displayed. The button may be held down to scroll faster.

4. When the desired time is displayed, press Button 5 to store.

· The remote will play a melody to indicate the alarm clock has been set.

To disable the alarm clock function:

1. Press and hold Buttons 2 and 3 until the remote beeps three times.

· The alarm clock bell and three bars will be shown indicating alarm clock set mode is entered.

2. Press Button 1 to disable the alarm clock.

· The remote will play a melody to indicate the alarm clock has been disabled.

Setting The Automatic Start Or Auto Activate Function

The Automatic Start Function provides a timer that allows the vehicle to automatically remote start at a

preset time of day. For non-remote start equipped systems, this feature allows activation of an auxiliary

feature at a preset time of day.

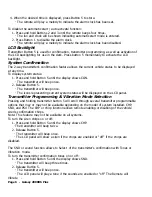
To set the automatic start / auto activate function:

1. Press and hold Buttons 2 and 3 until the remote beeps four times.

· The fan and clock will be shown indicating automatic start mode is entered.

2. Press Button 2 until the desired hour is displayed.

3. Press Button 3 until the desired minute is displayed. The button may be held down to scroll faster.

Summary of Contents for Galaxy 2000RS-2W

Page 1: ...2000RS 2 2W SERIES REMOTE START SYSTEM PRODUCT MANUAL...

Page 2: ...od there will be a maximum service charge of 25 00 per calendar year if required for repair and or replacement of any defective parts A copy of the original purchase receipt must accompany any product...

Page 3: ...Start Mode Page 10 Starter Diagnostics Page 10 5 Extended Features Page 11 Ignition Door Locking Page 11 Ignition Door Unlocking Page 11 Dome Light Activation Page 11 Auxiliary Function Outputs Page...

Page 4: ......
Page 5: ...ng in the event the vehicle is to be serviced System Contents Main Unit with built in ScyNet Network Interface Port Two 5 Button Random Code Remote Transmitters Status LED Coded Emergency Override Val...

Page 6: ...ons will shift to the next page allowing access to another set of features Once shifted to another page there are 4 pages total the transmitter will remain on that page for 10 seconds or until a butto...

Page 7: ...tters are to be used with both cars program transmitters A and B into the first vehicle in the manner described above Program transmitters C and D by pressing the Shift button twice before performing...

Page 8: ...d Button 5 is the Confirmation and Programming button Quickly pressing button 5 will activate the LCD display s backlighting for use in the dark Pressing button 5 for 2 seconds activates the system s...

Page 9: ...y to indicate the time has been set Setting The Alarm Clock The alarm clock function can be set to play an alert melody at a specific time of day To set the alarm clock function 1 Press and hold Butto...

Page 10: ...r will beep once The icons representing current system status will be displayed on the LCD panel Transmitter Programming Vibration Mode Selection Pressing and holding transmitter button 5 will scroll...

Page 11: ...es the engine is running on remote start equipped systems Trunk Release indicates the trunk or auxiliary function has been activated Door Open indicates the door zone has been triggered Shock Sensor i...

Page 12: ...ss and hold Button 1 for 3 seconds The horn will honk if connected The parking lights will flash The doors will unlock allowing access to the vehicle 2 Press Button 2 to stop Panic Mode If the ignitio...

Page 13: ...Remote Start feature is active any of the following actions will shutdown the engine 1 Pressing Button 4 After the engine shuts down the doors will lock if installed 2 Pressing the Brake Pedal 3 Openi...

Page 14: ...mes ending with Ignition in Off position 3 Press the Valet switch within three seconds Side lights will flash indicating that the Cold Start mode has been activated To turn off Auto Cold Starting do o...

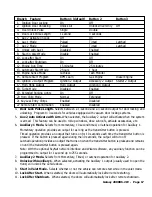
Page 15: ...y lighting audio video system control and more The Pulsed operation setting allows an output to activate as long as the button is held The Timed operation setting allows an output to activate when the...

Page 16: ...Volt Ohm meter for testing vehicle circuits Never use a test light 10 Always look before drilling any holes or mounting self tapping screws Be sure fuel lines and exterior wiring looms are clear as th...

Page 17: ...r module for an optional feature such as power window activation etc This output may be programmed for momentary timed or latched operation Pin 4 BLACK WHITE WIRE Dome Light Output 500 mA Connect to t...

Page 18: ...installed to keep the circuits separate NOTE Do not connect the WHITE wire to the vehicle s headlight circuit Pin 20 BROWN WHITE WIRE Horn Output 500 mA Connect to a relay to honk the vehicle s horn w...

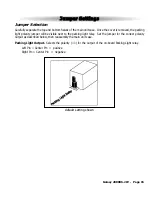
Page 19: ...olarity jumper will be visible next to the parking light relay Set the jumper for the correct polarity output as described below then reassembly the main unit case Parking Light Output Selects the pol...

Page 20: ...that the reset signal was received All System Programming parameters are now set to factory default settings The Valet Mode is off 3 Turn off ignition Programmable System Options The following is a de...

Page 21: ...with Auxiliary 1 When selected activating the Auxiliary 1 output usually used to open the trunk will unlcok the vehicle doors 9 Start in Valet Mode Selects whether or not the vehicle can remote start...

Page 22: ...nfirm The siren will chirp four times if the tach signal was not learned Gas Engine Sets the engine type for Gasoline Diesel Engine Sets the engine type for Diesel and monitors the glow plug input to...

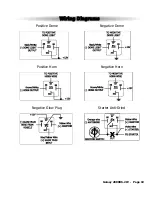
Page 23: ...Galaxy 2000RS 2W Page 19 Wiring Diagrams Positive Dome Negative Dome Positive Horn Negative Horn Negative Glow Plug Starter Anti Grind...

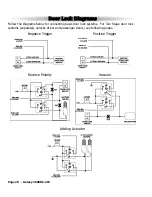
Page 24: ...Trigger Reverse Polarity Vacuum Adding Actuator Follow the diagrams below for connecting basic door lock systems For Two Stage door lock systems separately unlocks driver and passenger doors see follo...

Page 25: ...Positive Trigger The Galaxy Starter is equipped with a dedicated Passenger Unlock output allowing Two Stage Door Lock operation When connected as shown below unlocking the system will unlock only the...

Page 26: ...Page 22 Galaxy 2000RS 2W Two Stage Door Lock Diagrams cont d Two Stage Reverse Polarity Two Stage Adding Actuator...

Page 27: ...es with Part 15 of FCC Rules Operation is subject to the following two conditions 1 This device may not cause harmful interference 2 This device must accept any interference received including interfe...

Page 28: ...627 Cantara Street Unit B North Hollywood CA 91605 ScyTek Electronics 2005 Galaxy Starter r4 12 20 05 Wiring Diagram ScyNet Blue Start Green Emergency brake Antenna Port GALAXY 2000RS 2W External Acti...

Reviews: