❹
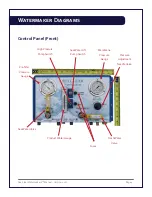
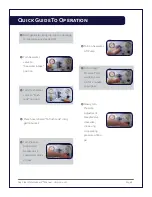
Turn the Pressure Adjustment Needle Valve counterclockwise 2 times to decrease pressure.
❺
Turn on the Seawater Lift Pump using the switch on the panel labeled “Seawater Lift Pump.”
❻
Verify the following:
• Water is running through the system and is being discharged overboard;
• The Membrane Pressure Gauge on the right side of the panel indicates zero pressure;
• The generator is still running smoothly at a steady speed
❼
Start the High Pressure Pump by using the switch on the panel labeled “H.P. Clutch.” You should see
the
fl
ow of water through the system increase.
❽
Let the watermaker run for a few minutes to clear any air from the system and to be sure that a
steady
fl
ow of water is being discharged overboard.
❾
Very slowly, turn the Pressure Adjustment Needle Valve on the panel in a clockwise direction until
the pressure increases to 700 psi. Let the system stabilize. Product water should now be
fl
owing into
your bucket.
❿
Verify that everything is running properly and that the pressure is being maintained at 700 psi. Now
turn the Pressure Adjustment Needle Valve in a clockwise direction again to increase the pressure to
its
fi
nal rate (the actual pressure will depend upon water temperature, salinity, etc.).
►►►
Never go above 850 psi.
Sea Clear Watermakers™ Manual - Version 1.1-G
Page 11
Your watermaker output will vary based on the temperature and salinity of the sea water. The
properties of the water will change based on temperature; the rule of thumb is the colder the
water, the lower the output at a given pressure. The same is true for a higher salt content; in
warmer climates, a higher output can be expected.
It is critical that the pressure remain constant at 800 PSI at all times. Do NOT increase the
pressure to attempt to achieve a higher product output.


