Section 08 STEERING SYSTEM
Subsection 01 (STEERING SYSTEM)
Steering Cable
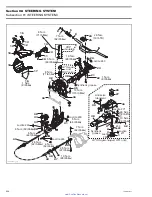
Disconnect steering cable
no. 43
from steering
stem arm
no. 33
.
Remove retaining block
no. 29
.
Disconnect ball joint
no. 44
from jet pump nozzle.
Remove ball joint and jam nut
no. 45
from cable.
Loosen nut
no. 46
, then remove half rings
no. 47
and O-ring
no. 48
.
NOTE:
To loosen nut, use the steering cable tool
(P/N 295 000 145).
Remove steering cable from watercraft.
ASSEMBLY
Assembly is essentially the reverse of disassem-
bly procedures. However, pay particular attention
to the following.
CAUTION:
Apply all specified torques and ser-
vice products as per main illustration at the be-
ginning of this subsection.
Handle Grip and Grip Insert
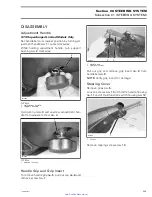
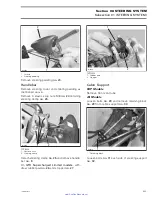
When installing the grip insert
no. 8
in the handle-
bar
no. 9
, ensure that it is properly inserted in the
slot at the end of the handlebar tubing.
F02K0JA
1
1. Grip insert
Install grip
no. 5
on handlebar
no. 9
matching it to
the notch in the handlebar.
Install flat washer and screw
no. 7
.
Torque screw to 7 N•m (62 lbf•
in
).
Install cap
no. 6
.
F02K0KA
1
2
4
5
3
1. Grip insert
2. Grip
3. Flat washer
4. Screw
5. Cap
CAUTION:
Ensure to install flat washer other-
wise screw will damage grip end.
Steering Stem
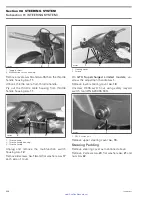
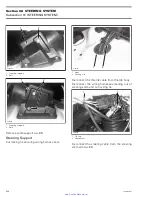
Position steering stem arm
no. 33
and support
no. 37
onto steering stem
no. 38
.
WARNING
Make sure the integrated flat keys of the steer-
ing stem arm and support are properly seat-
ed in steering stem keyways. Steering stem
arm must be locked in place before torquing
the bolts.
F07K09A
2
1
2
1. Keyways
2. Integrated flat key
Replace lock nuts
no. 49
by new ones.
Torque bolts
no. 36
of steering stem arm to 6 N•m
(53 lbf•
in
).
Handlebar Support
GTX Supercharged Limited Models Only
Apply Loctite antiseize lubricant (P/N 293 800 070)
then install support bushings
no. 50
on handlebar
support.
234
smr2005-022
www.SeaDooManuals.net


