Section 08
ELECTRICAL
Sub-Section 08
(STARTING SYSTEM)
08-08-14
Charging 2 or More Batteries at a Time
Connect all positive battery posts together and
use a charger with a capacity (rated) equal to
:
number of battery to be charged multiply by 2 A.
For example
:
Charging 5 batteries at a time re-
quires a 10 A rated charger (5 x 2 A = 10 A).
TYPICAL
1. 2 batteries = 4 A
INSTALLATION OF BATTERY
Proceed as follows :
1. Install battery in its emplacement.
2. Secure vent line to the battery. Ensure vent line
is not kinked or obstructed. Ensure check valve
is not blocked.
WARNING : Vent line must be free and
open. If not, it will restrict ventilation and
create a gas accumulation that could result in
an explosion. Gases given off by a battery be-
ing charged are highly explosive. Always
charge in a well ventilated area. Keep battery
away from cigarettes or open flames. Avoid
skin contact with electrolyte.
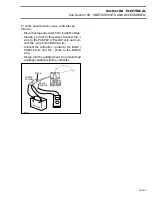
WARNING : To prevent any possible spark
that may occur at the battery terminals
while connecting the cables, unscrew and dis-
connect the connector at the electrical box PRI-
OR TO CONNECTING THE BATTERY CABLES.
1. Electrical box connector
WARNING : Always connect RED positive
cable firts then BLACK negative cable last.
3. First connect RED positive cable.
4. Then connect BLACK negative cable last.
5. Apply anticorrosion product (salt water resis-
tant) such as dielectric grease on battery posts.
6. Verify cable routing and attachment.
7. Reinstall the electrical box connector.
A17E0PA
-
+
+
-
1
;
;
F04H28A
1
;
Summary of Contents for Challenger 5896
Page 1: ......
Page 2: ......
Page 3: ...219 100 044 0 0 0 1996 Shop Manual 0 R ...
Page 152: ...Section 08 ELECTRICAL Sub Section 03 IGNITION SYSTEM 08 03 2 ELECTRICAL BOX Sportster F04H11S ...
Page 154: ...Section 08 ELECTRICAL Sub Section 03 IGNITION SYSTEM 08 03 4 ELECTRICAL BOX Speedster F04H26S ...
Page 251: ...Section 11 HULL DECK Sub Section 01 COMPONENTS 11 01 5 F04L3IS Loctite 242 ...
Page 274: ......


