14
FishSkiff|
REPAIRS
Patching
The most common
repairs are a puncture or
small cut. A penny size
patch is sufficient for
repairs of this type.
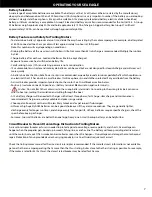
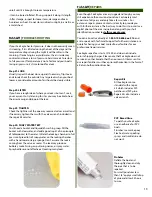
Trace the outline of a penny
on the patch material and
on the boat. If a larger
patch is needed, use a
larger item as a
template.
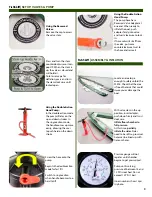
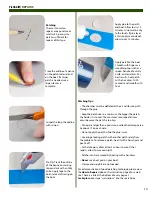
Cut patch along the outline
with scissors.
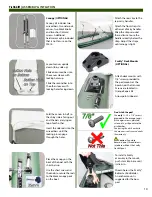
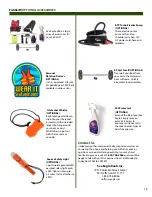
Apply glue to the patch
and boat. Allow to dry 15
minutes. Glue must be dry
to the touch. If glue layer
is thin, apply second coat,
allow to dry 15 minutes.
Pro Tip: Trace the outline
of the penny on masking
tape and cut with a utility
knife. Apply tape to the
boat instead of tracing on
the boat.
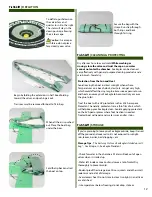
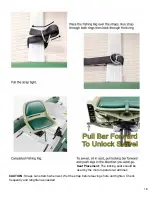
Apply patch to the boat.
Smooth with finger or a
smoothing tool such as a
spoon, handle of a utility
knife, or screwdriver. For
best results, heat patch
with a hair dryer 10-20
seconds and smooth with
tool.
Patching Tips:
• The chamber must be deflated or the air will force a path
through the glue.
• Keep the patch size to a minimum, the bigger the patch,
the harder it is to seal. The most common repair failures
occur because the patch is too big.
• For repairs larger than a puncture, overlap the damage area
by about ½” on each side.
• Do not apply the patch while the glue is wet.
• Covering a leaking patch with another patch rarely fixes
the problem. To remove a patch, heat it with a hair dryer and
peel it off.
• For field repairs, allow at least an hour to cure. Other
repairs, allow to cure overnight.
• Patches can be removed by heating with a hairdryer.
• Never
use a heat gun on your boat.
• Clamps and weights are not needed.
For a demonstration of good patching technique, please view
the
How to Repair
video on the instruction page of our web
site. There is a link at the bottom of every page at
SeaEagle.com
or type “instructions” into the search box.


