background image


Page 4 of 11


123-652 Rev - 


3.3.1


ELECTRICAL INPUT/OUTPUT CONNECTIONS 


1
2
3
4

VIN1 +

VIN1 -

VIN2 +

VIN2 -
VIN3 +

VIN3 -

DISPLAY
PANEL


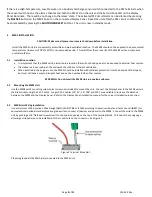
Figure 2: Input/output Terminal Block 


3.3.1.1


MSRS Pressure Switch (PS1) Terminals 1 and 2 connection  


Install one of the wires from the Cylinder Low-Pressure Switch or from the Discharge Pressure Switch to 
the terminals marked “1” and the other wire to the terminal marked “2”.  See Figure 2. 


3.3.1.2


MSRS Pressure Switch (PS2) Terminals 3 and 4 connection 


The MSRS unit has a wire jumper installed across PS2 terminals from the factory.  If the MSRS PS2 
terminals are being used, remove the wire jumper.  Leave the wire jumper in-place if the PS2 terminals are 
not being used.   


Install one of the wires from the High Temp Sensor or the Cylinder Low-Pressure Supervisory Switch to the 
terminal marked “3” and the other wire to the terminal marked “4”.  See Figure 2. 

o


Low-Pressure Switch/Auxiliary Cylinder Supervisory Switch - When the pressure in the cylinder drops 
to an unserviceable (low) pressure, the switch shall open activating the early warning alarm. 

o


Temperature Sensor – When the temperature in the protected zone goes above the fixed temperature 
of the sensor, the sensor shall open activating the early warning alarm.   


3.3.1.3


Power Supply Terminals – Main Supply, Backup Supply, and Generator  


The MSRS Unit has 3 diode-protected inputs but only one power source is needed to operate the MSRS 
and should be connected to  V IN1+ and V IN1-.  See Figure 2.  
 

o


If available, a backup power source should be connected to one of the additional power source inputs.  


Connect the MSRS unit to the power source(s) using a 5A circuit breaker with an ON/OFF switch.  Use the 
breaker switch to turn the MSRS Unit OFF when all the machinery is OFF and to turn the MSRS Unit ON if 
any machinery is ON.  


3.3.1.4


RJ45 Port 


The RJ45 socket connects the Display Panel to the MSRS unit via a supplied CAT-5 cable.  Install one end of 
the CAT-5 cable into the MSRS unit RJ45 socket and the other end into one of the Display Panel RJ45 
socket.  

o


Connect Multiple Display Panels to the MSRS unit by using the available RJ45 socket on the back of the 
Display Panel. 


Check the Display Panel Installation Manual on how to correctly connect and use the Display Panel.      


Summary of Contents for 131-740

Page 1: ... Sea Fire automatic and manual Fire Suppression Systems Installation must be accomplished by or under the supervision of a qualified marine electrician who is familiar with American Boat and Yacht Council ABYC or other recognized and accepted marine standards and practices Caution Do not install this device in fuel storage compartments See the installation section of this manual for further detail...

Page 2: ...reset function 2 OPERATION The Machinery Shutdown Restart unit is a low voltage microcontroller unit designed to integrate with the Sea Fire Fire Suppression System to shut down the engine s blower s generator s damper s and other machinery in the protected space should fire or extreme overheating cause the Sea Fire automatic Fire suppression system to discharge The machinery shutdown will ensure ...

Page 3: ...led in a box or cabinet the enclosure should have sufficient ventilation When installed in the engine room the MSRS should be installed with sufficient protection from the hazards of that space but must still have a way to dissipate heat and not be overheated by other sources WARNING Do not install the MSRS Unit in a sealed enclosure 3 2 Mounting the MSRS Unit Use the MSRS unit 4 mounting screw ho...

Page 4: ...l open activating the early warning alarm o Temperature Sensor When the temperature in the protected zone goes above the fixed temperature of the sensor the sensor shall open activating the early warning alarm 3 3 1 3 Power Supply Terminals Main Supply Backup Supply and Generator The MSRS Unit has 3 diode protected inputs but only one power source is needed to operate the MSRS and should be connec...

Page 5: ...l the cylinder supervisory switches in series Connect the leading switch wire to Terminal marked 3 and the trailing wire of the last pressure switch to Terminal marked 4 See Figure 2 When connecting more than one Engineered System discharge pressure switch reference the engineered fire suppression manual and electrical circuit diagram provided as part of the system 3 3 1 6 Engine or Machinery conn...

Page 6: ...down the alarm should sound and the red PS1 LED on the MSRS Unit should illuminate as well as the red Discharge LED on the Display Panel 6 Press the SILENCE button on the Display Panel or on the MSRS Unit to silence the alarm 7 With the PS1 circuit still open put the MSRS into override by simultaneously pressing the SILENCE and the buttons on display panel a The connected machinery should be able ...

Page 7: ... is not making good contact with the terminals Recycle power to the MSRS unit Remove and re install jumper The MSRS has an internal fault Recycle power to the MSRS unit Replace the MSRS unit 4 The PS1 and the PS2 LED are on the Alarm does not silence AND the unit does not reset The MSRS has an internal fault Replace the MSRS unit 5 The SILENCE button on the MSRS unit does not silence the alarm The...

Page 8: ...C MAY APPLY PER CUSTOM CONFIGURATION DIAGRAMS NOTE THE 5A CIRCUIT BREAKER WITH ON OFF SWITCH ARE TO BE SUPPLIED BY CUSTOMER MANUAL AUTOMATIC FIRE SUPPRESSION SYSTEM UPON SYSTEM DISCHARGE SHUT DOWN ENGINE FORCED VENTILATION ELECTRICAL SYSTEMS FOR MANUAL OPERATION REMOVE PIN PULL HANDLE F I R E PN 136 XXX SMAC PULL CABLE 5A CIRCUIT BREAKER WITH ON OFF SWITCH 5A CIRCUIT BREAKER WITH ON OFF SWITCH 5A ...

Page 9: ...USTOMER 5A CIRCUIT BREAKER WITH ON OFF SWITCH 5A CIRCUIT BREAKER WITH ON OFF SWITCH 5A CIRCUIT BREAKER WITH ON OFF SWITCH PN 124 LPS CYLINDER SUPERVISORY SWITCH SPST BLACK RED PN 124 969 OR PN 124 914 HORN STROBE P N 131 311 DISCHARGE PRESSURE SWITCH DPDT NOTE THIS WIRING SCHEMATIC IS A REFERENCE EXAMPLE ONLY CUSTOMER SPECIFIC WIRING SCHEMATIC MAY APPLY PER CUSTOM CONFIGURATION DIAGRAMS ...

Page 10: ... ISO 9001 registered company is fully committed to exceeding our Customer s expectations ONE YEAR LIMITED WARRANTY We guarantee to the original retail purchaser of the Sea Fire Machinery Shutdown Restart System for a period of one 1 year after retail purchase against defective material and faulty workmanship Any Engine Interrupt System found to be defective during the warranty period will be repla...

Page 11: ...Page 11 of 11 123 652 Rev ...

Reviews: