background image

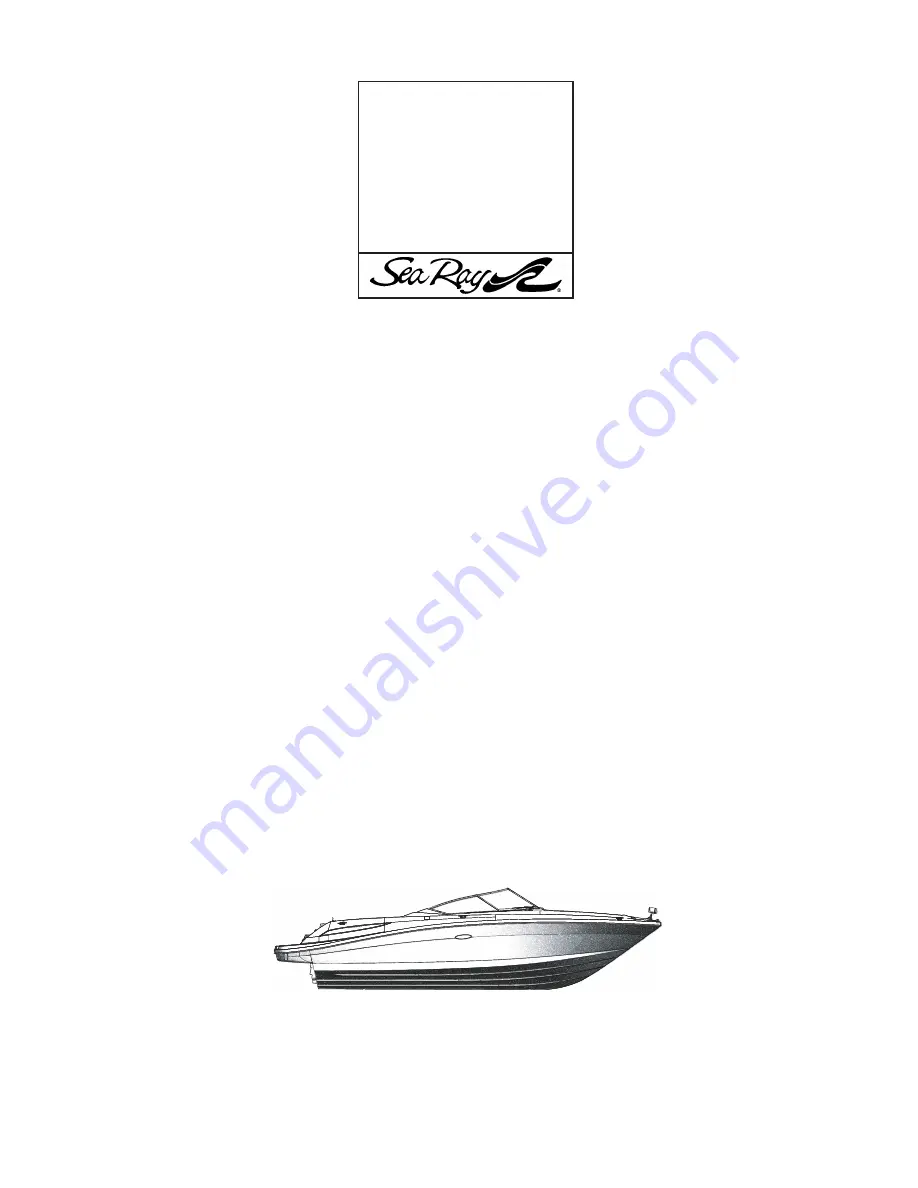
Owner’s Manual Part Number: MRP 1803645

Sea Ray

Owner’s

Manual

270 Select EX

Summary of Contents for 270 Select EX

Page 1: ...Owner s Manual Part Number MRP 1803645 Sea Ray Owner s Manual 270 Select EX...

Page 2: ......

Page 3: ...on as well as reminding you about your responsibilities as a boat owner operator Original Equipment Manufacturer OEM Information This section of your Owner s Manual Packet contains information from th...

Page 4: ...270 Select EX ii THIS PAGE LEFT INTENTIONALLY BLANK...

Page 5: ...tion in the safe and proper handling of your boat Understand and follow the rules of the road Learn how to navigate Registration In addition to the registration requirements for your boat in the state...

Page 6: ...our boat has its own warranty that will be found with the specific information and manual for that component These are included with your Owner s Manual Packet Locate and read the individual warrantie...

Page 7: ...es that all of its products comply with these laws The NMMA National Marine Manufacturers Association provides Sea Ray with a third party certification The NMMA is an organization that represents the...

Page 8: ...engines stern drives controls propellers batteries trailers or other equipment or accessories carrying their own individual warranties nor does the Limited Warranty cover engines parts or accessories...

Page 9: ...siderations 1 13 A Fuel and Oil Spillage 1 13 B Waste Disposal 1 14 C Excessive Noise 1 14 D Wake Wash 1 14 20 Nautical Terms 1 14 21 Key to Symbols on Controls and Prints 1 16 22 Warning Label Locati...

Page 10: ...lytic Corrosion and Zinc Anodes 6 11 13 Marine Electronic Cathodic Anti Corrosion System 6 12 14 Electrical Schematics 6 12 SECTION 7 OPTIONS ACCESSORIES 1 Layout and Accessory Locations 7 1 2 Water S...

Page 11: ...F If the Engine Does Not Start 8 12 G Operating the Generator 8 13 9 After Market Equipment Checklist 8 14 10 Maintenance Log 8 15 SECTION 9 CARE REFINISHING 1 Paint Cleaning Agents Other Substances...

Page 12: ...sold prior to the date of such changes Owner s Manual 270 Select EX Printed in the U S A January 2005 Revised July 2005 Sea Ray Boats Inc A Brunswick Company MRP 1803645 Sea Ray Boats Inc 2600 Sea Ra...

Page 13: ...r dealer at least annually Ensure that the Coast Guard required safety equipment is on board and functions See page 1 2 DANGER Immediate hazards which WILL result in severe personal injury or death if...

Page 14: ...rican Boat and Yacht Council ABYC recommends that you have three 3 Type B 1 ABC fire extinguishers on board located outside the engine compartment at the helm station and in the galley Whistle Horn Yo...

Page 15: ...cations Be sure to have sufficient ventilation when using canvas or window type side curtains when underway anchored moored or docked If the convertible top is installed operate with the forward hatch...

Page 16: ...to remain afloat with far less effort and heat loss extending survival time necessary to find and retrieve them Boat operators are required to carry one wearable personal flotation device Type I II I...

Page 17: ...Death or serious injury can result from improper boat operation WARNING 7 IMPAIRED OPERATION Drugs and or alcohol will prevent you from operating your boat safely This single factor is involved in mor...

Page 18: ...carry more weight or passengers than indicated on the certification plate regardless of weather or water conditions The boat can capsize swamp or sink DANGER BUILDER S PLATE INTERNATIONAL FIG 1 6 1 B...

Page 19: ...bilge area as dry as possible and close all openings hatches and windows in rough weather When visibility becomes impaired because of weather time of day or high bow angle you must slow down so that...

Page 20: ...is hazardous Bad weather and or rough sea or water conditions can cause an unsafe situation Consult local weather information or listen to the NOAA weather reports for the latest weather conditions or...

Page 21: ...s advised that you become familiar with water skiing safety and hand signals as you will most likely on occasion find yourself in the vicinity of or engaging in water skiing activity Anyone who water...

Page 22: ...when approaching the skier Never back up to anyone in the water Learn the signals to communicate with a skier The skier is to control the boat through hand signals Fig 1 10 1 Turn Arm raised circle w...

Page 23: ...rtable extinguisher ready in case the fire flares up Signal for help Grab distress signals and survival gear Put on PFDs Prepare to abandon ship All boaters have a legal obligation to help other boate...

Page 24: ...If you are boating outside of U S waters consult the nation you are visiting for accident reporting requirements F GROUNDING In the event of running aground Check for leaks If water is coming in stop...

Page 25: ...sportes Spain 9 EC Recreational Craft Directive European Community Further information concerning these requirements may be obtained from Sea Ray Customer Service 1 800 SRBOATS 17 SAFETY HOT LINES The...

Page 26: ...er structure which covers the hull between gunwales Draft depth of water required to float boat and its propulsion system Fathom six feet Fenders rope or plastic pieces hung over the side to protect t...

Page 27: ...movable fixture at the stern used for steering Scupper hole permitting water to drain overboard from deck or cockpit Sheer curve or sweep of the deck as viewed from the side Snub to check or tighten a...

Page 28: ...ASHER WINDSHIELD WASHER WINDSHIELD WIPER WASTE WATER SEWAGE FRESH WATER BASED COOLANT ANCHOR LIGHT RUNNING LIGHTS UNDER POWER INTERIOR LIGHT ELAPSED TIME OIL BILGE PUMP BILGE BLOWER UNLEADED FUEL LEAD...

Page 29: ...MAX MRP 1744738 SR 747 INSIDE SIDE PANEL IF SWITCH IS TURNED OFF WHILE ENGINE IS RUNNING ALTERNATOR WILL BE DAMAGED MRP 1746901 SR 7167 ON BATTERY SWITCH PANEL CAUTION MRP 1745125 SR 7111 WARNING USE...

Page 30: ...which have been pre cleaned to the extent that any food particles adhering to them would not normally in terfere with the operation of au tomatic dishwashers GRAYWATER Means drainage from a dishwashe...

Page 31: ...the engine can cause rust and is to be avoided With fiberglass boats severe gelcoat crazing or more serious hull damage can occur during launching and hauling if pressure is created on the gunwales by...

Page 32: ...Fig 2 3 1 While the person at the wheel must alert passengers before any sudden or erratic boat movement such as crossing wakes rapid turns sudden acceleration or deceleration etc an emergency action...

Page 33: ...PATION DURING NORMAL OPERATION Rotating propellers can injure or kill you Shut off engine when persons are in water near boat on swim platform or ladder DANGER Wet decks are slippery You can be seriou...

Page 34: ...ured to the hull s stringers at the rear end of the hull The stern drive unit also called the lower unit because it hangs below the hull is part of the propulsion system that attaches to the outside o...

Page 35: ...TO PREVENT RUNNING AGROUND Dry Weight 5 555 lbs 2 520 kg Fuel Capacity 94 gal 355 8 liters Usable Fuel 89 gal 336 9 liters Water Capacity 21 gal 79 5 liters Holding Tank 10 gal 37 9 liters Dead Rise 2...

Page 36: ...P OUT PLATE COMPANION SEAT COCKPIT FLOOR STORAGE CARRY ON COOLER DEDICATED STORAGE ANCHOR CHAIN ROPE STORAGE LOCKER AFT TABLE BASE U SHAPED AFT SEATING WITH STORAGE BELOW CONTROL STATION BOW SEATING W...

Page 37: ...17 100 140 175 210 250 F C 60 80 100 UP DN E 1 4 1 2 3 4 F 6 HELM GAUGE SWITCH LAYOUT INSTRUMENT PANEL FIG 2 7 1 SYSTEM TACH SPEEDOMETER NAVMAN CHART PLOTTER SWITCH PANELS FIG 2 7 2 OIL PRESSURE TEMPE...

Page 38: ...t EX PORT SWITCH PANEL HELM LAYOUT CONTINUED TRIM TABS CONTROLS STARBOARD SWITCH PANEL GAUGE PANEL SPOT LIGHT CONTROLS OPTION HELM LAYOUT FIG 2 8 1 COMPASS STEREO REMOTE STEERING WHEEL WITH REMOTE CON...

Page 39: ...TOUTS FIG 2 9 2 BILGE THROUGH HULL CUTOUTS FIG 2 9 3 TRANSOM THROUGH HULL CUTOUTS FIG 2 9 4 WET BAR DRAIN GARBOARD DRAIN DOCKING LIGHT OPTIONAL TRANSDUCER HEAD SINK DRAIN CORSA EXHAUST OPTIONAL CORSA...

Page 40: ...shift mechanism to be disengaged from the throttle This allows the throttle to be advanced without shifting the transmission when starting It may be necessary to use the throttle only button in order...

Page 41: ...h in one half second bursts until the boat is righted Using both switches to lower both tabs on a side to side balanced boat will lower the bow when on plane if the rear of the boat is highly loaded A...

Page 42: ...POWER TRIM FIG 2 12 2 C POWER TRIM UNIT AND GAUGE The power trim allows the operator to raise and lower the stern drive unit while underway to provide the ideal boat angle in relation to water surfac...

Page 43: ...ch down POWER TRIM SWITCHES OPTIONAL FIG 2 13 1 POWER TRIM SWITCH If you raise the stern drive up too far while you are on plane you could cause a loss of speed and power due to condition called prope...

Page 44: ...ified person The reason for this is that nearby instruments or objects containing magnets or current carrying electrical wires will influence the compass reading This is especially true if you add ele...

Page 45: ...G 2 15 1 NAVIGATION LIGHT SWITCH ANCHOR LIGHT SWITCH STERN NAVIGATION ANCHOR LIGHT REMOVABLE To keep the plexiglass dome free from scratches remove salt deposits and dust with a damp cloth An occasion...

Page 46: ...2 16 SECTION 2 GENERAL BOAT ARRANGEMENT 270 Select EX THIS PAGE LEFT INTENTIONALLY BLANK...

Page 47: ...four 4 minutes Feel to confirm airflow at hull vent on hull side Inspect bilge area for visual and odor confirmation that there are no fuel leaks Gear shift in neutral position Throttle pumped before...

Page 48: ...Shut off engine bilge blower and all other electrical equipment Shut off gas burning appliances gas stove etc Close all hatches doors and keep engine compartment closed to prevent gasoline fumes from...

Page 49: ...sist passengers back into the boat 4 PERSONAL FLOTATION DEVICES PFDS Operator must instruct all passengers on location and use of PFDs See Section 1 Safety page 4 for type and usage Children less than...

Page 50: ...fied in Section 8 and in the engine manual 2 Check that water level in bilge is minimal Verify that the bilge pump is operating by turning the bilge pump switch to MANUAL and listening for the pump ru...

Page 51: ...9 After engine starts reduce speed to between 1000 and 1500 RPM and check oil pressure 10 If oil pressure is correct let engine warm up to normal temperature range as specified in the engine manual be...

Page 52: ...hat is hydraulically assisted power steering at the stern drive end Fig 3 6 4 3 6 5 THE CABLE AND ITS CONNECTIONS TO THE STEERING WHEEL AND TO THE OUT DRIVE MUST BE INSPECTED AT LEAST TWICE A YEAR BY...

Page 53: ...through the WINDLASS breaker on the Main DC Breaker Panel located on the cockpit floor storage aft bulkhead The windlass facilitates the anchoring of your boat by automatically raising and lowering t...

Page 54: ...Periodically check the motor and control box electrical connections remove any residue and cover the connections with a small coating of grease It is recommended at least once a year to disassemble th...

Page 55: ...ilge Fig 4 1 2 DANGER Install and tighten drain plug before launching boat Boat will sink if drain plug is not in place and tight DRAIN PLUG FIG 4 1 2 TRANSOM HULL GARBOARD DRAIN DRAIN PLUG URETHANE C...

Page 56: ...the pump To clean the pump strainer depress the lock tabs on both sides of the pump and lift the pump motor TROUBLESHOOTING If water does not come out of discharge hose 1 Check the BILGE PUMP and FWD...

Page 57: ...wly EXPLOSION FIRE HAZARD Run blower at least four 4 minutes before starting engine or generator Check bilge and engine compartment for fumes WARNING Do not allow obstructions to interfere with bilge...

Page 58: ...amage is visible there could be internal problems or difficulty maneuvering If you must use the boat after impact run at the lowest speed possible 2 ENGINE AND STERN DRIVE A MAINTENANCE AND SERVICE En...

Page 59: ...e the propeller nut by bending three 3 of the tabs of the propeller nut retainer into the thrust hub grooves Because of the many variables of boat design only testing will determine the best propeller...

Page 60: ...2 inches This variance is referred to as slippage PITCH DIAMETER PROPELLER PITCH AND DIAMETER FIG 4 6 2 PROPELLER PARTS FIG 4 6 1 REAR PROPELLER NUT SHAFT ANODE PROPELLER SHAFT REAR THRUST HUB REAR PR...

Page 61: ...at occurs in all propeller driven craft under certain conditions The surface of propeller blades are not perfectly flat and as water is drawn through the blades to be discharged aft into the propeller...

Page 62: ...8 1 4 BILGE LAYOUT FRESH WATER PUMP BATTERIES FIRE EXTINGUISHER J A B C D E F G H I L M K POWER TRIM PUMP TRIM TAB PUMP BLOWER FRESH WATER TANK FUEL TANK TRANSDUCER BILGE PUMP A B C D E F M L K J I H...

Page 63: ...t in the event of fuel line failure GASOLINE FUEL SYSTEM FIG 5 1 1 Never start an engine until you are certain that fuel fumes are not present in the engine compartment or elsewhere in the boat CAUTIO...

Page 64: ...ing compartments Shutdown the engine motors and fans prior to taking on fuel Any ignition sources should be extinguished before filling the fuel tank Close all ports windows doors and hatches Diesel e...

Page 65: ...es stopped Electrical equipment including blowers power off Windows doors hatches closed Smoking material extinguished Inboard tanks grounded Filler pipe marked GAS or DIESEL Fuel nozzle in contact wi...

Page 66: ...5 4 SECTION 5 FUEL SYSTEM 270 Select EX THIS PAGE LEFT INTENTIONALLY BLANK...

Page 67: ...be between the lower and upper markings Replenish only with distilled water Do not use metal funnel Coat battery terminal clamps with silicone grease Keep batteries clean and dry Battery life is short...

Page 68: ...ems need constant power to perform their task This allows the bilge pump to operate any time excess fluid accumulates in the bilge which can occur B RECOMMENDED BATTERIES The following table describes...

Page 69: ...r cables are not ignition protected DO NOT USE jumper cables in the engine compartment The engine compartment may accumulate dangerous explosive gasoline fumes vapors and hydrogen gas from batteries b...

Page 70: ...ette lighter style plug that may be used with any 12 volt accessories using this type of plug BILGE COMPONENT BOARD FIG 6 4 1 WINDLASS DISCONNECT SOLENOID OPTIONAL MAIN DC NEGATIVE BUS STEREO MEMORY F...

Page 71: ...S FIG 6 5 1 A D C B D C C C RECTANGLE LIGHT BULB REPLACEMENT BULB CEC1141 D BOW NAV LIGHT BULB REPLACEMENT BULB GE2641L 12V R 10W A MAST NAV LIGHT BULB REPLACEMENT FUSE TYPE BULB 12V10WPERKO B COCKPIT...

Page 72: ...ain breaker interrupts both the neutral and hot feeds in the AC circuit to prevent equipment damage due to internal overloads and external surges 120 Volt 60 Hz Wiring Standard System The 120 volt wir...

Page 73: ...ower cord extensions can cause a voltage drop and may prevent some electronic devices from operating correctly CAUTION It is imperative that the shore power outlet is dry before plugging into the dock...

Page 74: ...ater Always clean and spray your cord ends with moisture repellant before using and before storing the cord C D DOCK POWER BOX FIG 6 8 3 SHORE POWER RECEPTACLE FIG 6 8 4 E 0 AC VOLTS 50 100 150 0 AC V...

Page 75: ...he charge will remain in this mode until the 12 volt system is activated Equalize Mode this stage activates for 15 minutes every 21 hours When the converter charger is in the float mode the voltage is...

Page 76: ...afety devices yet designed will protect against all hazards or carelessly handled or misused electrical equipment or wiring CAUTION BATTERY CHARGER CONVERTER FIG 6 10 1 BATTERY CHARGER CONVERTER Note...

Page 77: ...trical contact between the anode and the metal it contacts or by paint on the anodes If the anodes are deteriorating rapidly or not at all contact your dealer When an AC shore power system is connecte...

Page 78: ...st should be performed every 100 hours or annually Contact your authorized Sea Ray dealer to arrange for this test Refer to the engine operator s manual for more detailed information 14 ELECTRICAL SCH...

Page 79: ...6 13 270 Select EX DC WIRING DIAGRAM 1 OF 3 FIG 6 13 1 DRAWING NO 09 601 1 OF 3 REV 04 270 SLX ELECTRICAL SCHEMATICS...

Page 80: ...6 14 270 Select EX 270 SLX ELECTRICAL SCHEMATICS CONTINUED DC WIRING DIAGRAM 2 OF 3 FIG 6 14 1 DRAWING NO 09 601 2 OF 3 REV 04...

Page 81: ...6 15 270 Select EX DC WIRING DIAGRAM 3 OF 3 FIG 6 15 1 DRAWING NO 09 601 3 OF 3 REV 01 270 SLX ELECTRICAL SCHEMATICS CONTINUED...

Page 82: ...6 16 270 Select EX SPORTS TOWER WIRING SCHEMATIC FIG 6 16 1 DRAWING NO 09 607 270 SLX ELECTRICAL SCHEMATICS CONTINUED STEREO WIRING SCHEMATIC FIG 6 16 2 DRAWING NO 09 608 1 OF 2 REV 01...

Page 83: ...6 17 270 Select EX STEREO WIRING SCHEMATIC PREMIER STEREO UPGRADE OPTION FIG 6 17 1 DRAWING NO 09 608 2 OF 2 REV 01 WINDLASS WIRING DIAGRAM FIG 6 17 2 DRAWING NO 09 614...

Page 84: ...6 18 270 Select EX WIRING DIAGRAM 220VAC 50HZ FIG 6 18 2 DRAWING NO 09 632 REV 02 270 SLX ELECTRICAL SCHEMATICS CONTINUED WIRING DIAGRAM 120VAC 60HZ FIG 6 18 1 DRAWING NO 09 630...

Page 85: ...6 19 270 Select EX 270 SLX ELECTRICAL SCHEMATICS CONTINUED SMARTCRAFT SYSTEM DIAGRAM W INTELLIWHEEL FIG 6 19 1 DRAWING NO 09 713...

Page 86: ...6 20 270 Select EX NAVMAN SYSTEM DIAGRAM FIG 6 20 1 DRAWING NO 09 720 270 SLX ELECTRICAL SCHEMATICS CONTINUED...

Page 87: ...6 21 270 Select EX WIRE HARNESS FIG 6 21 2 DRAWING NO 09 801 2 OF 2 270 SLX ELECTRICAL SCHEMATICS CONTINUED WIRE HARNESS FIG 6 21 1 DRAWING NO 09 801 1 OF 2 REV 04...

Page 88: ...6 22 270 Select EX 270 SLX ELECTRICAL SCHEMATICS CONTINUED STARBOARD DECK HARNESS FIG 6 22 1 DRAWING NO 09 805 PORT DECK HARNESS FIG 6 22 2 DRAWING NO 09 806...

Page 89: ...6 23 270 Select EX BATTERY CHARGER HARNESS FIG 6 23 1 DRAWING NO 09 809 270 SLX ELECTRICAL SCHEMATICS CONTINUED WASTE SYSTEM HARNESS FIG 6 23 2 DRAWING NO 09 811...

Page 90: ...6 24 270 Select EX SPORT SPOILER HARNESS FIG 6 24 1 DRAWING NO 09 813 270 SLX ELECTRICAL SCHEMATICS CONTINUED WINDLASS HARNESS FIG 6 24 2 DRAWING NO 09 821...

Page 91: ...onents on your boat Using these drawings walk through your boat locate the features shown and become familiar with their operation and maintenance If a water treatment additive is not available the fo...

Page 92: ...WATER PUMP FILTER WATER PUMP SUCTION C WINTERIZING THE WATER SYSTEM For winterizing the water system refer to Section 8 Winterization Checklist For Boats Stored on Land E Water System WATER SYSTEM INS...

Page 93: ...ed by a fuse on the bilge component board Check the pump and float switch for obstructions and proper working order The pump comes on when there is enough water in the sump to raise the float switch a...

Page 94: ...HOLDING TANK PORT STBD FWD 3 GRAY WATER SYSTEM OPTION The gray water system is designed for boats that are used in areas that restrict overboard water discharge The system directs waste water from acc...

Page 95: ...ated to prevent the overboard discharge of sewage treated or untreated or of any waste derived from sewage The EPA standards further state that this shall not be construed to prohibit the carriage of...

Page 96: ...R The vent filter is designed to control odors associated with the head system operations The vent filter is located on the holding tank The filter must be changed at the beginning of each boating sea...

Page 97: ...seconds in radio mode cycles between AM FM1 FM2 and FM3 bands in satellite mode cycles between SAT1 SAT2 and SAT3 bands In CD player mode When pressed and released skips to the next CD track When pre...

Page 98: ...o the fire and flashback could occur IF A FIRE OCCURS IMMEDIATELY SHUT DOWN ALL ENGINES POWERED VENTILATION ELECTRICAL SYSTEMS AND EXTINGUISH ALL SMOKING MATERIALS DO NOT IMMEDIATELY OPEN THE ENGINE C...

Page 99: ...flooding the area in fire killing concentrations WHEN ACTUATION OCCURS IMMEDIATELY SHUT DOWN ALL ENGINES POWERED VENTILATION ELECTRICAL SYSTEMS AND EXTINGUISH ALL SMOKING MATERIALS DO NOT IMMEDIATELY...

Page 100: ...ot have these tags they become lost or are unable to be read contact your dealer for replacement labels For your safety decide which canvas pieces you want to remove or install before you leave the bo...

Page 101: ...at the helm CANVAS FIG 7 11 1 SUNBRELLA BIMINI TOP SIDE CURTAINS FRONT CURTAINS AFT CURTAIN DANGER In rainy weather and or cold weather fresh air must circulate through boat to avoid carbon monoxide p...

Page 102: ...7 12 SECTION 7 OPTIONS ACCESSORIES 270 Select EX THIS PAGE LEFT INTENTIONALLY BLANK...

Page 103: ...cle 6 10 Shore Power 6 7 Electrical System DC 6 1 Accessory Fuse Block 6 3 Batteries 6 1 Battery Cable Routing 6 2 Battery Switch 6 2 Fuses 6 3 Main Distribution Panel 6 6 Electrolytic Corrosion 6 11...

Page 104: ...ual Packet i P Personal Flotation Devices PFDs 1 2 1 4 3 3 Power Capacity 1 6 Power Trim 2 12 Propellers 1 6 4 4 Removal and Installation 4 5 Propulsion System 2 4 R Recommended Equipment 1 4 Refriger...

Page 105: ...4 V VacuFlush Head 7 5 Visual Distress Signals 1 2 W Warranties iv vi Water Pump 7 2 Water Sport Tower 7 8 Water Sports 1 9 Water System 7 1 8 6 Water Temperature 2 14 See also Layout Helm Gauge Swit...

Page 106: ...270 Select EX Index 4 INDEX THIS PAGE LEFT INTENTIONALLY BLANK...

Page 107: ...boat Electrical Connections Check for looseness To be done by Sea Ray dealer annually GFCI AC Outlet Check for operation Owner s Manual p 6 16 Battery Check water level Owner s Manual p 6 1 Bilge Are...

Page 108: ...lled and tight Owner s Manual p 4 1 Hull damage Check for loose damaged Always after striking object Stern drive or missing parts Topside Supplies Check for loose damaged Owner s Manual p 8 5 or missi...

Page 109: ...R HOME PORT BOAT NAME REGISTRATION NUMBER STATE HULL SERIAL NUMBER WARRANTY REGISTRATION DATE ENGINE MAKE MODEL SERIAL NUMBER PART NUMBER FUEL CAPACITY WATER CAPACITY KEY NUMBER IGNITION DOOR SELLING...

Page 110: ...mulate and can be the source of an explosion WARNING Work on electrical wiring can create shock hazards or sparks Always shut off battery switch breakers and or pull fuses before checking electrical w...

Page 111: ...life jackets for tears and deterioration Make certain you have enough PFDs on board for the maximum number of persons you can carry Check your first aid kit making certain it is complete and that the...

Page 112: ...sure water is removed from each line Blow air through the water lines removed from the water pump NOTE When blowing air be careful not to blow air with all faucets closed System could be damaged by o...

Page 113: ...fittings for unobstructed water passage Be alert for any deteriorated hoses and or fittings below the water line which might fail in service and admit water Test the navigation lights Check all wirin...

Page 114: ...DLE SEACOCK BODY PIVOT POINT 7 SEACOCK LUBRICATION With boat out of water remove the hose from top of the seacock Put seacock handle in closed position Add a few drops of lubricating oil inside Work h...

Page 115: ...ciable amounts of water overboard 2 Blowers Working Sniff the bilge engine compartment for fuel odor 3 Navigation Lights Working Have spare bulbs and if applicable fuses aboard 4 Radio Electronics Wor...

Page 116: ...y Open 3 Engine Alarm Test Should sound after a few seconds 4 Gear Shift Throttle Control In NEUTRAL and IDLE positions STARTING THE ENGINE 1 Gearshift Throttle Control Shift in NEUTRAL Refer to your...

Page 117: ...eck idle and shift Listen for abnormal noises and visually check the engine compartment while underway D RETURNING TO PORT GENERAL 1 Passengers Crew Instructed in duties for line handling 2 Lines and...

Page 118: ...sitions ENGINE 1 Ignition Switched in the OFF position lights off and master ignition keys removed from DC distribution panel 2 Battery Switch In the OFF position 1 Fuel Valves Diesel Only Closed hand...

Page 119: ...d any time the generator is running 3 Depress PREHEAT ON Preheat time should not exceed 30 seconds 4 Depress START RUN Switch Depress until generator starts 5 When the Generator Starts Release the STA...

Page 120: ...HECKLIST Any safety or operational equipment added to your boat after delivery should be checked for seaworthiness and proper working condition Use the area below to list any equipment and the proper...

Page 121: ...LOG Follow the recommended maintenance listed on pages 1 2 of this section and keep a record of this and ALL maintenance performed on your boat You might want to copy these pages before using them to...

Page 122: ...8 16 SECTION 8 REQUIRED INSPECTION SERVICE AND MAINTENANCE 270 Select EX MAINTENANCE LOG CONT D Date Maintenance Description Engine Hours...

Page 123: ...ng season may suffice In southern climates an application of wax every three months will be required for adequate protection REFER TO THE 3M ONE STEP MAINTENANCE AND RECONDITIONING PRODUCTS PAMPHLET I...

Page 124: ...auty and greatly affect its performance There are two methods of preventing this Periodically haul the boat out of the water and scrub the bottom with a bristle brush and a solution of soap and water...

Page 125: ...ith fresh cold water Then let the canvas dry completely before stowing All metal components of the canvas should be rinsed with fresh cold water and exposed components wiped dry to maintain appearance...

Page 126: ...KET FOR INSTRUCTIONS AND OTHER CLEANING INFORMATION 10 EXTERIOR UPHOLSTERY FABRIC Exterior fabrics should be cleaned with a sponge or very soft scrub brush and a mild soap and warm water solution Afte...

Reviews: