9711-44 Ku-Band TXRX
Installation (144” Radome)
3-9
19.
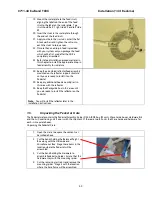
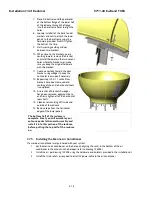
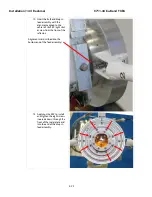
Mount the scalar plate to the feed struts,
aligning the labels on the end of the feed
strut to the label on the scalar plate. Top
strut should be #1, right side #2 and left side
#3.
20.
Insert the studs in the scalar plate through
the ends of the feed struts.
21.
Apply Loctite to the six studs, install the flat
& lock washers and tighten the nuts onto
each the studs to torque spec.
22.
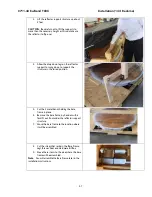
If more than one drop-in feed is provided
with your system only un-package the feed
which will be first used after the ADE is
completely assembled.
23.
Refer to feed installation procedures later in
this chapter to install the appropriate drop-in
feed assembly for initial use.
24.
Keep the assembled reflector/feed assembly
mounted on the reflector support structure
until you are ready to install it on the
Pedestal.
25.
Keep any additional Feed assembly(ies) in
this area with the reflector.
26.
Keep the Waveguide box in this area until
you are ready to install the reflector on the
Pedestal.
Note:
You will install the reflector later in the
installation instructions.
3.5.
Unpacking the Pedestal Crate
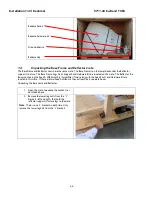
The Pedestal crate contains the Pedestal Assembly, Spider, DAC & BDE box, RF units, Wave Guide boxes, Hardware Kits
and the Air Conditioning unit if one is with the shipment. If there are two RF units the Wave Guide and hardware for
each is in separate boxes.
Unpacking the Pedestal Crate:
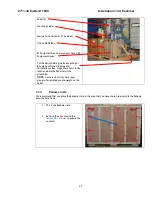
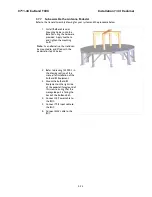
1.
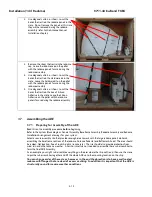
Open the crate, to expose the contents, as
described above.
2.
Cut the bands holding the Balance Weight
Box along with the Hardware and
Miscellaneous Box. Stage these items in the
location where the Pedestal will be
assembled.
3.
Cut the band holding the Hardware to
assemble Pedestal to Spider. Assure that this
hardware stays with the mounting spider.
4.
Cut the remaining restraints and remove the
mounting spider. Stage it with the location
where the base frame will be assembled.
Summary of Contents for 9711-44 KU-BAND TX/RX
Page 3: ......
Page 12: ...Table of Contents xii This Page Intentionally Left Blank ...
Page 24: ...Site Survey 9711 44 Ku Band TXRX 2 8 This Page Intentionally Left Blank ...
Page 64: ...Installation 144 Radome 9711 44 Ku Band TXRX 3 40 This Page Intentionally Left Blank ...
Page 112: ...Basic Setup of the ACU 9711 44 Ku Band TXRX 5 4 This Page Intentionally Left Blank ...
Page 114: ...Setup Ships Gyro Compass 9711 44 Ku Band TXRX 6 2 This Page Intentionally Left Blank ...
Page 116: ...Setup Band Select 9711 44 Ku Band TXRX 7 2 This Page Intentionally Left Blank ...
Page 122: ...Setup Home Flag Offset 9711 44 Ku Band TXRX 9 4 This Page Intentionally Left Blank ...
Page 130: ...Setup Searching 9711 44 Ku Band TXRX 11 6 This Page Intentionally Left Blank ...
Page 150: ...Antenna Specific Operation 9711 44 Ku Band TXRX 16 4 This Page Intentionally Left Blank ...
Page 154: ...Functional Testing 9711 44 Ku Band TXRX 17 4 This Page Intentionally Left Blank ...
Page 158: ...Installation Troubleshooting 9711 44 Ku Band TXRX 18 4 This Page Intentionally Left Blank ...
Page 180: ...Maintenance 9711 44 Ku Band TXRX 19 22 This Page Intentionally Left Blank ...
Page 198: ...Drawings 9711 44 Ku Band TXRX 23 2 This Page Intentionally Left Blank ...
Page 205: ......
Page 210: ......
Page 218: ......
Page 230: ......
Page 231: ......
Page 242: ......
Page 243: ......
Page 252: ......
Page 254: ......
Page 256: ......


